Telephony (contains old too)
Numbers
The Numbers section is your central hub for managing phone numbers and telephony accounts on Hooman Labs. It is divided into three tabs:
-
Numbers — View and manage all phone numbers added to your workspace.
-
Telephony — Connect and manage your telephony provider accounts.
-
Compliance — Submit and track compliance applications required for Indian numbers.
Overview: How It All Works
Before you can make or receive calls, you need to complete three things in order:
-
Connect a telephony account (your provider, e.g. Plivo, Twilio, Exotel).
-
Submit a compliance application (required for Indian numbers).
-
Add a number and assign it to an agent or use it for outbound calls.
Telephony
The Telephony tab lists all provider accounts connected to your workspace, showing their Id, Account Name, Provider, and the number of Numbers linked to each account.
Connect a Telephony Account
Click + Connect Telephony in the top-right corner. This opens a 3-step wizard:
Step 1 of 3 : Provider
Select your Provider from the dropdown. Supported providers:
-
Plivo
-
Exotel
-
Tatatele
-
Ozonetel
-
Twilio
-
SIP Trunk
-
Enter an Account name — this is a label to identify the account within your workspace (e.g. Primary Exotel, Twilio India).
-
Click Continue.
Step 2 of 3 — Credentials
Enter the API credentials for your chosen provider. These are found in your provider's dashboard.
|
Provider |
Required Fields |
|---|---|
|
Plivo |
Auth ID, Auth Token |
|
Twilio |
Auth SID, Auth Token |
|
Exotel |
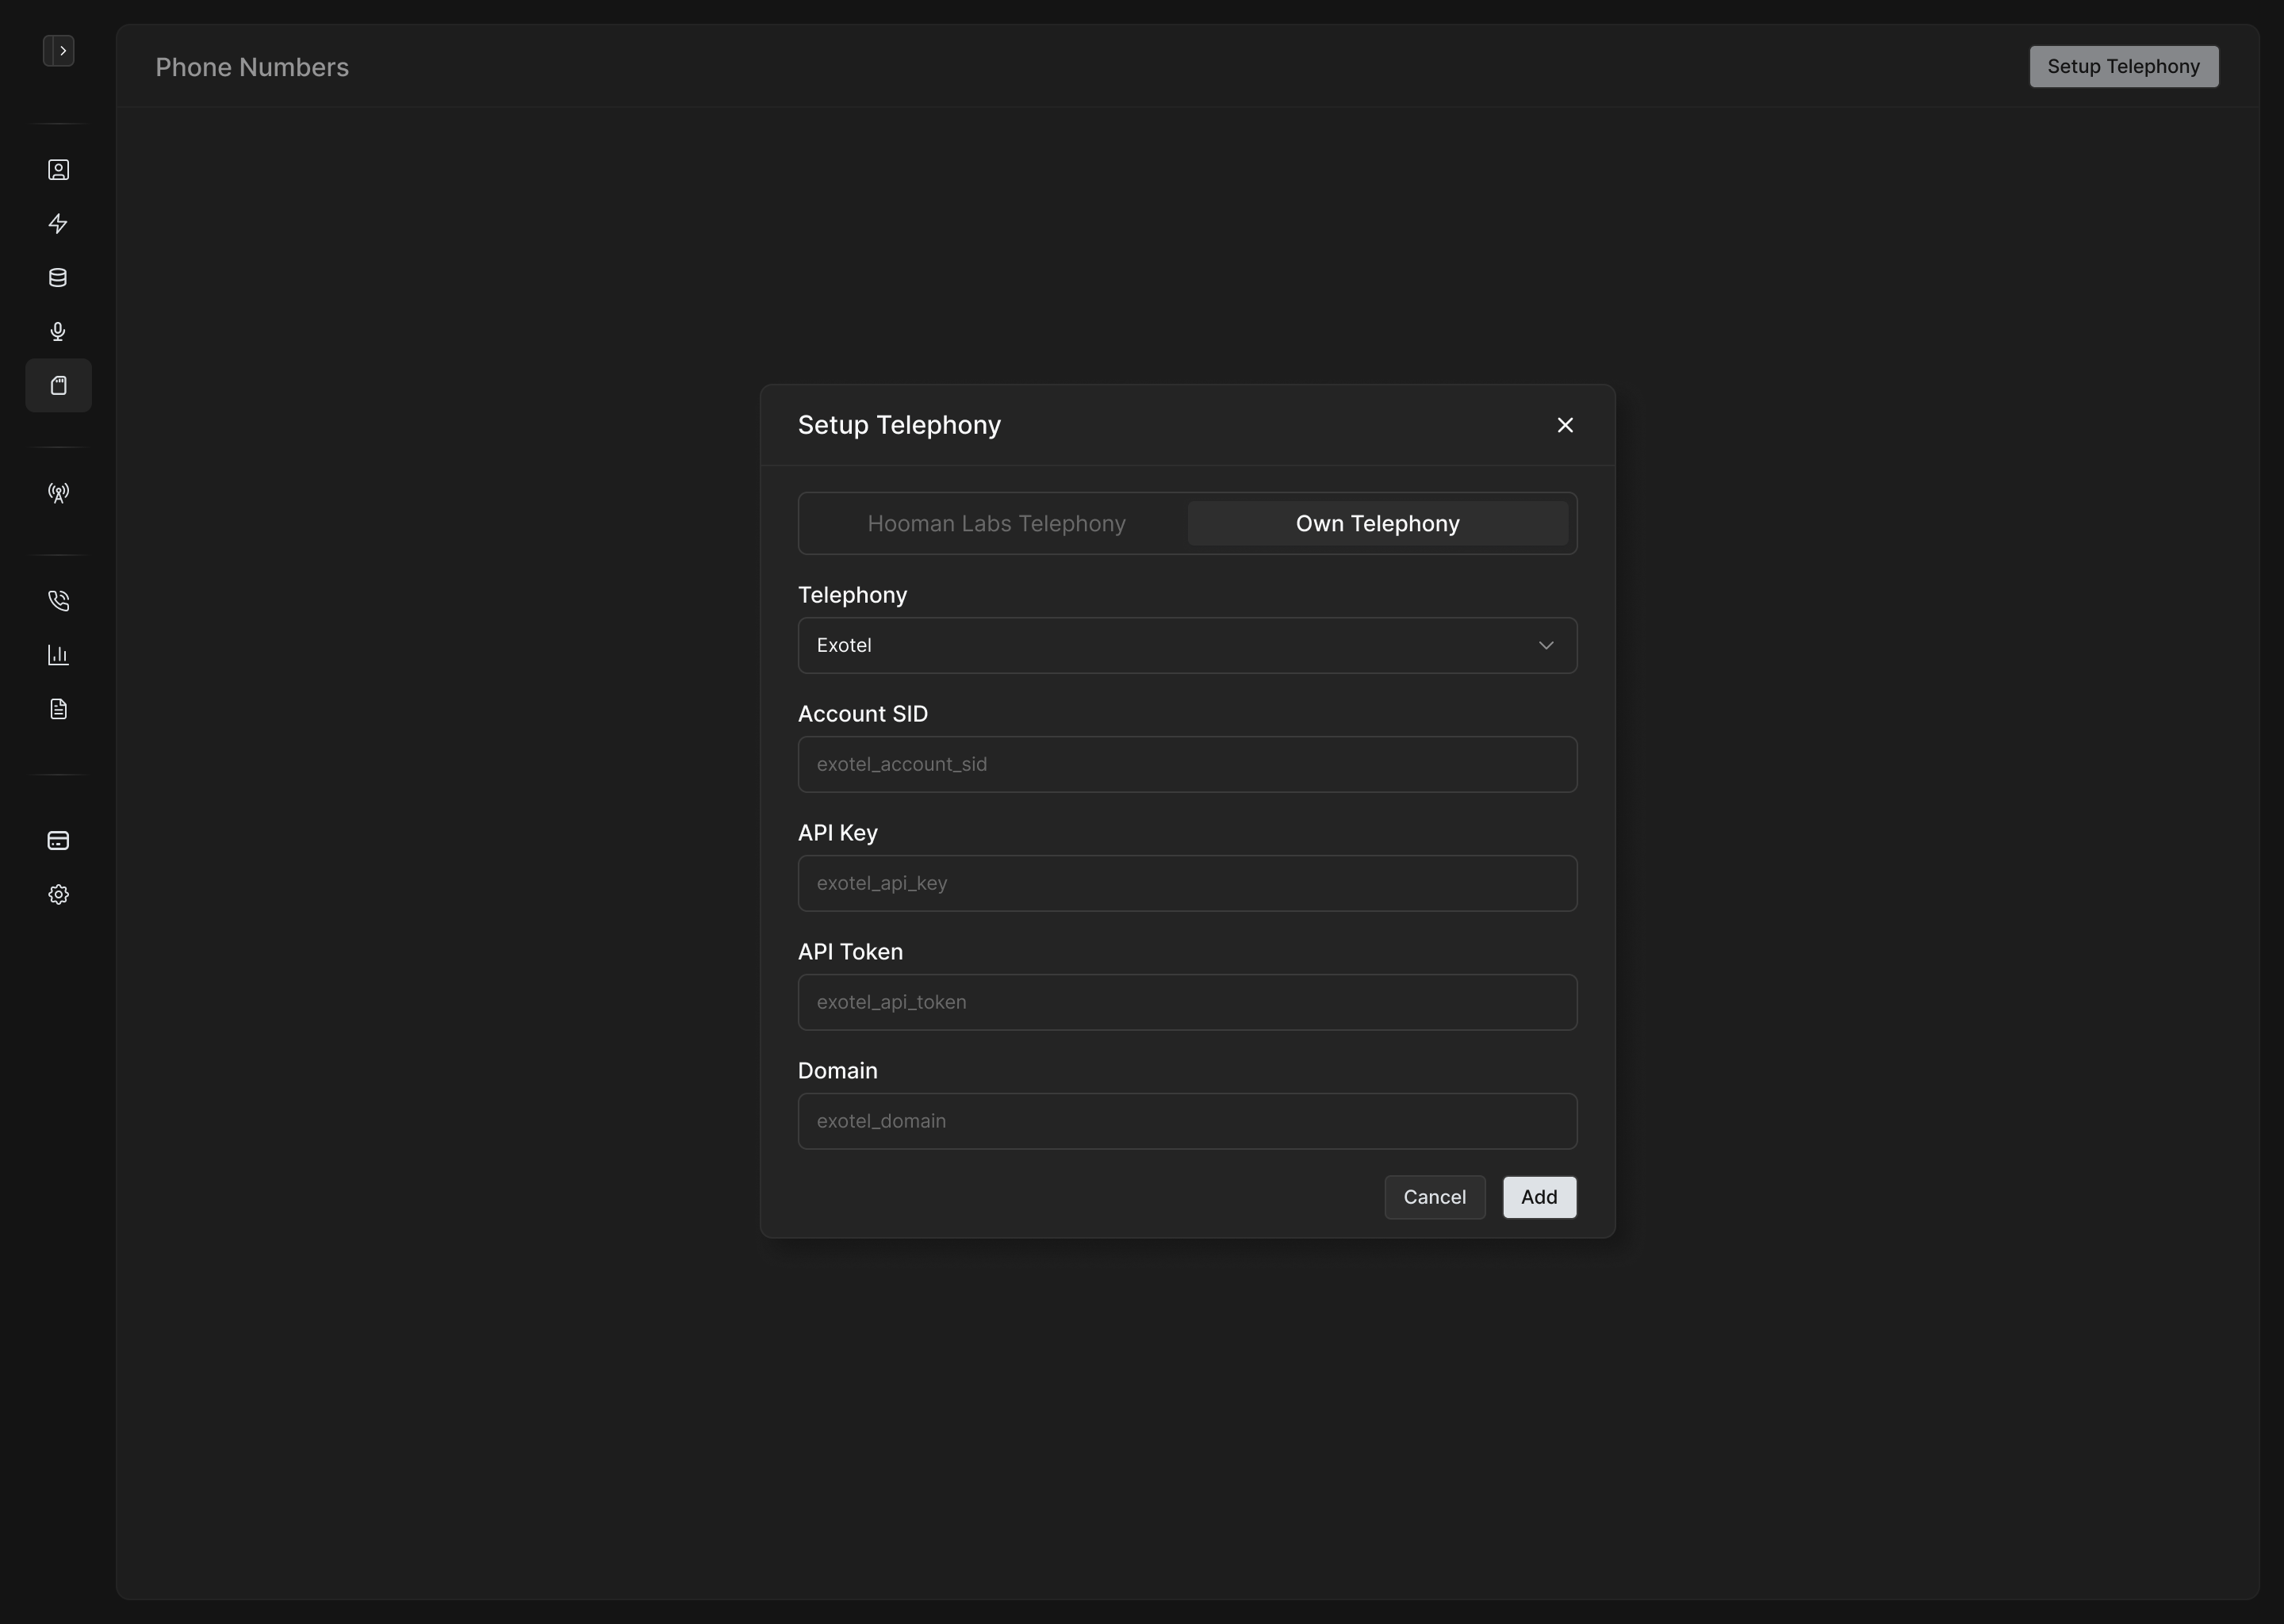
Account SID, API Key, API Token, Domain |
|
Tatatele |
Account-specific credentials |
|
Ozonetel |
Account-specific credentials |
|
SIP Trunk |
SIP-specific credentials |
Click Continue after entering your credentials.
Step 3 of 3 — Webhook Setup
Hooman Labs automatically configures all required webhooks for your connected account.
Webhooks configured automatically. No manual setup needed.
Click Connect account to finish.
Your telephony account will now appear in the Telephony tab and be available when adding numbers.
(Below is the old one)
We offer two flexible telephony options for outbound and inbound calling:
Hooman Labs Telephony
We offer both Indian and International virtual numbers powered by Plivo. To start:
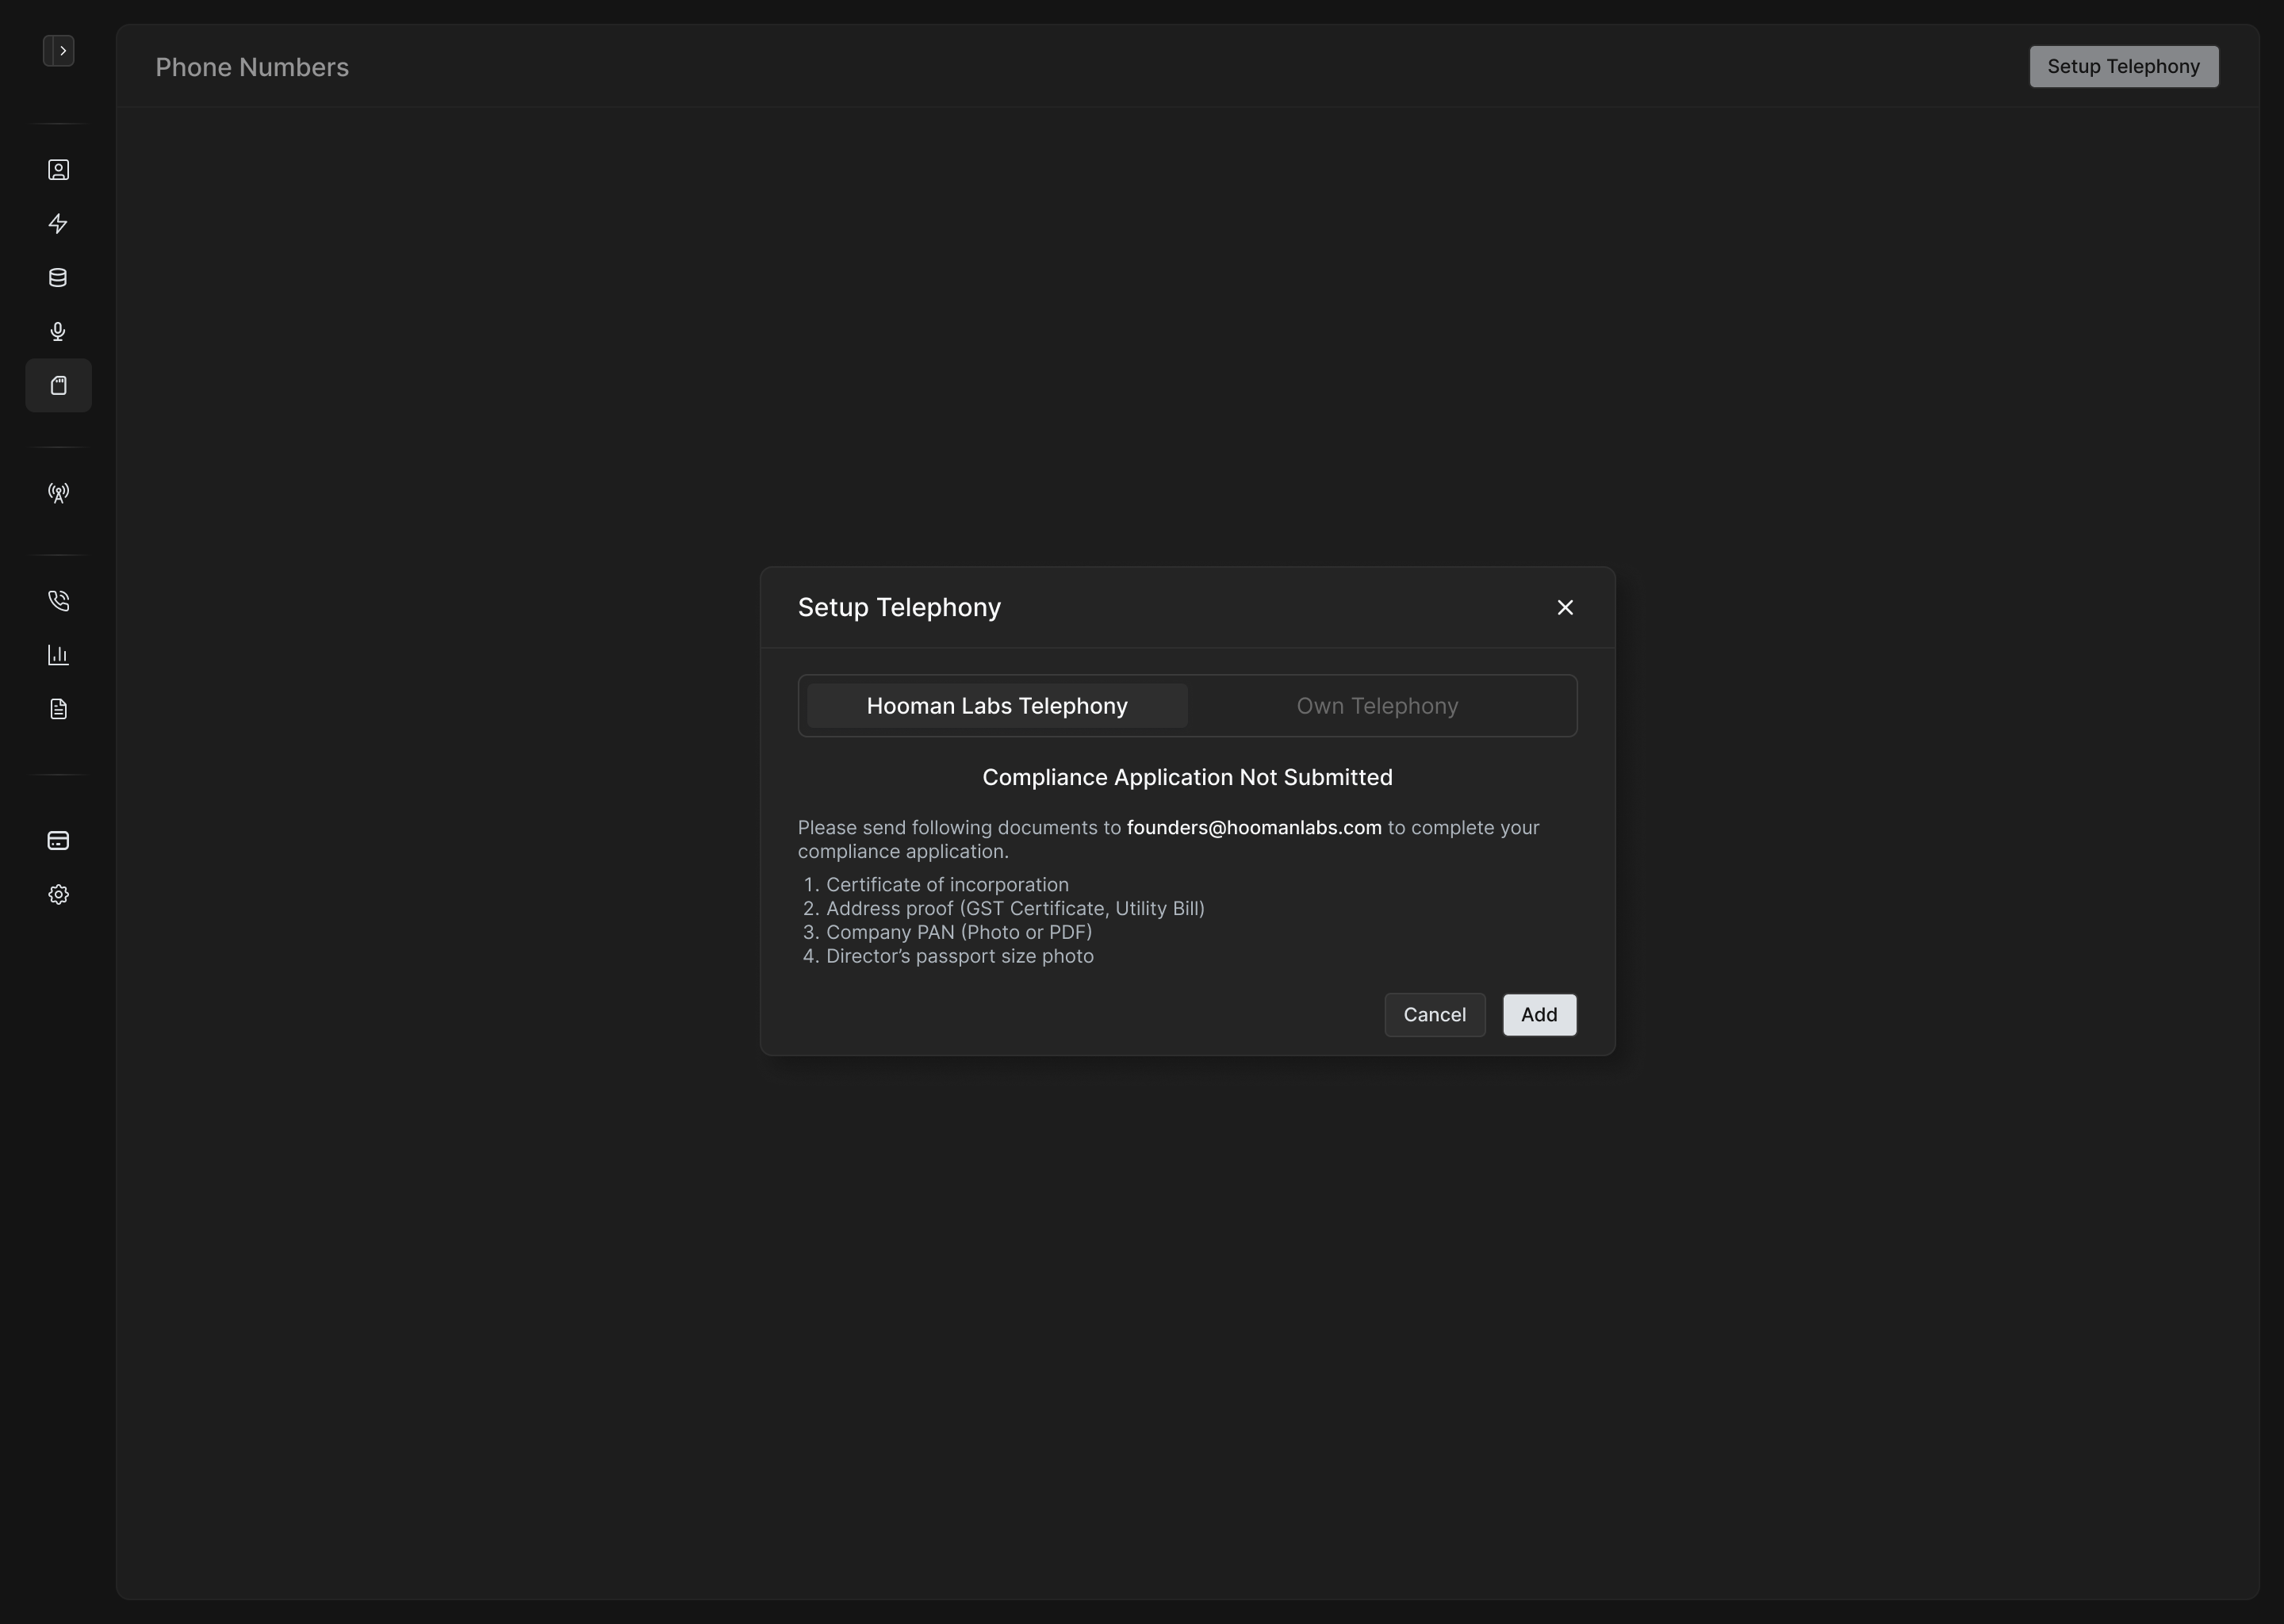
Step 1: Compliance Application
-
Submit your business documents for compliance review.
-
Once approved, you can proceed to add numbers.
Documents required for Indian virtual numbers:
-
Certificate of incorporation
-
GST Certificate
Compliance application is a one time requirement. Once approved, you can add new numbers whenever you want.
Step 2: Add Numbers
-
Click Add Number.
-
Choose from available numbers in the dropdown.
-
Assign:
-
As a "From Number" for outbound calls.
-
Or link to a specific inbound agent for incoming calls.
-
A workspace can be connected to only a single Telephony account but can support multiple numbers under same account.
Bring Your Own Telephony
We support direct integration with the following providers:
-
Plivo
-
Exotel
-
Twilio
-
Tatatele
-
Ozonetel
Plivo
-
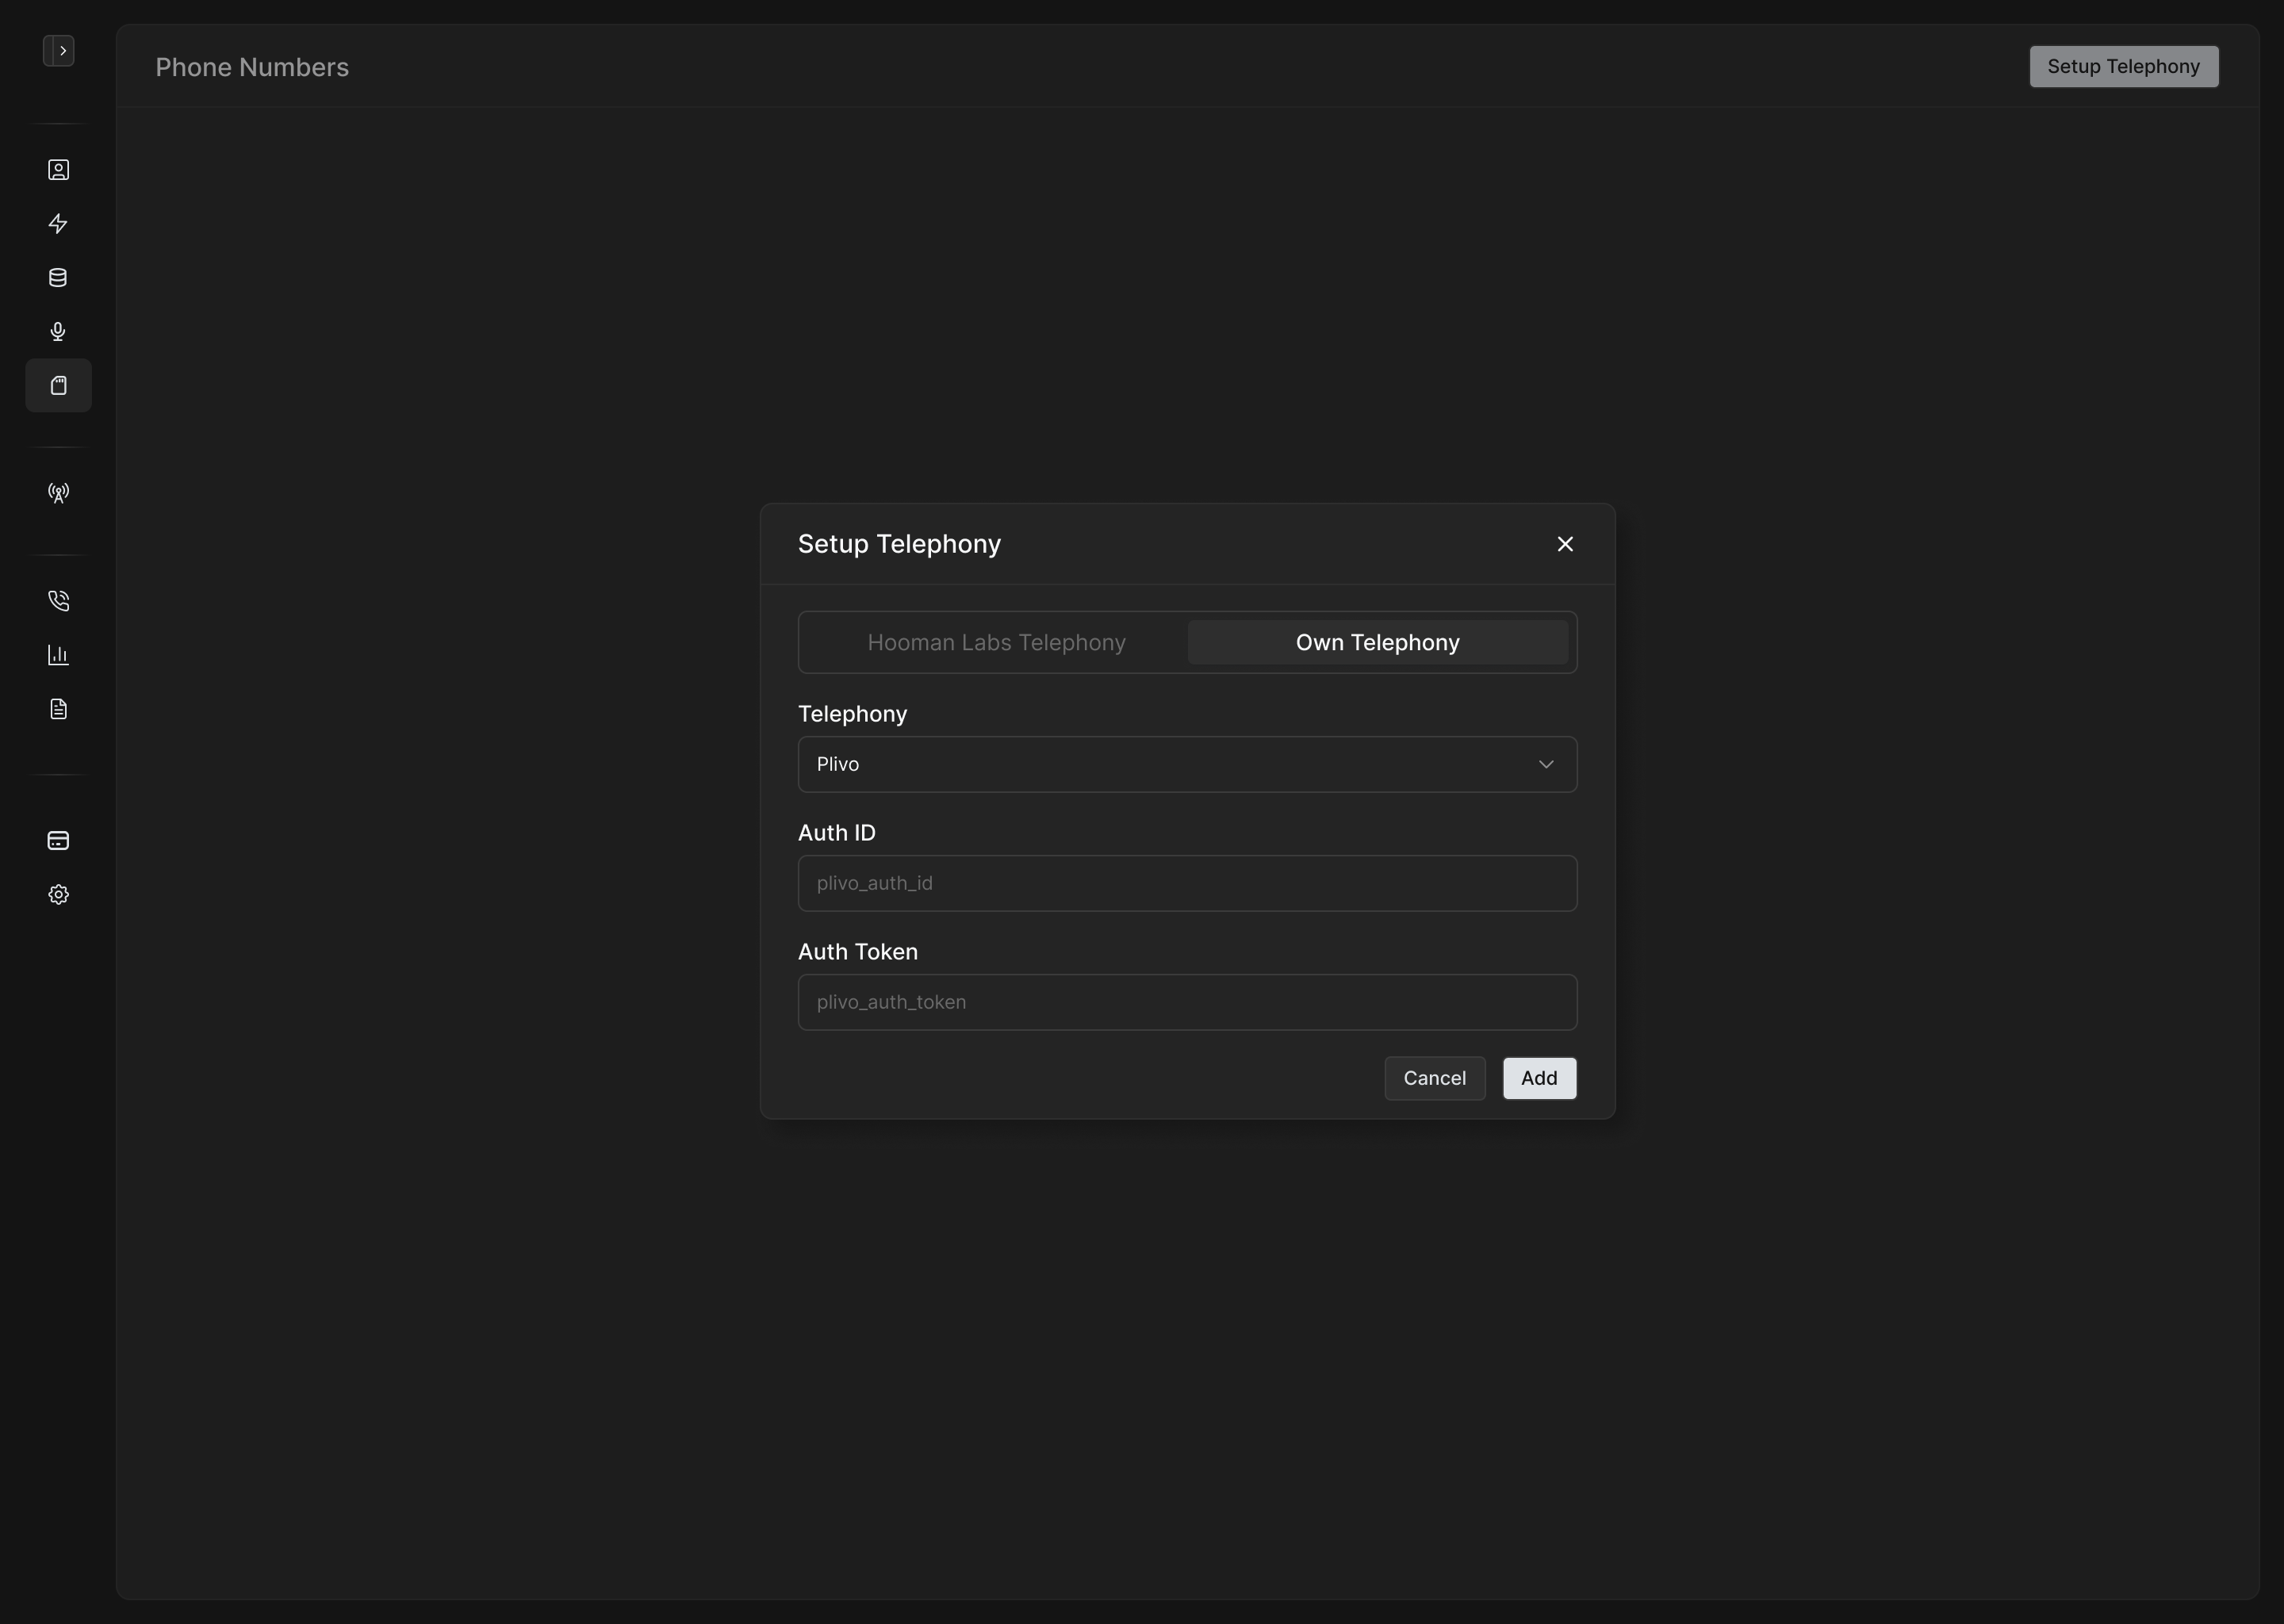
Select Plivo from the integration options.
-
Enter your Auth ID and Auth Token.
-
Rest of the setup like adding phone numbers, assigning agents etc remain same as Hooman Labs Plivo.
Exotel
-
Select Exotel as provider.
-
Provide the required account details.
-
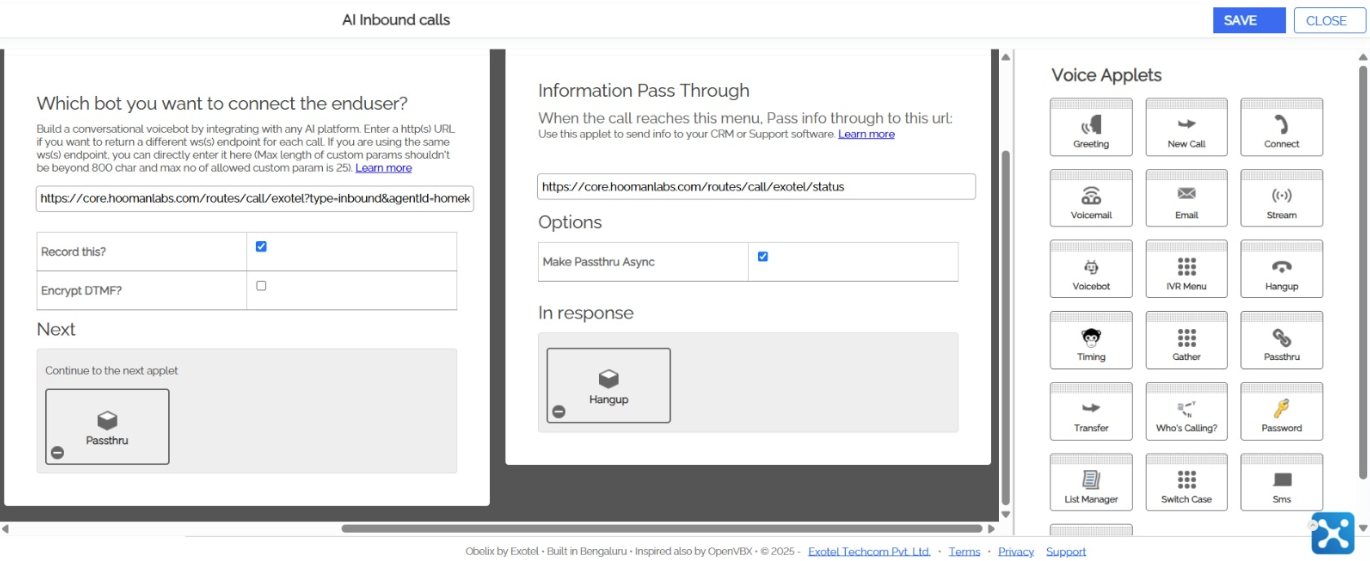
After setup, two URLs will be generated:
-
Answer URL: for Voicebot applet
-
Pass Through URL: for Passthru applet
-
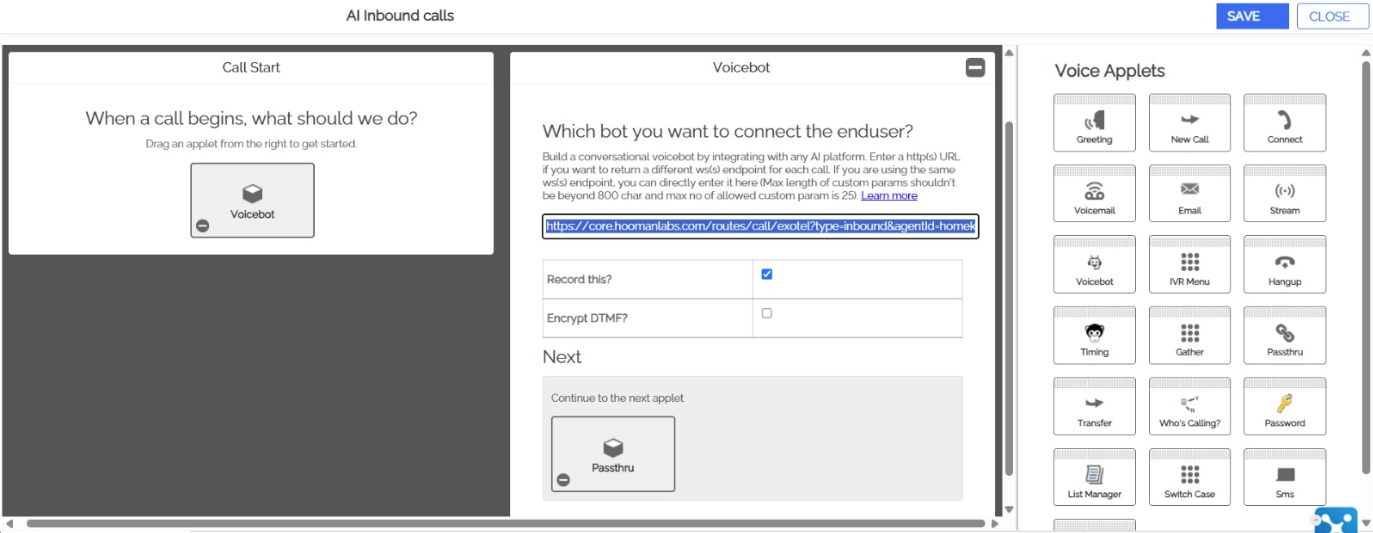
On Exotel Dashboard (Refer Screenshots):
-
Create a new flow.
-
Drag Voicebot applet onto the canvas.
-
Paste the Answer URL into the field.
-
-
Link it to Passthru applet.
-
Paste the Status URL here.
-
-
Add the outbound Flow ID back to Hooman Labs panel.
Twilio
-
Select Twilio and provide your Auth SID and Auth Token.
-
Add your Twilio numbers.
-
For inbound calling:
-
Use the generated Answer URL and Status URL in your Twilio configuration.
-