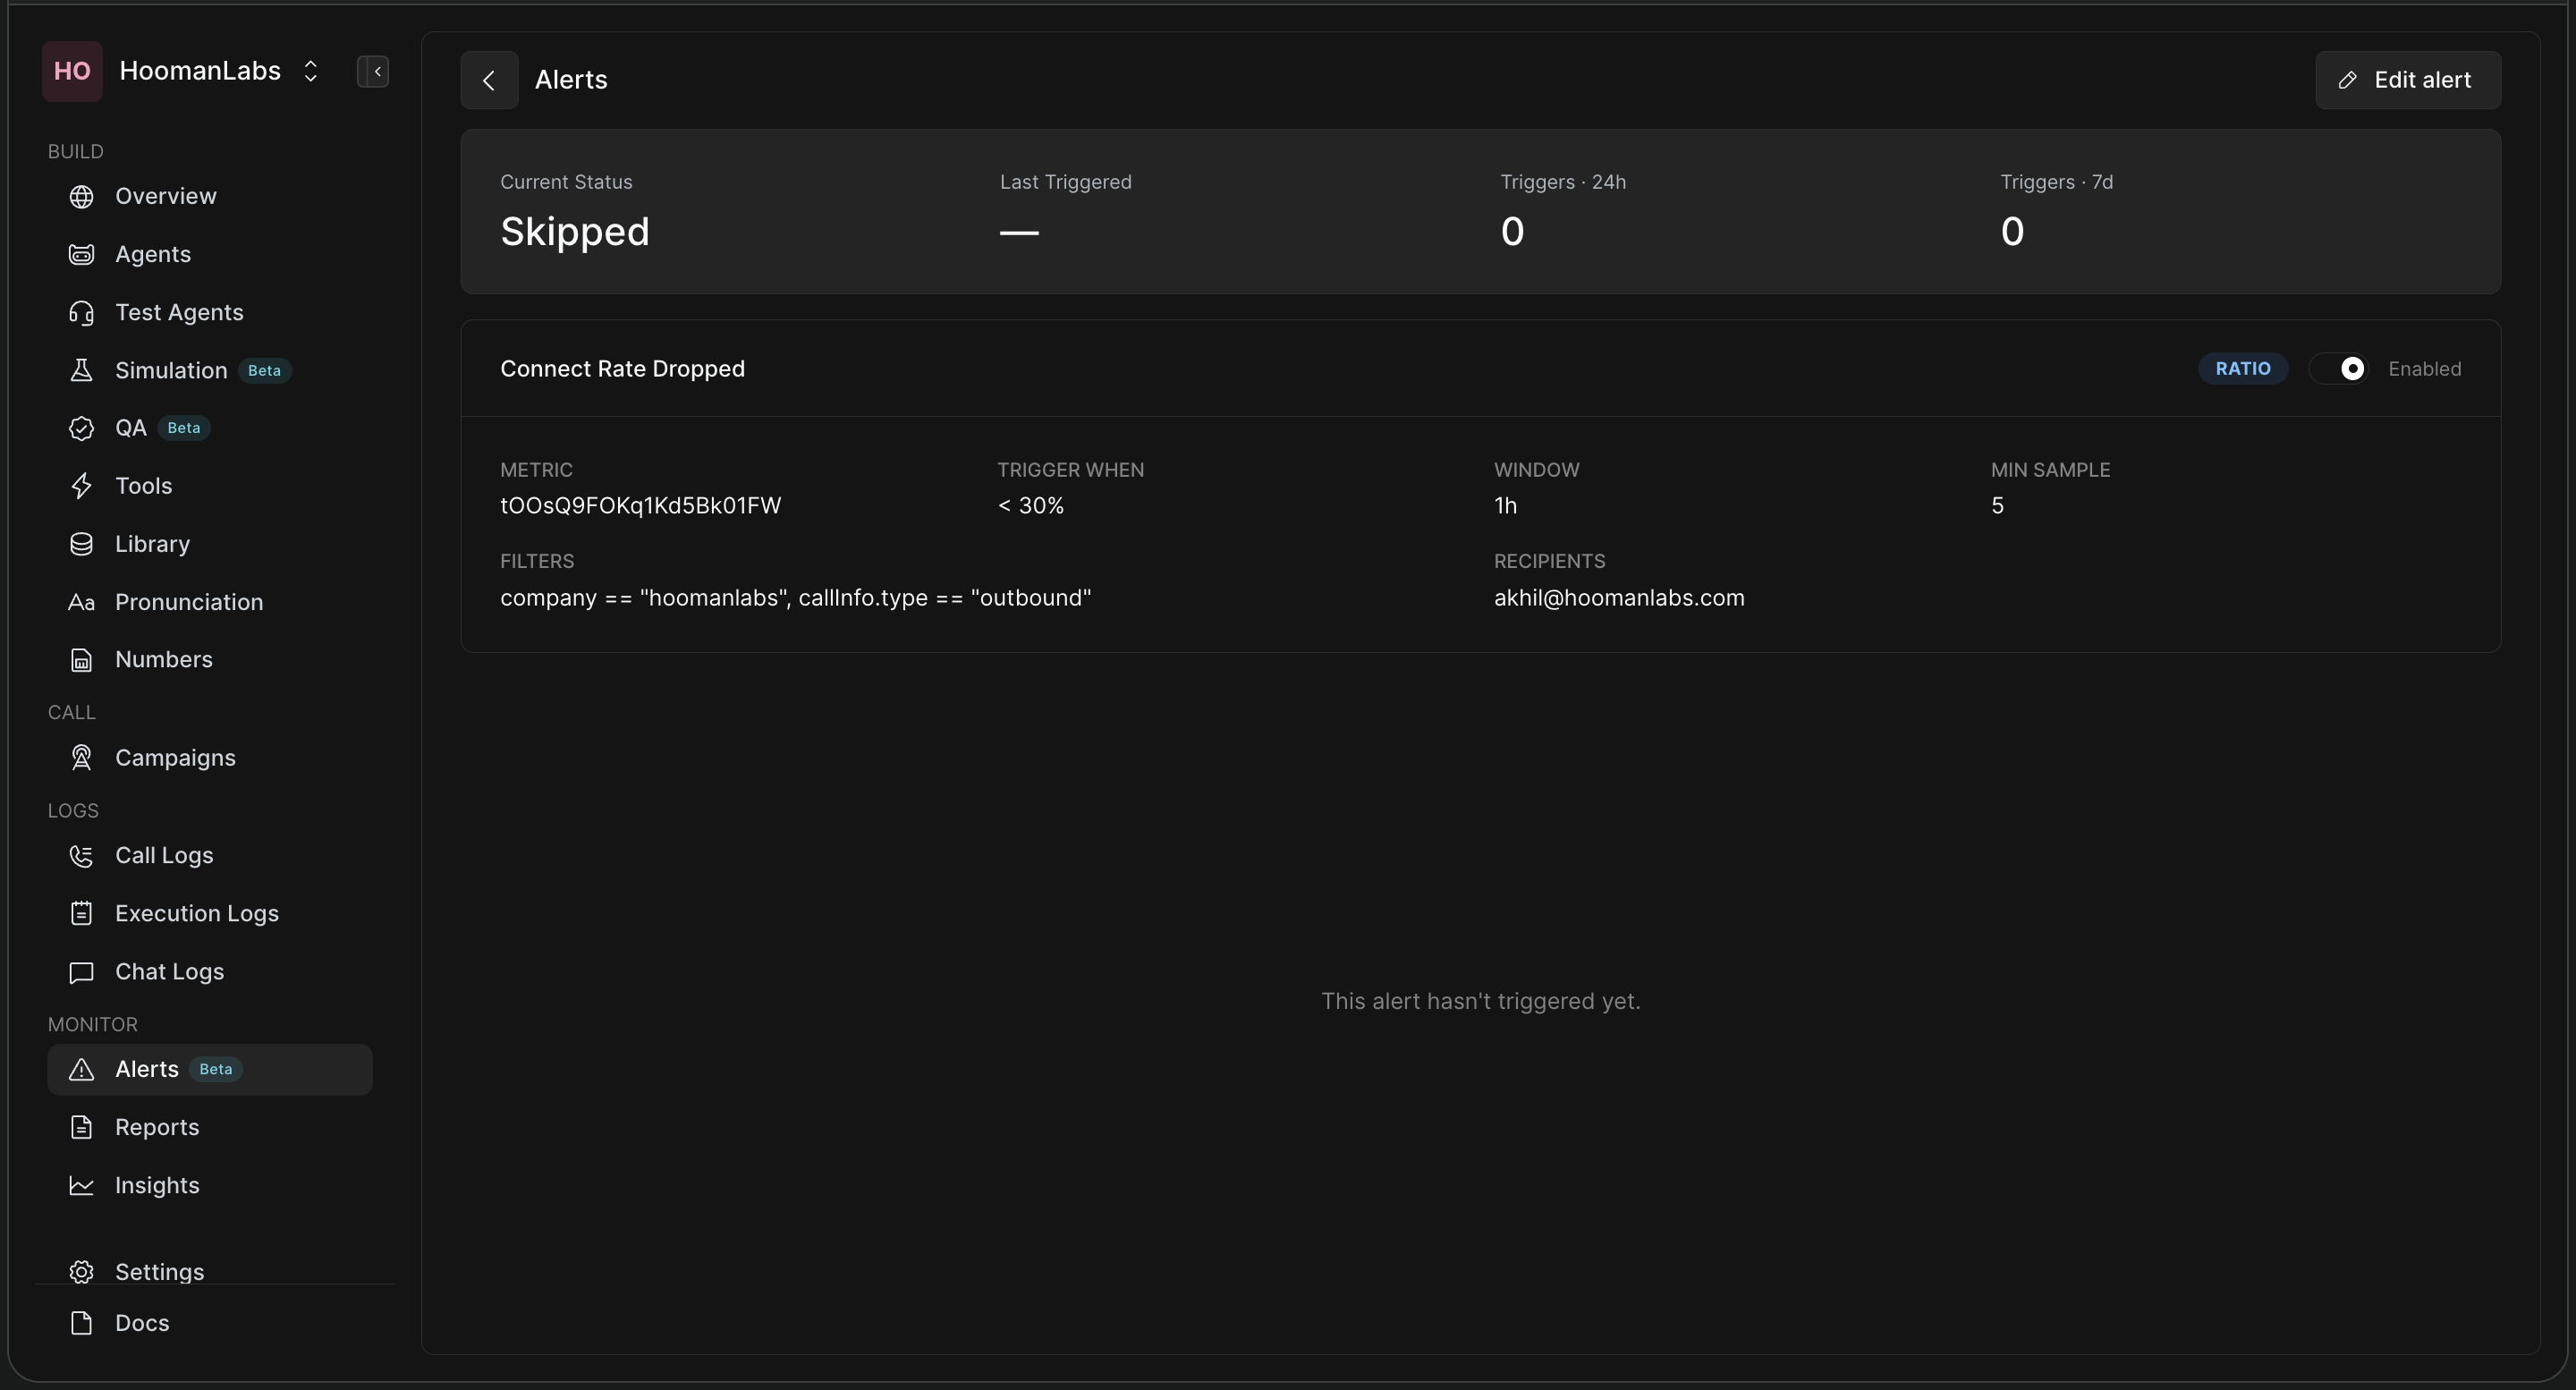
Alerts
Beta Testing
Overview
The Alerts feature allows users to monitor the performance of their call campaigns and receive notifications based on specific metrics. This tool is designed to help you track data anomalies and stay informed about critical performance shifts in real-time.
Creating a New Alert
To create a new alert:
-
Navigate to the Alerts section in the sidebar.
-
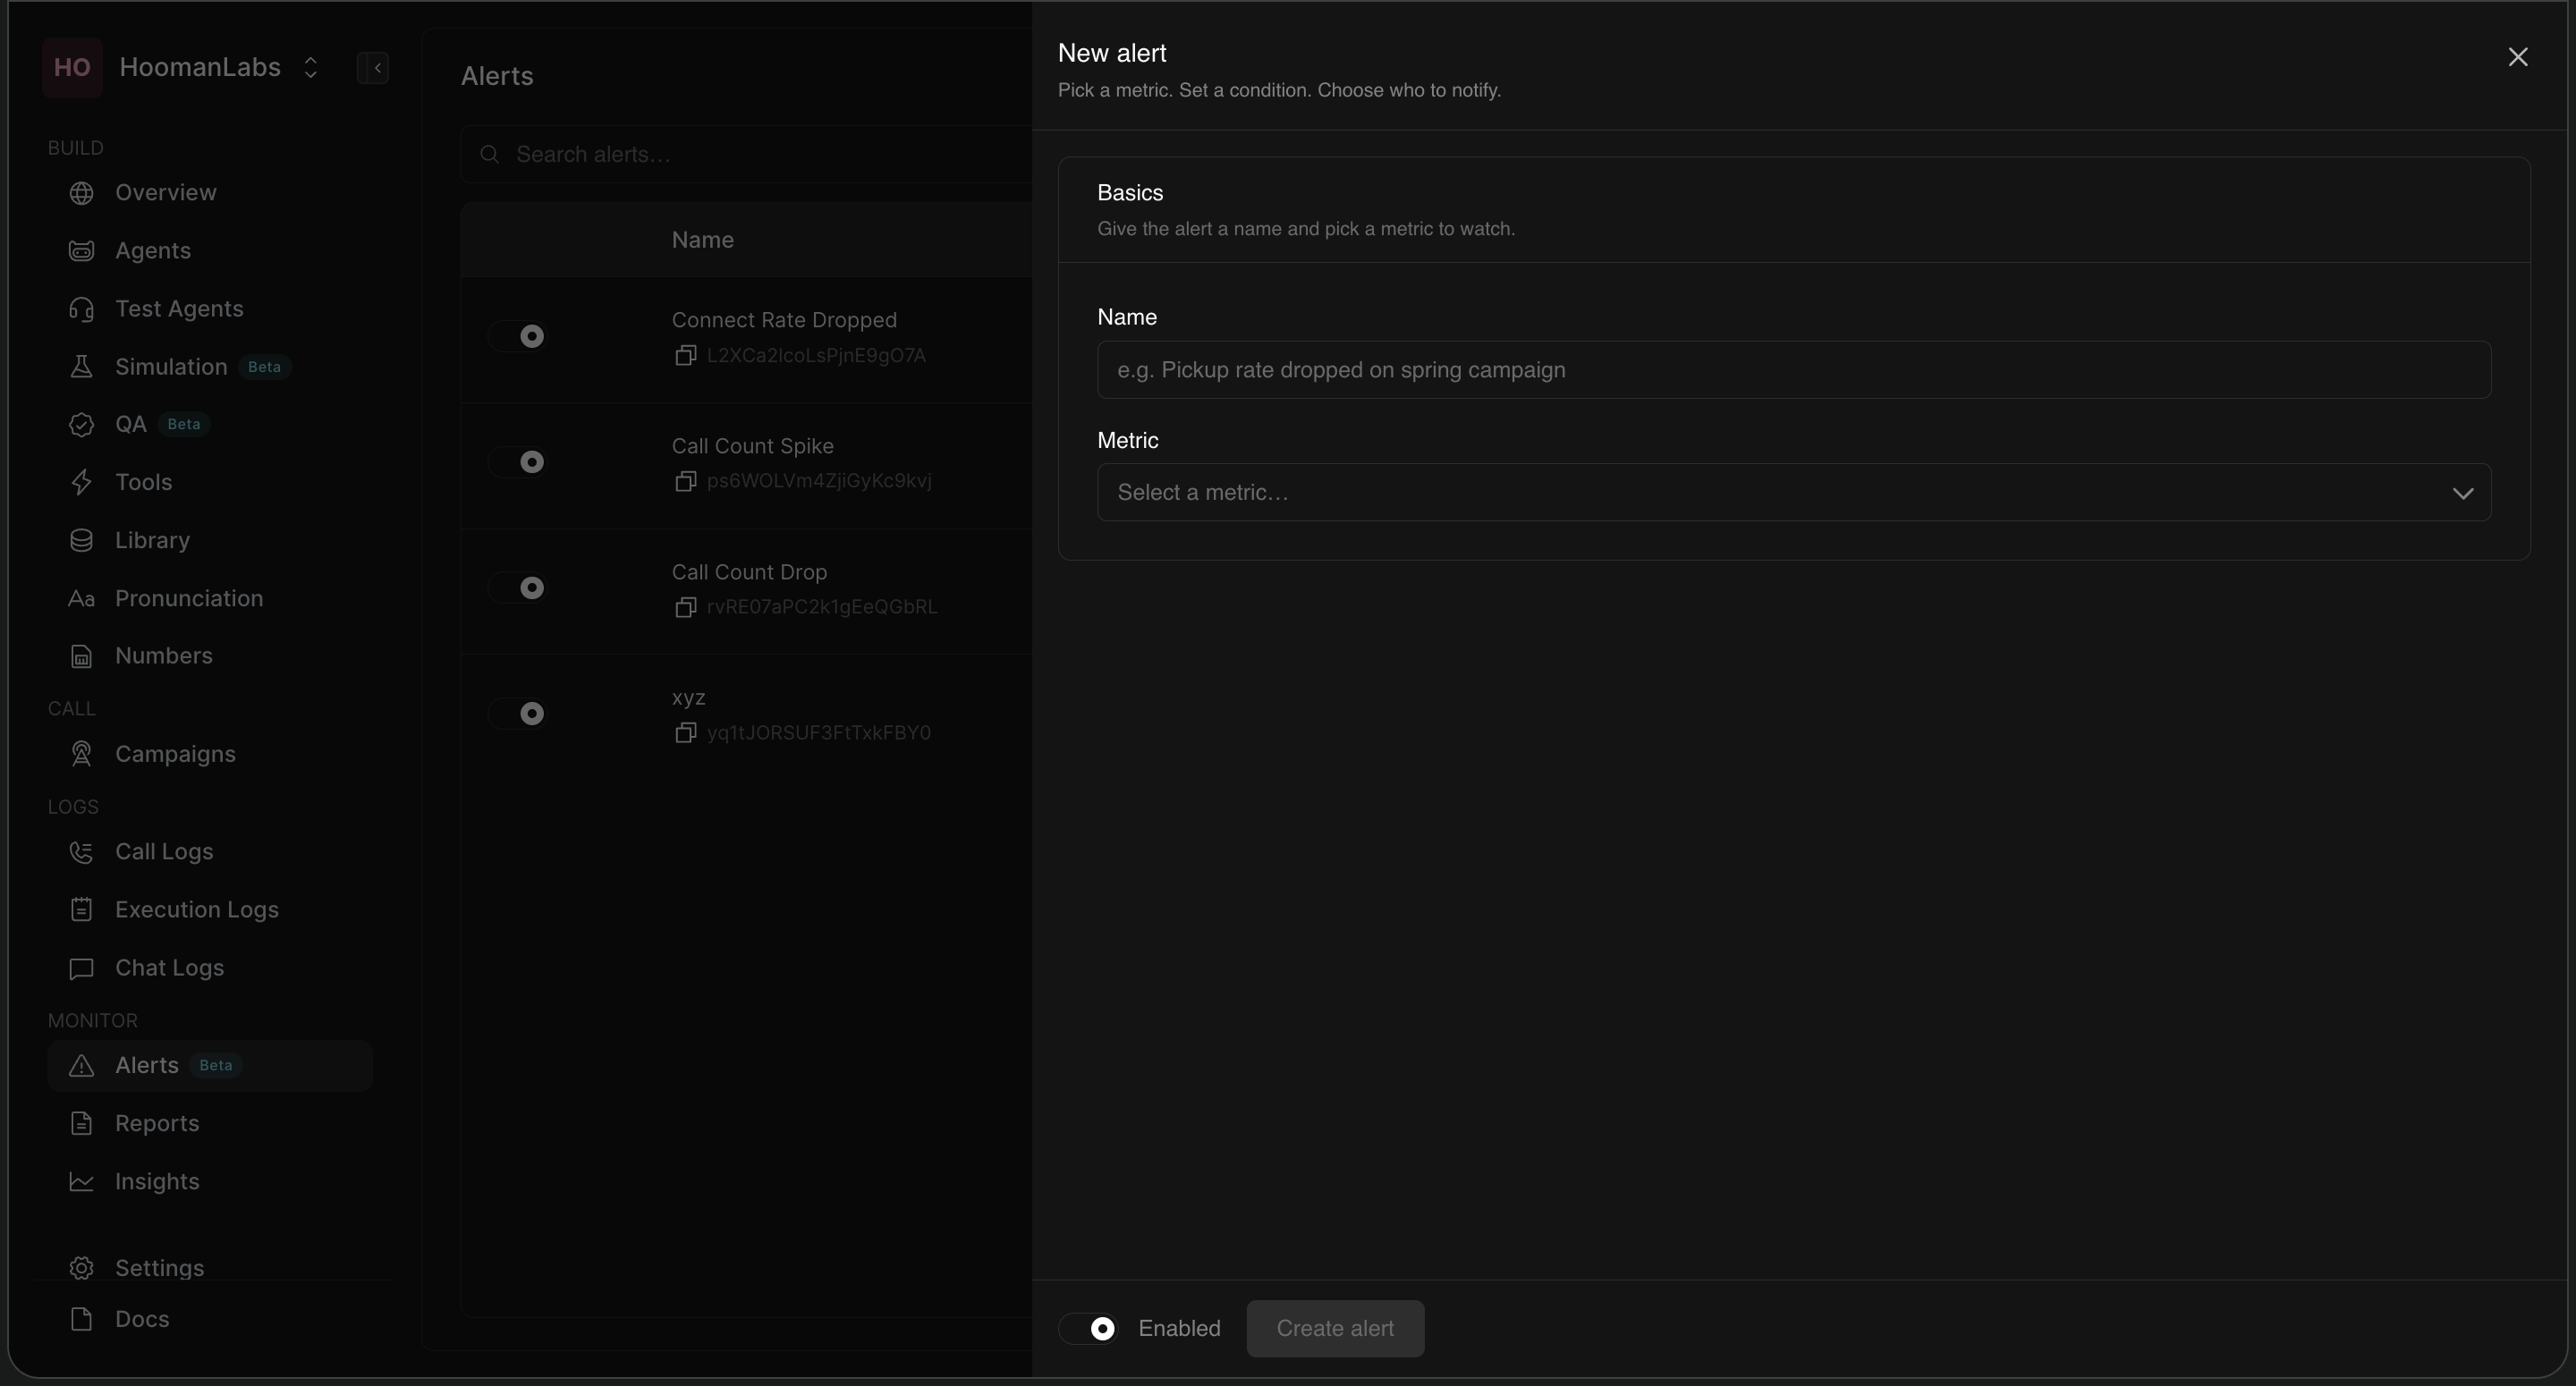
Click the '+ New Alert' button in the top right corner.
-
Basics: Provide a descriptive name for the alert (e.g., "Connect Rate Dropped").
-
Metric: Select the desired metric from the dropdown menu (e.g., Voicemail Call Count, Call Duration (Avg), etc.).
Configuration and Filtering
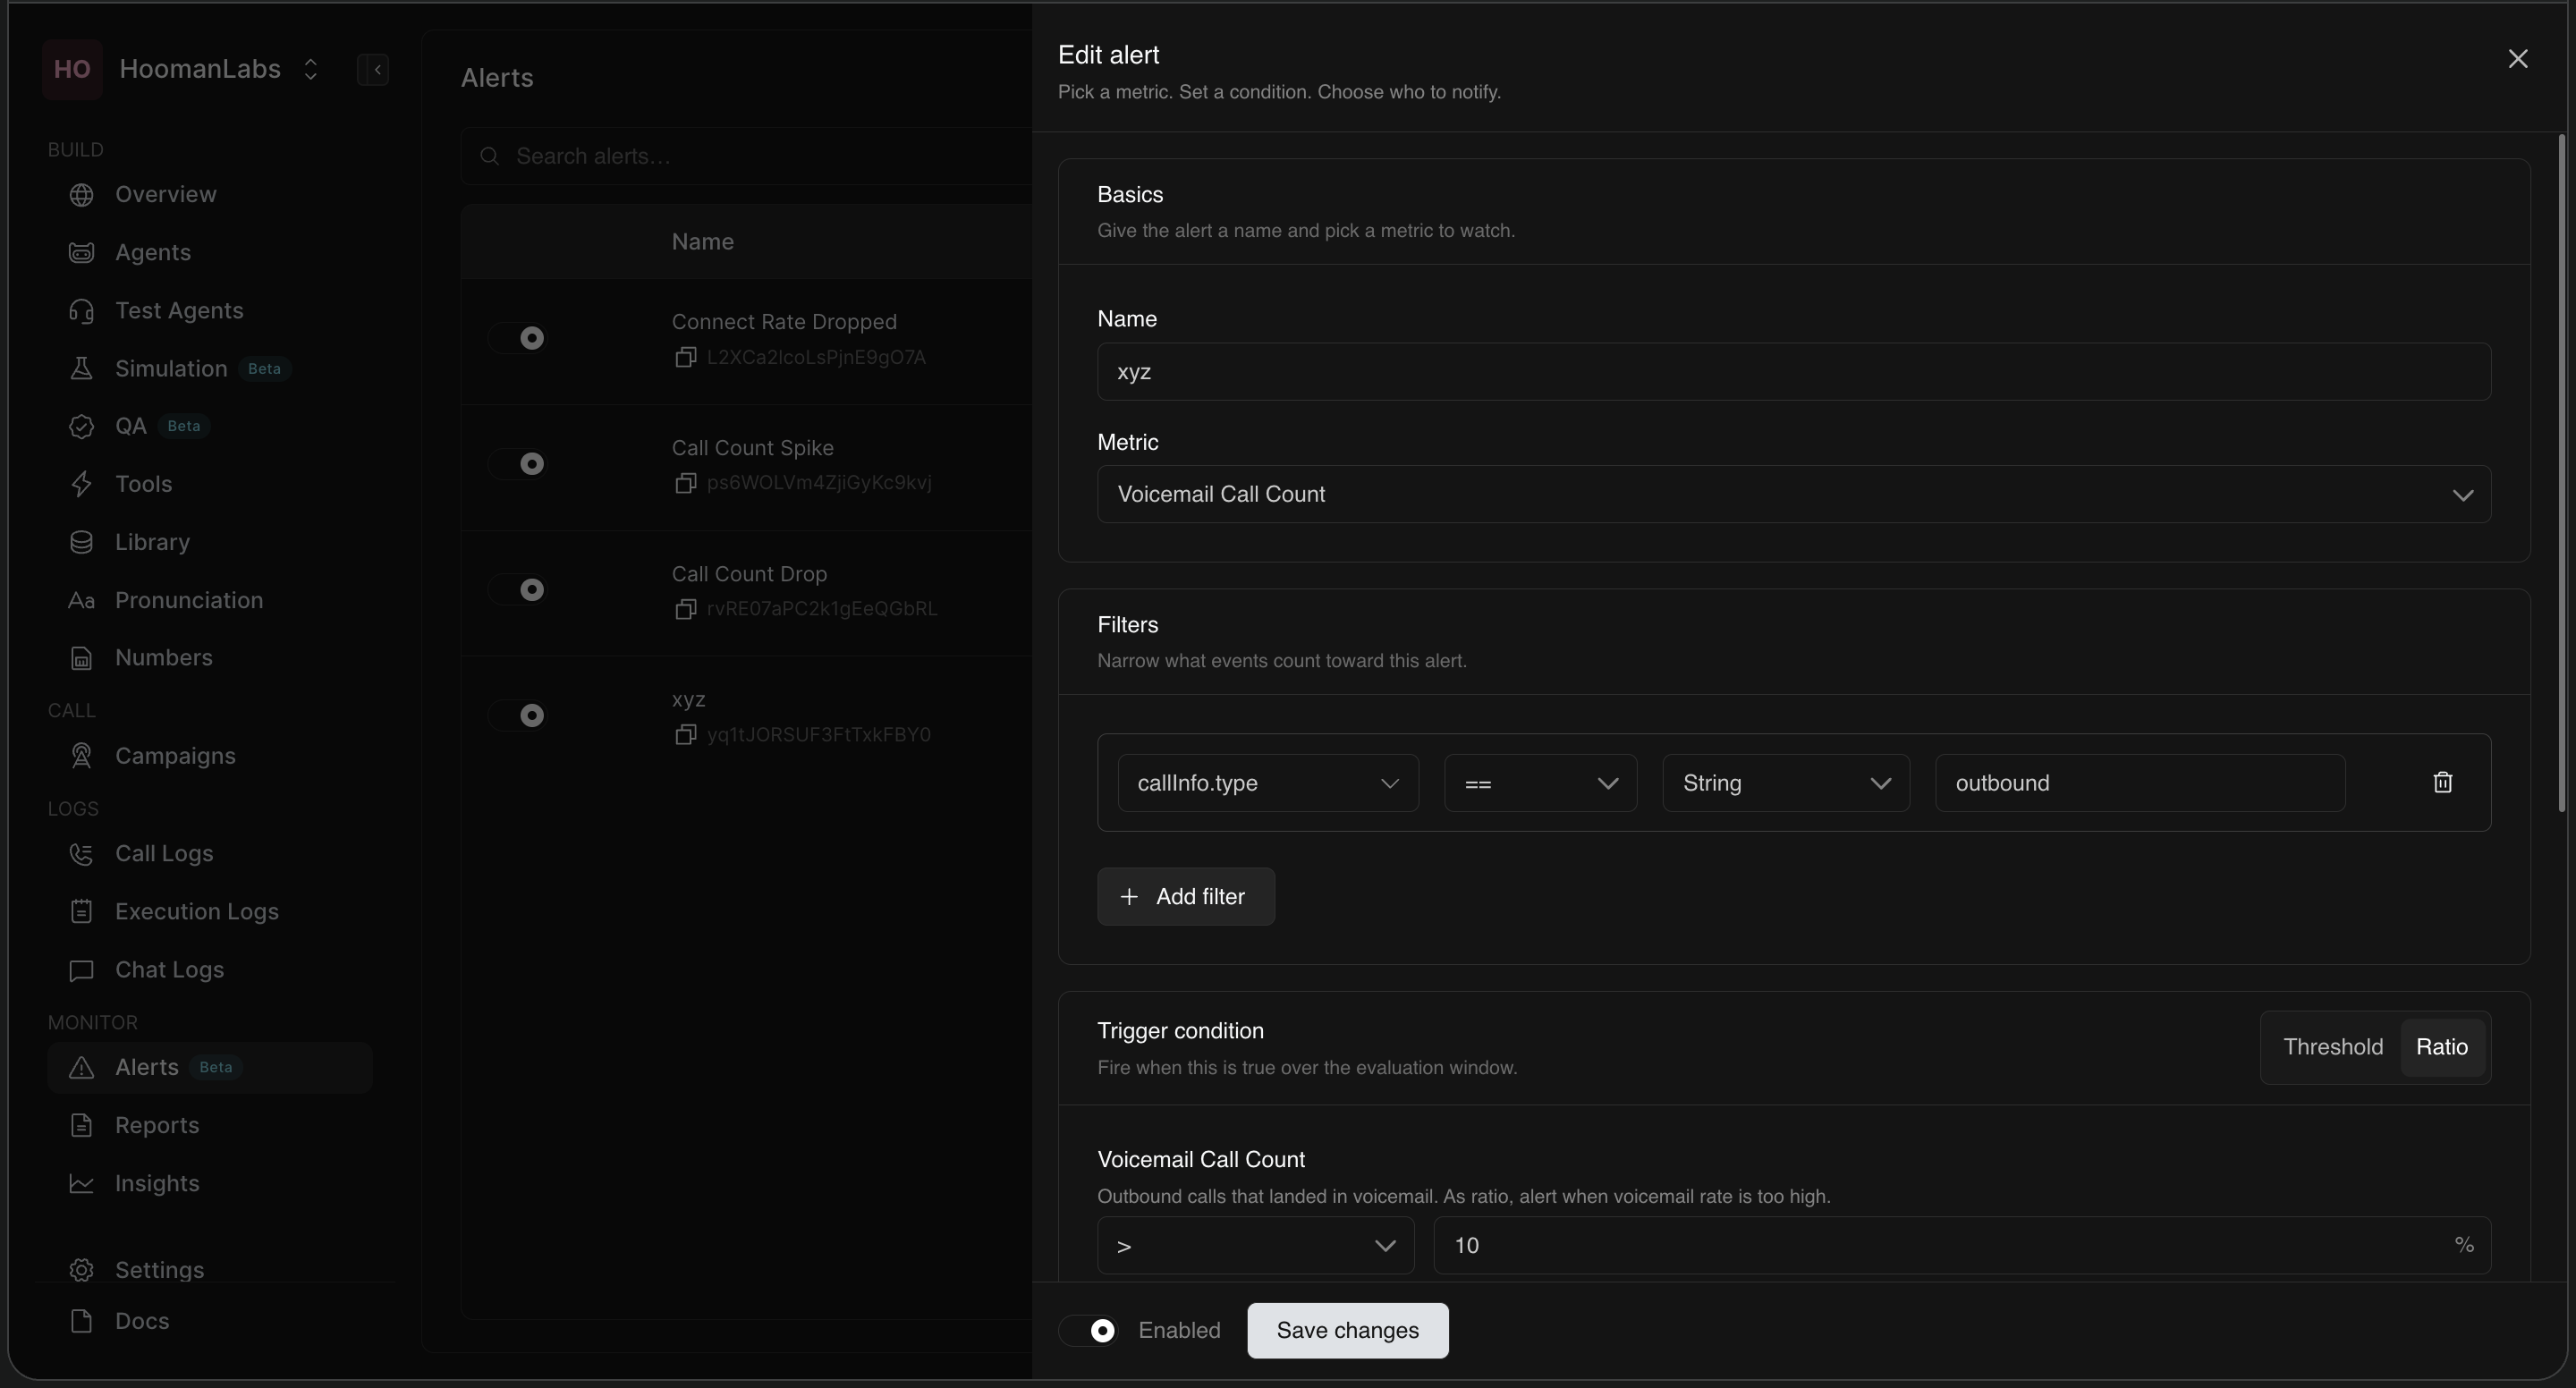
Filters
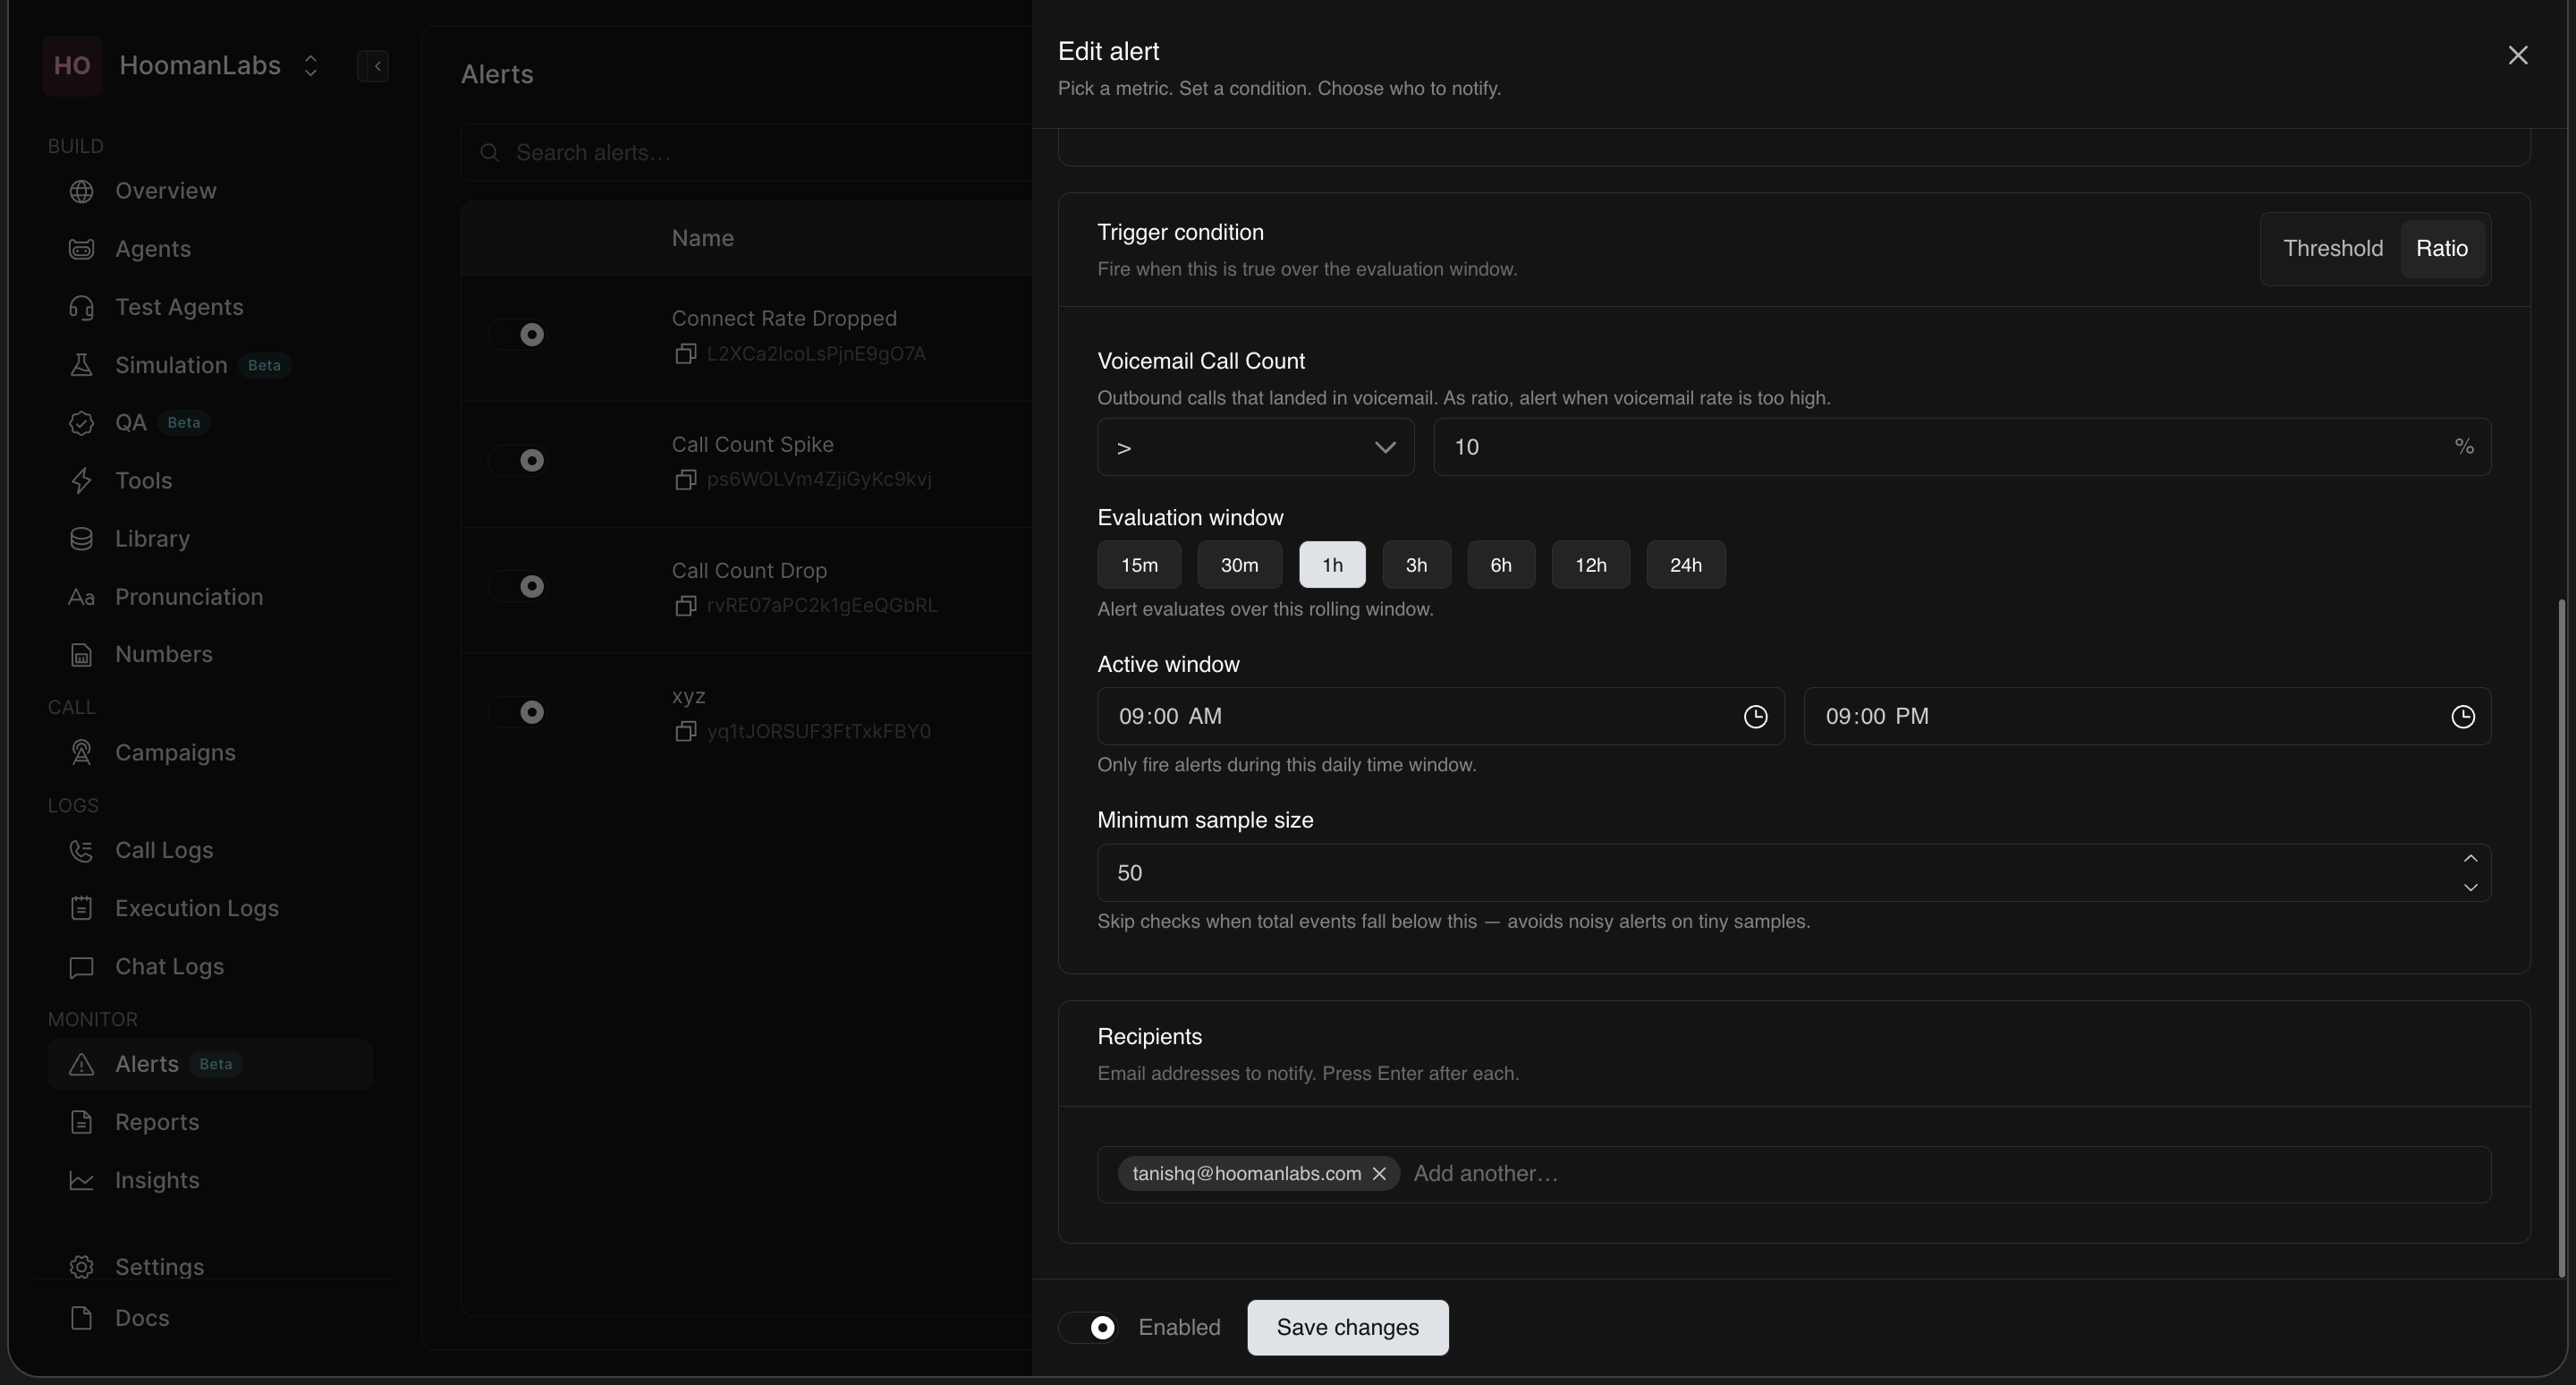
You can narrow down which events count toward an alert by adding filters. For instance, by default, voicemail alerts are filtered by callInfo.type == outbound. You can modify these or add custom filters based on other available event attributes.
Trigger Condition
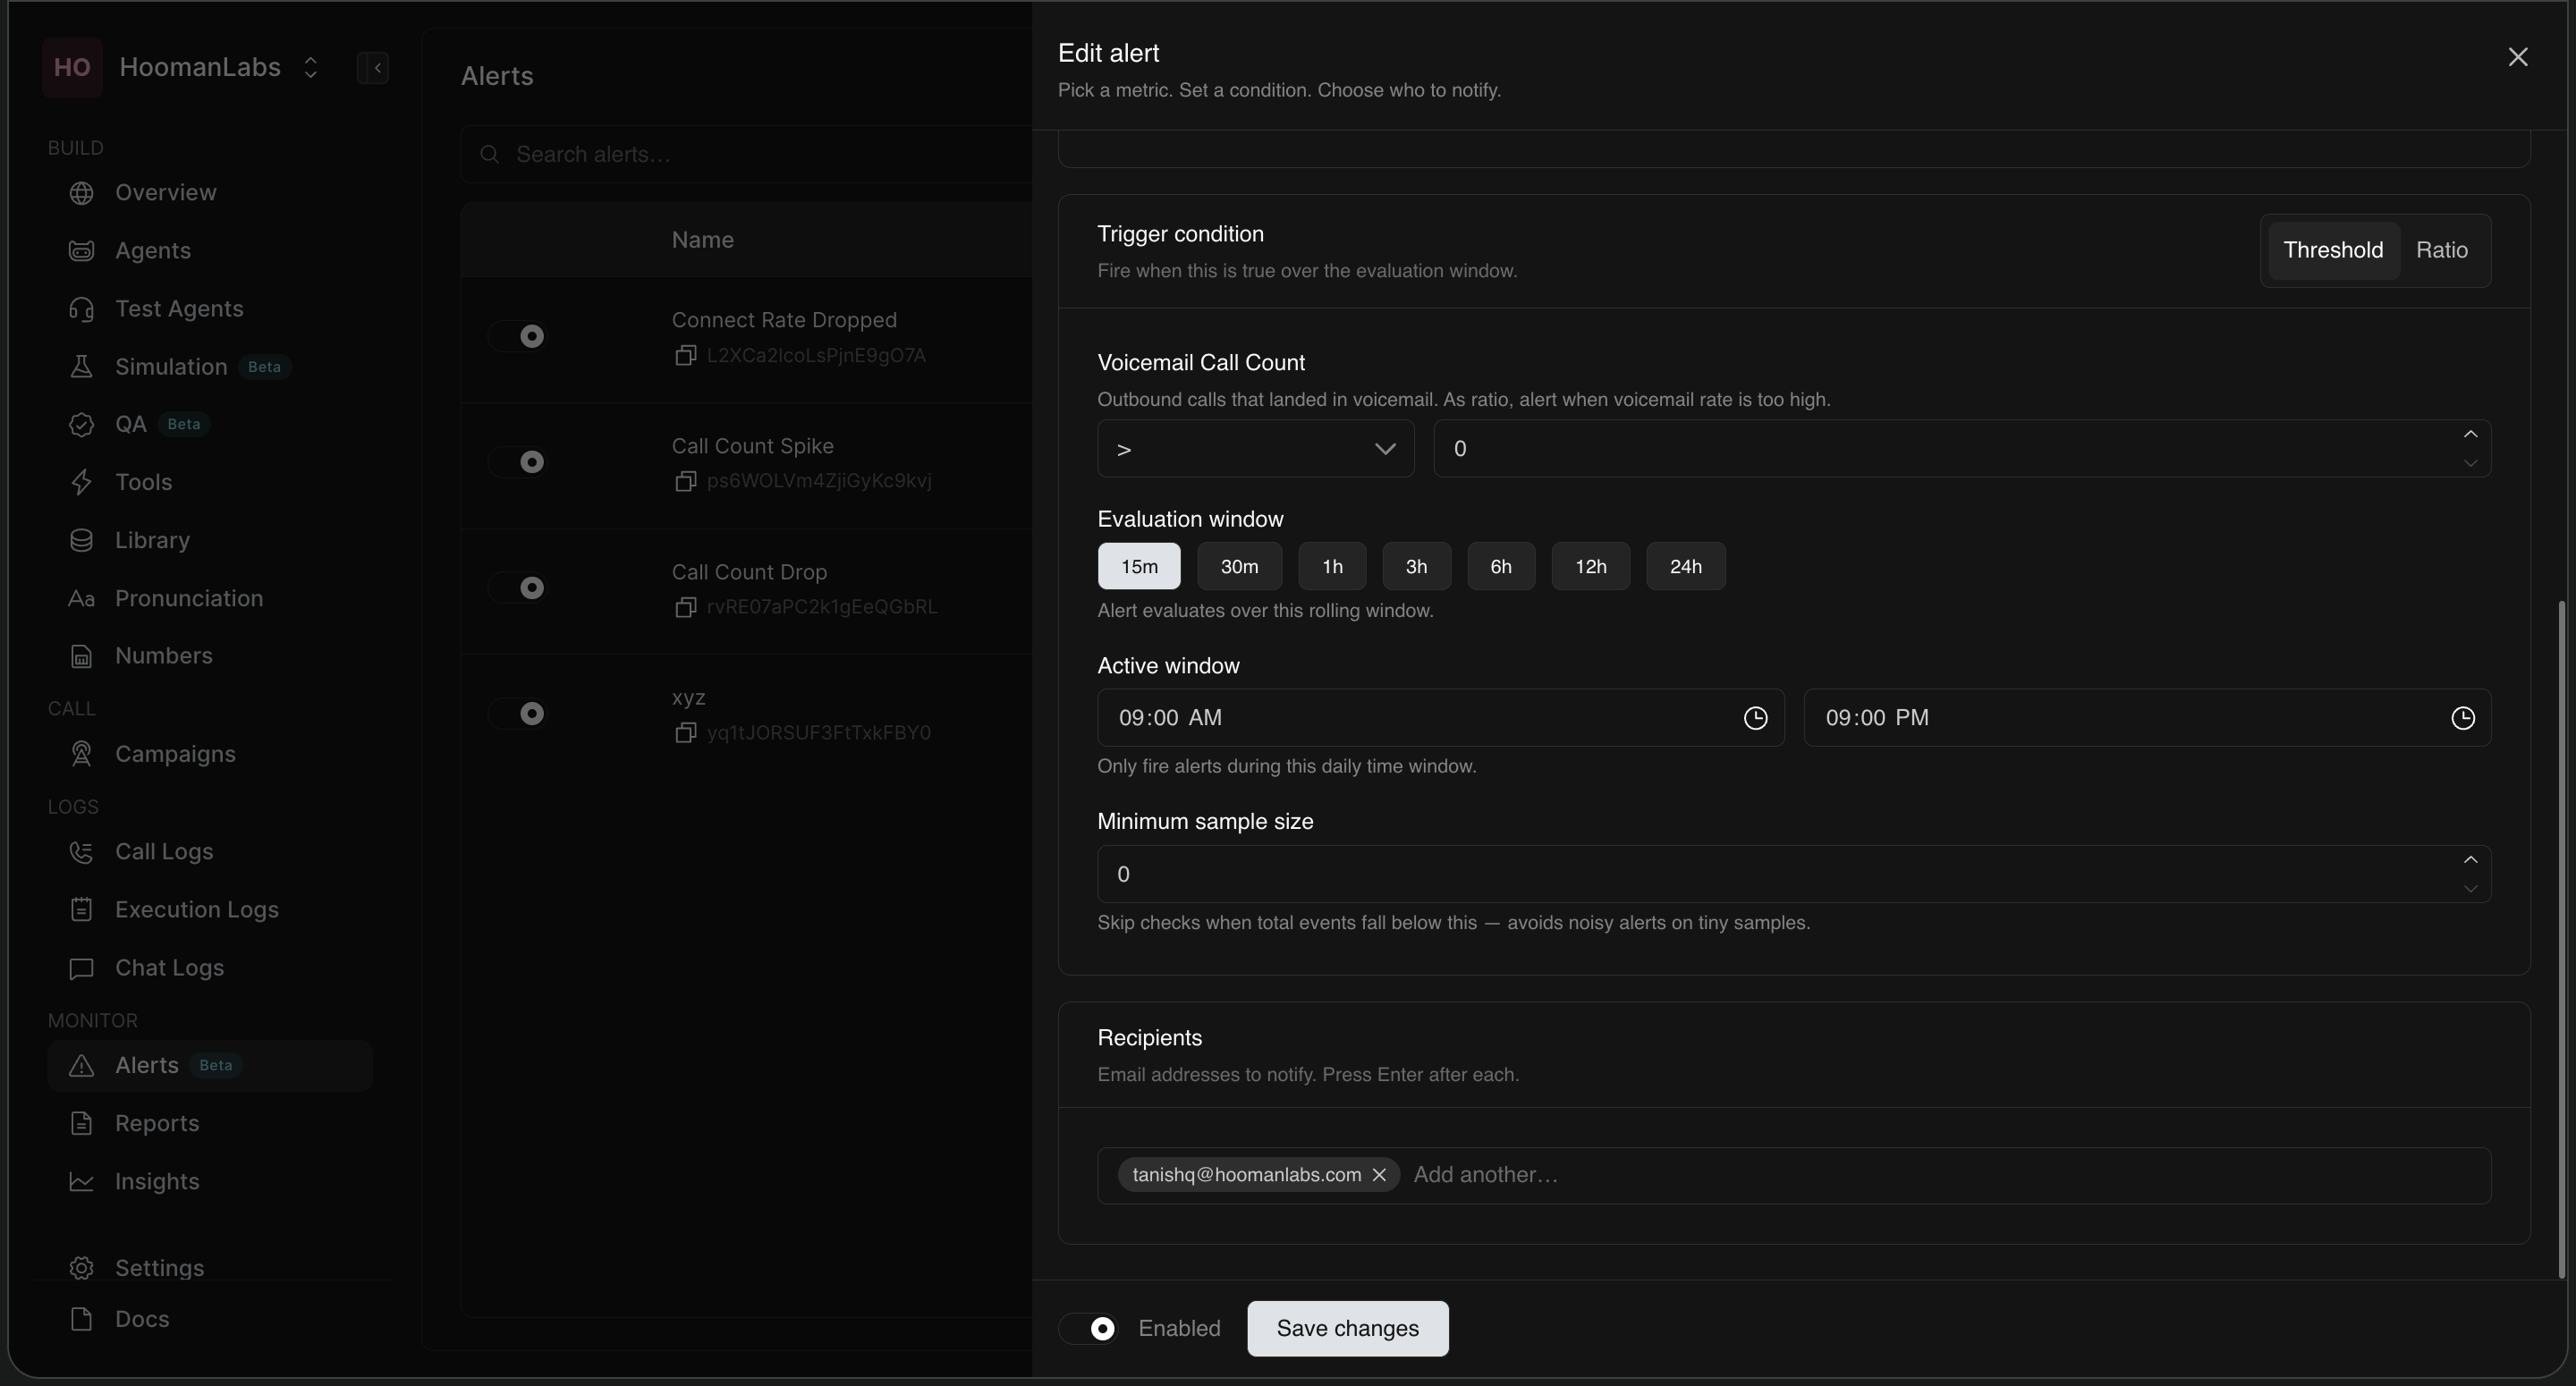
Select the logic for the alert trigger:
-
Threshold: Use this for specific numerical values (e.g., triggering when the Call Count exceeds a certain number).
-
Ratio: Use this for percentages or rates (e.g., triggering when the Voicemail Rate exceeds 10%).
Notifications and Management
-
Recipients: Enter the email address of the person to be notified and press Enter.
-
Status: Toggle the Enabled switch to turn the alert on or off. You can save a configuration while keeping it disabled for future use.
-
Alert Status:
-
Healthy: The metric is within the defined boundaries.
-
Triggered: The alert conditions were met.
-
Skipped: The alert check was bypassed (e.g., due to insufficient sample size or the metric not meeting the criteria during that specific window).
-
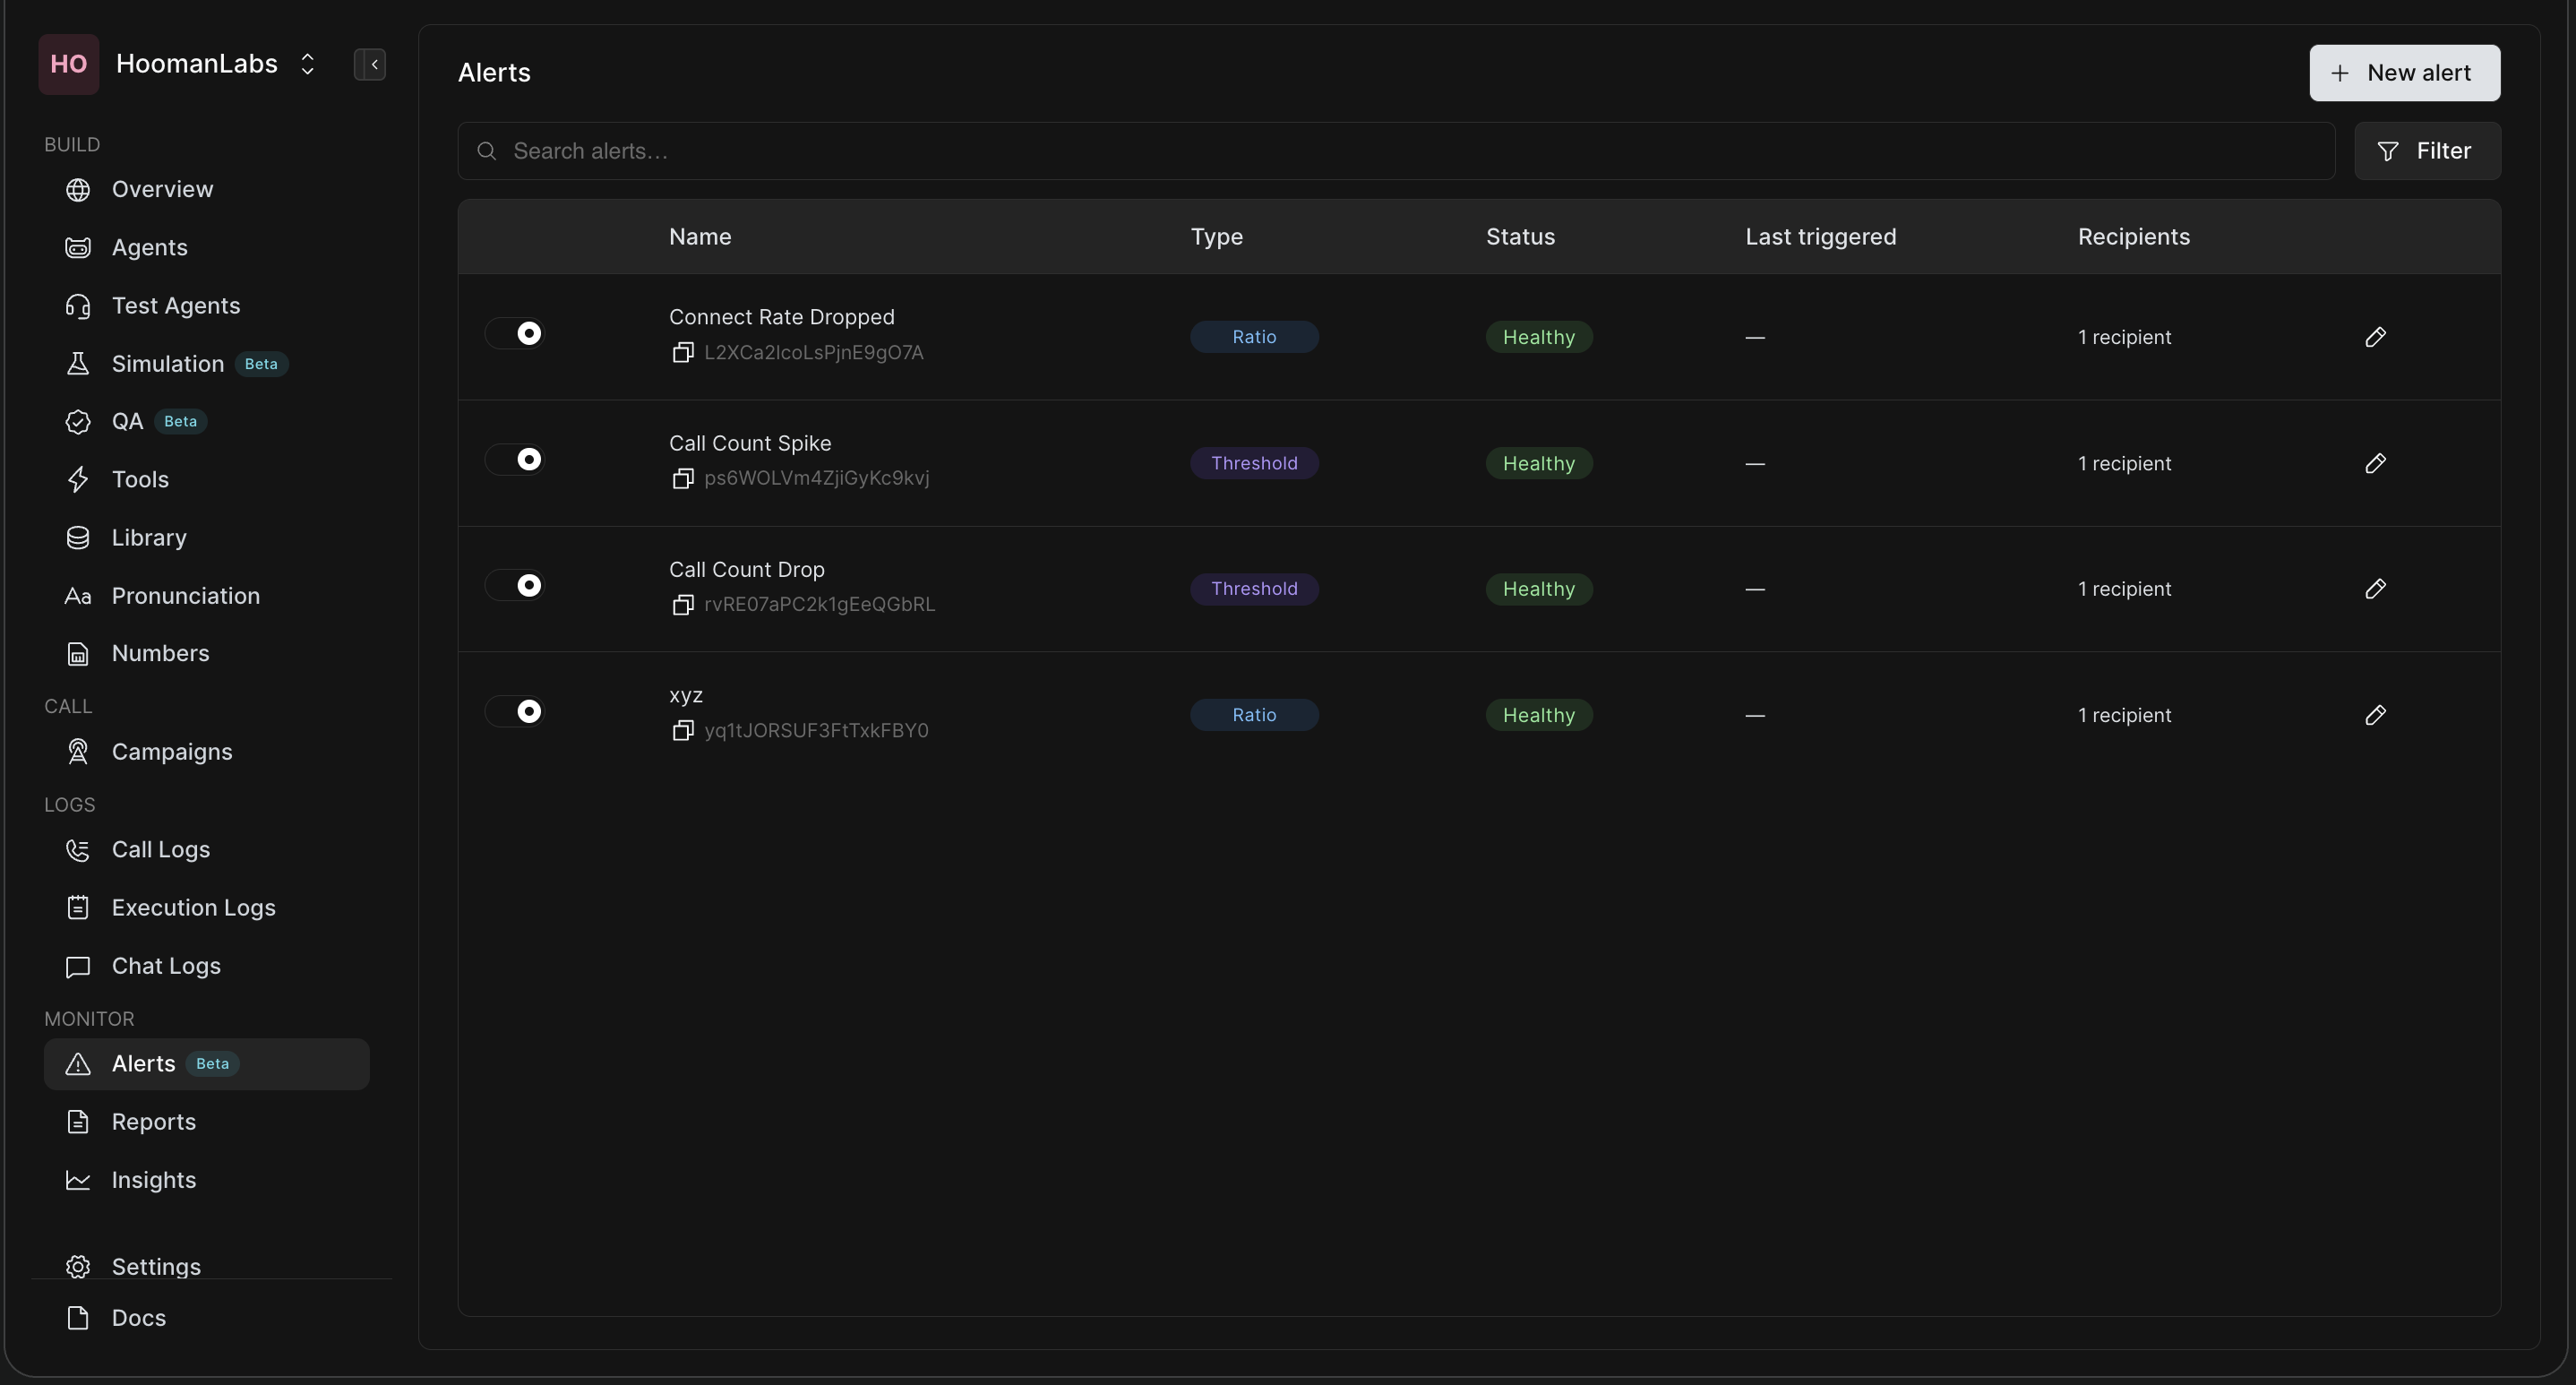
Clicking on a row in the alerts table allows you to view the history of when and why an alert was triggered or skipped.