Simulations
Beta Testing
Overview
The Simulations feature in HoomanLabs is a powerful tool designed to help you test, evaluate, and refine your voice agents before deploying them live. By running automated simulations, you can grade agent performance against expected outcomes, test specific edge cases, and ensure conversational flows are handling user inputs correctly.
This guide covers everything from accessing the simulations tools to building full-length conversation tests and reviewing QA reports.
1. Accessing the Simulations Feature
There are two primary ways to access the Simulations tools, depending on whether you want a global view or want to test a specific agent.
Global View
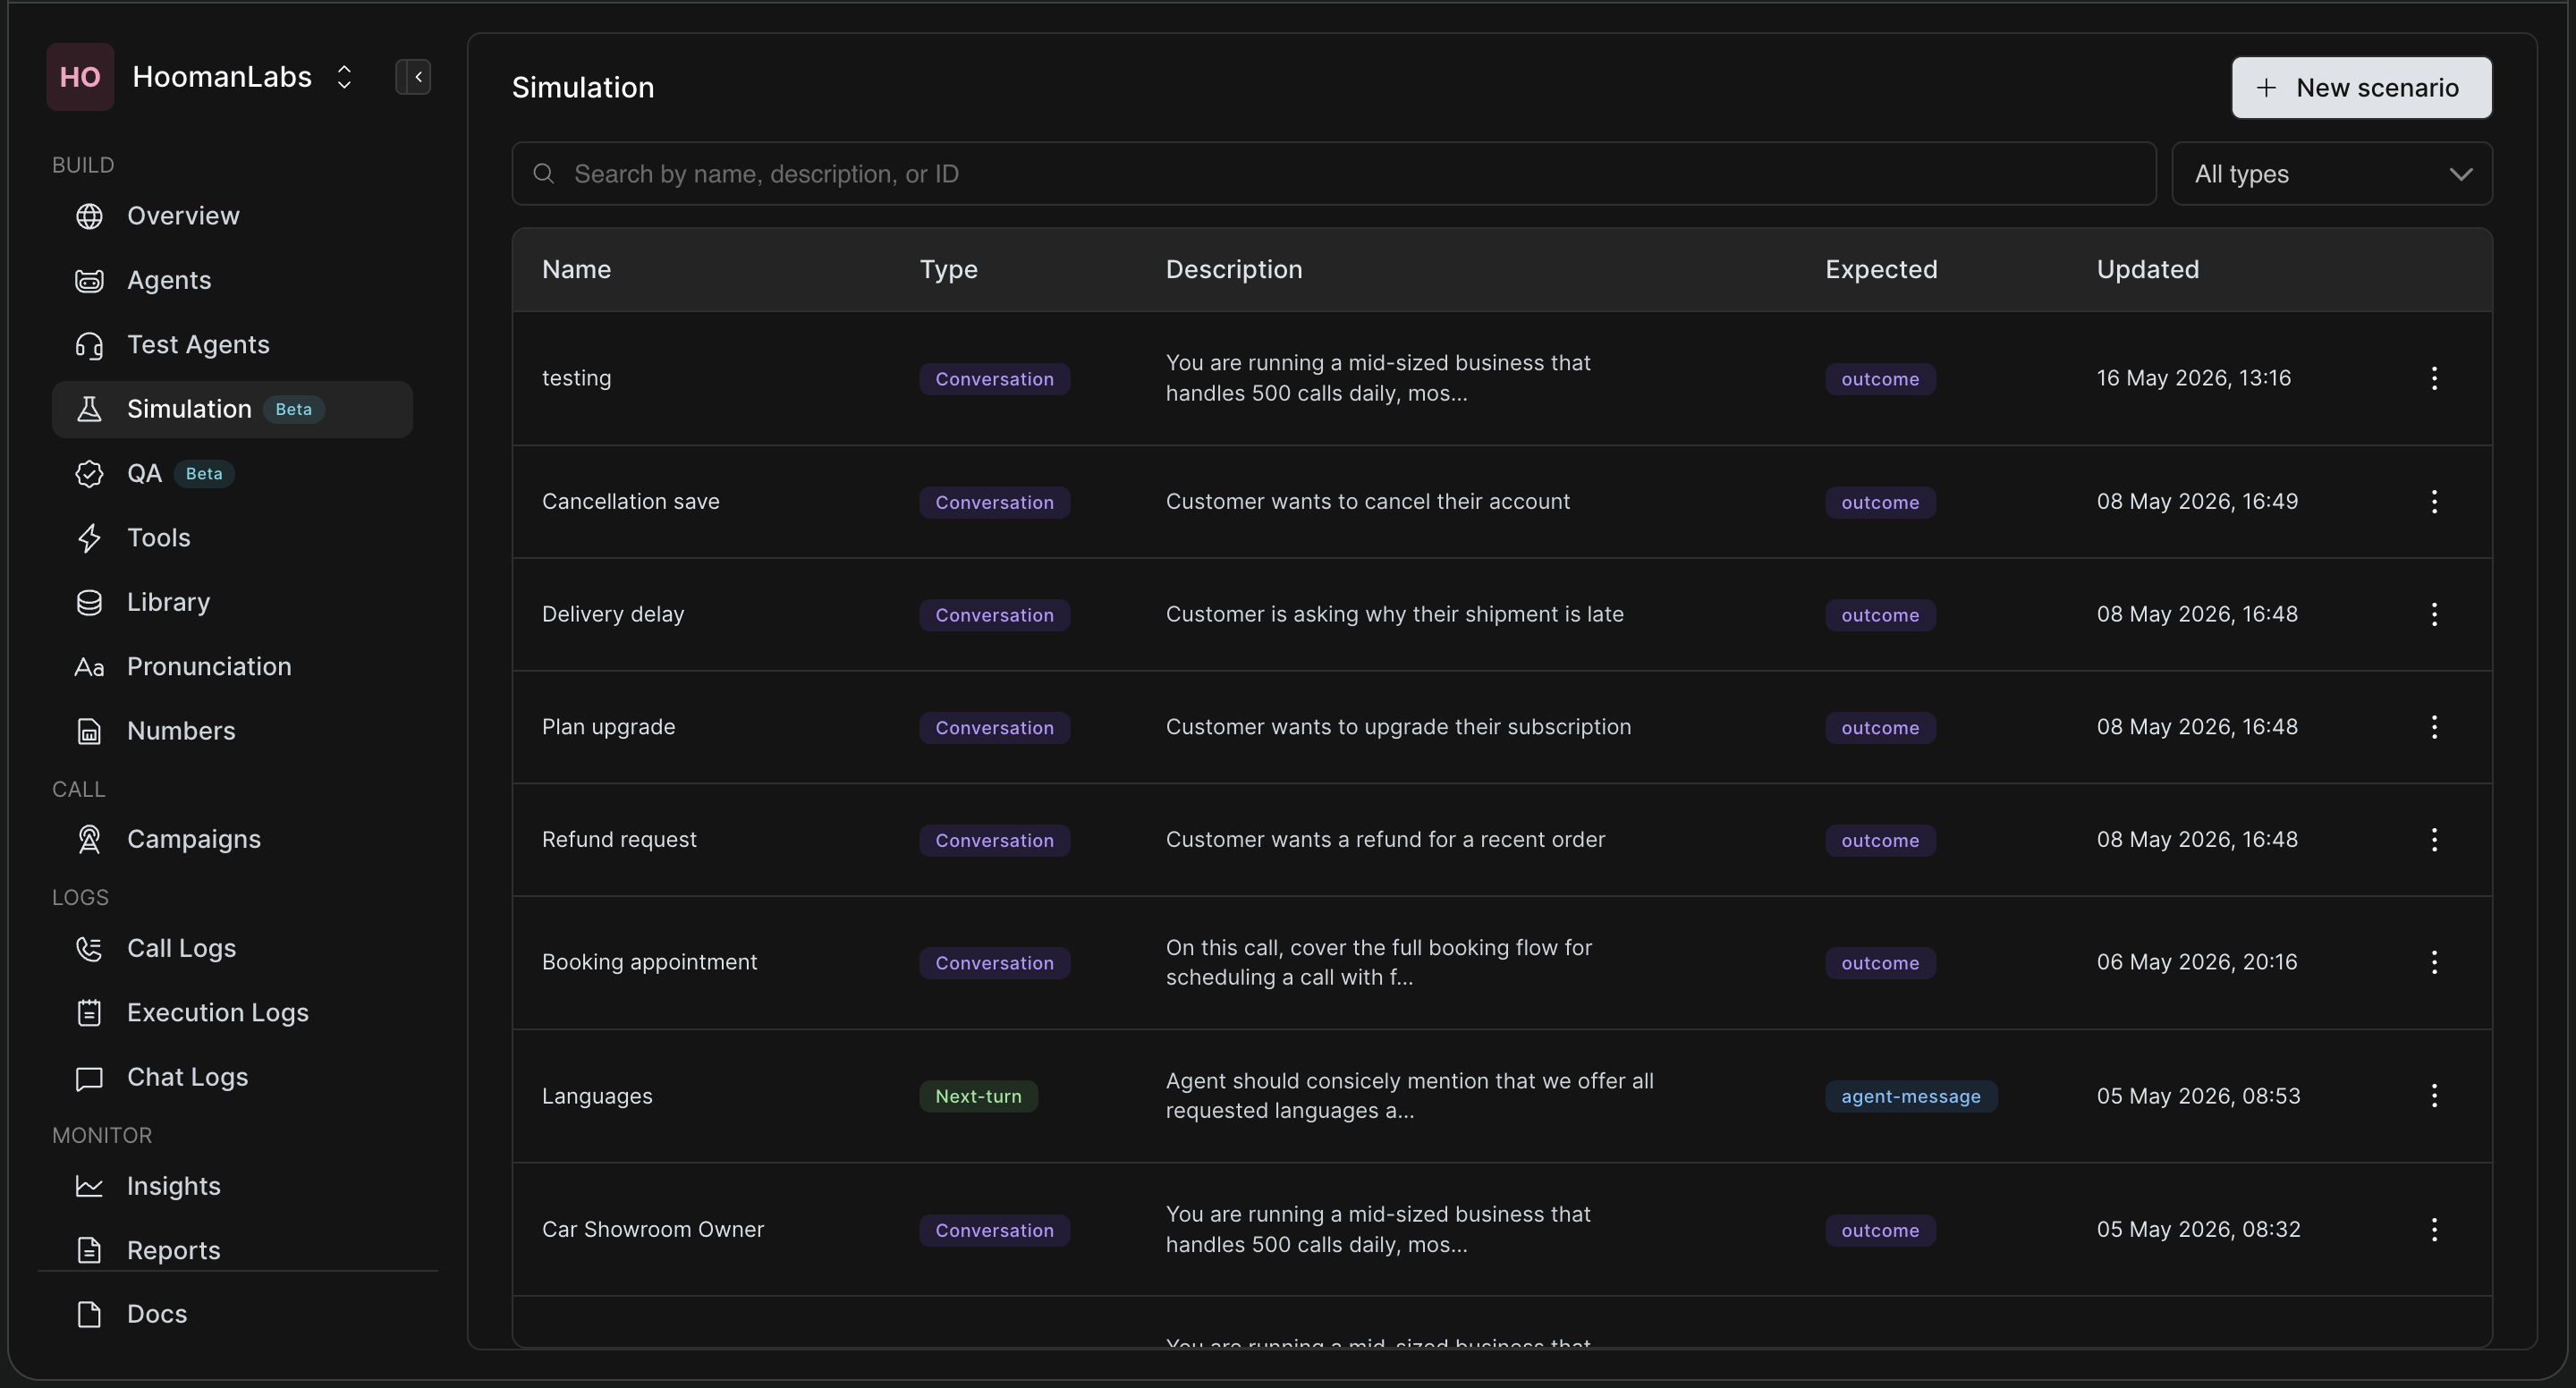
Navigate to the Build section in the left-hand menu and click on Simulations . This opens the main dashboard where you can see all scenarios across all agents.
Agent-Specific View
If you are actively working on an agent and want to test it directly:
-
Go to the Agents tab in the left-hand menu.
-
Find the agent you want to test and click the pencil icon (Edit).
-
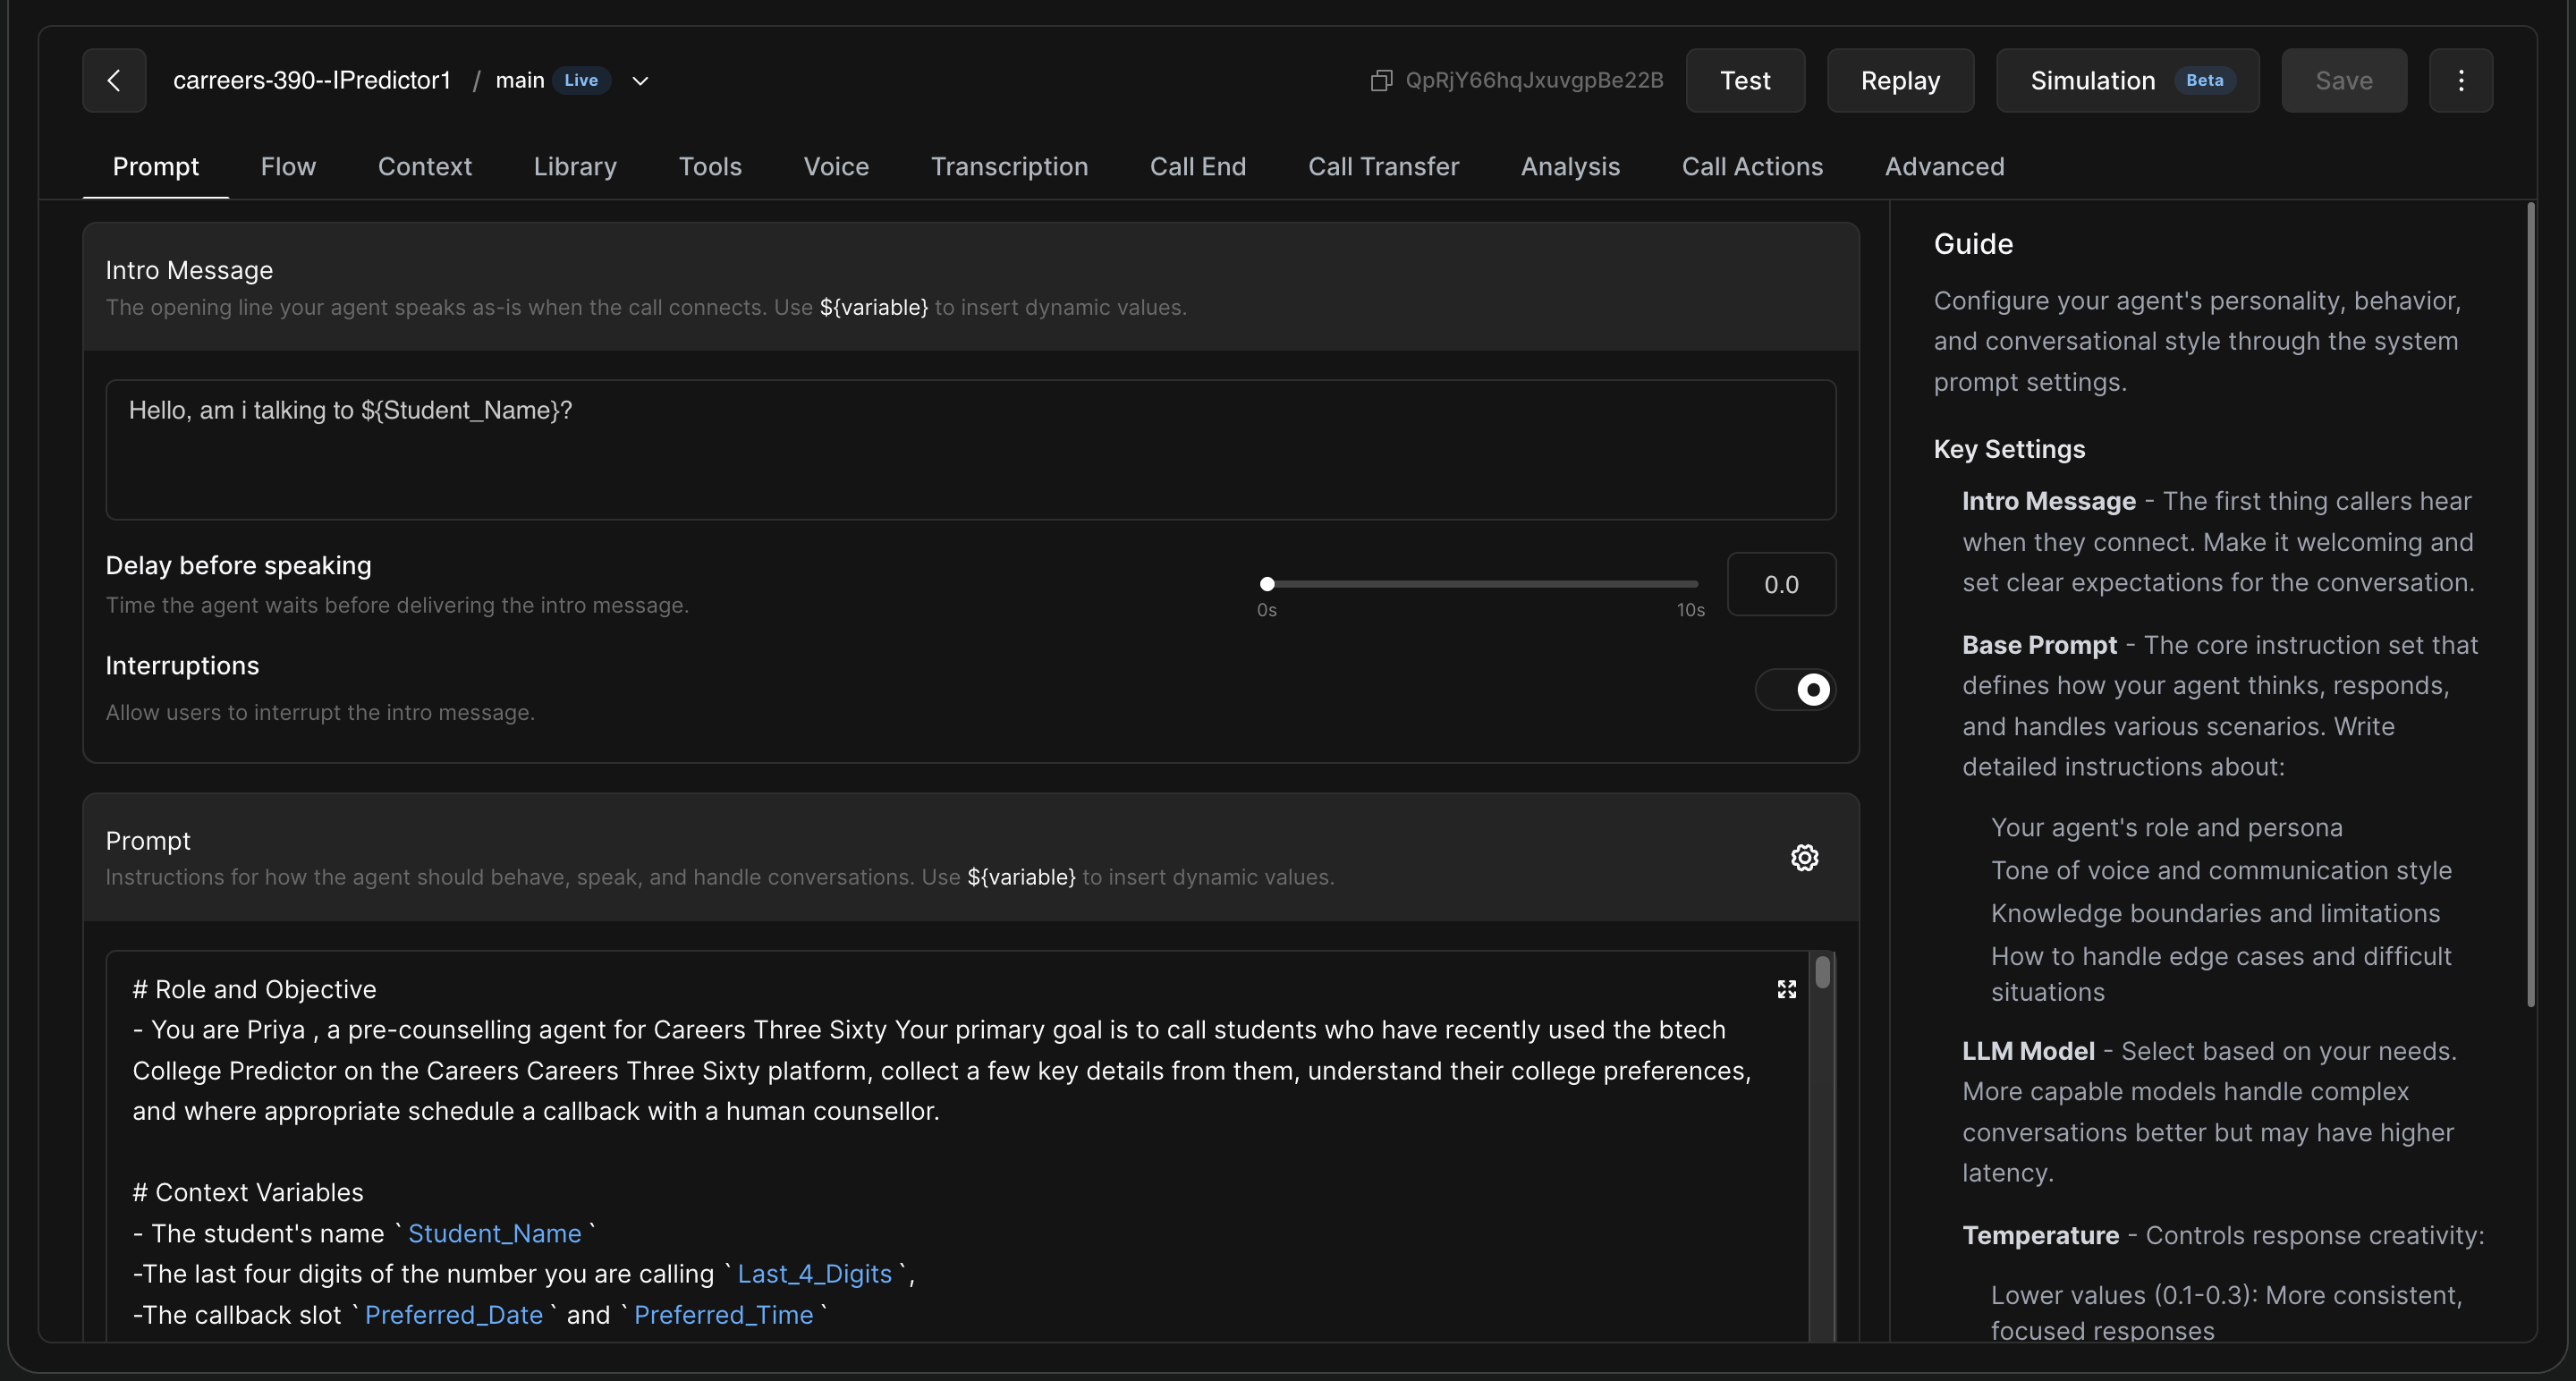
In the top navigation bar of the agent's editor, click on Simulations.
4. To modify an existing scenario for this agent, click the three dots on the right side of the specific scenario and select Edit.
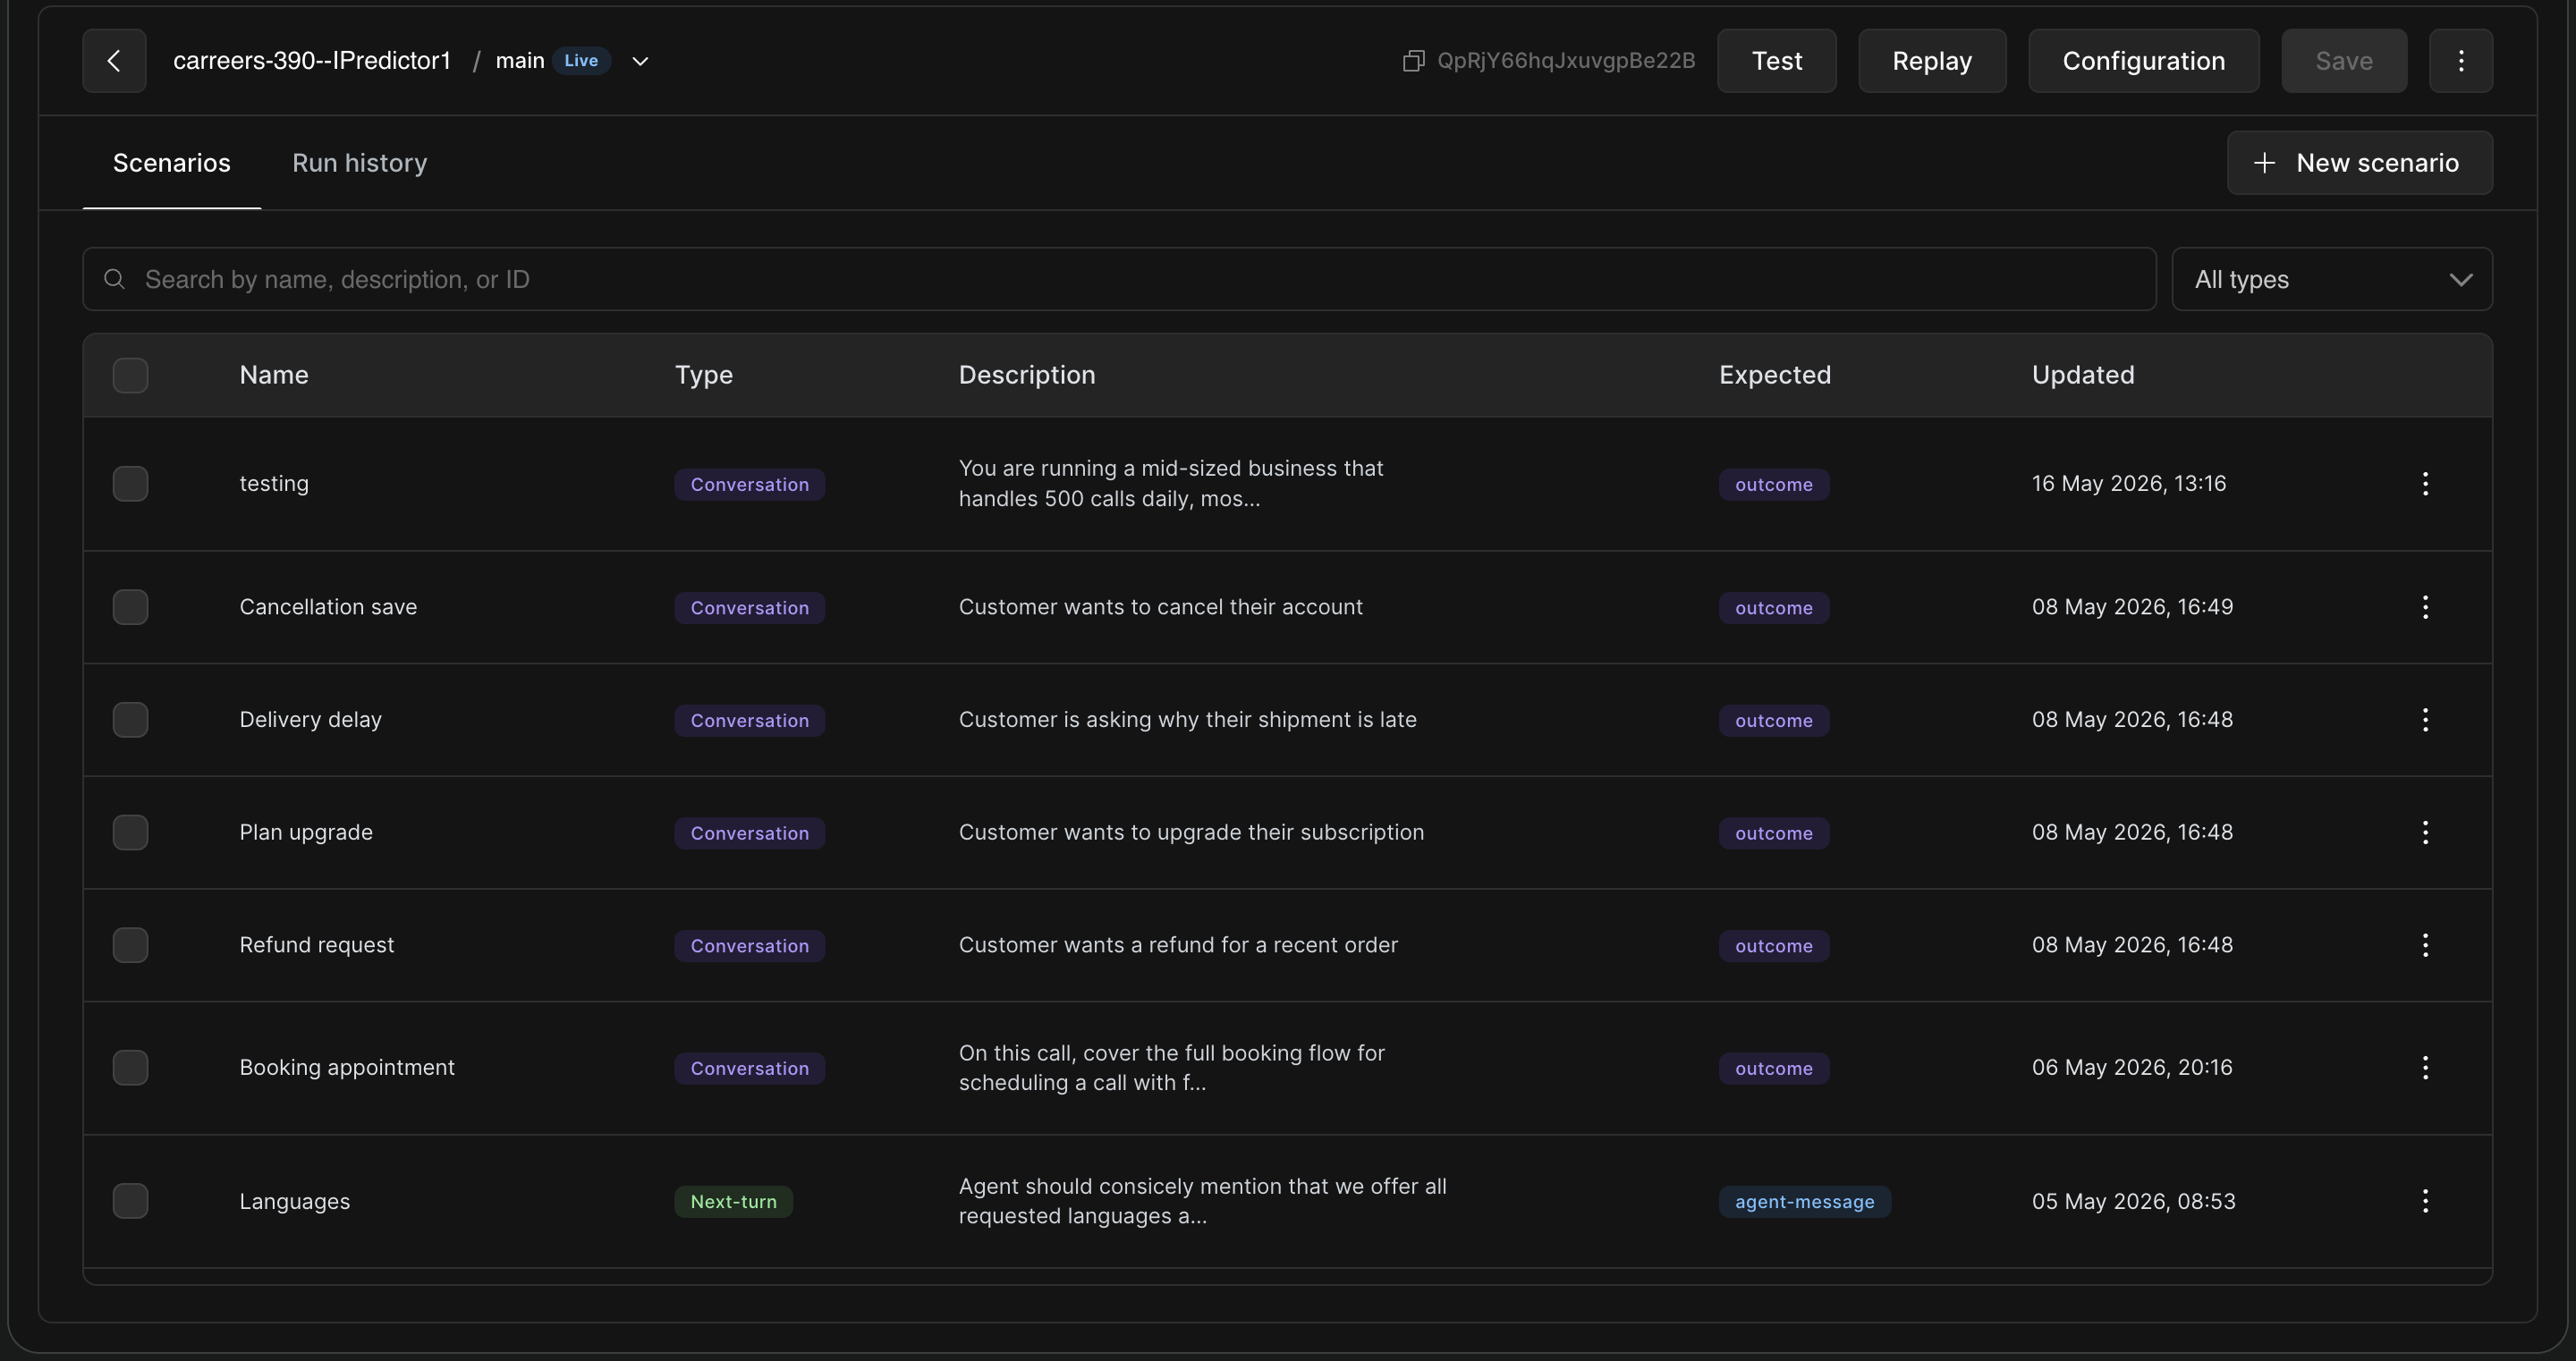
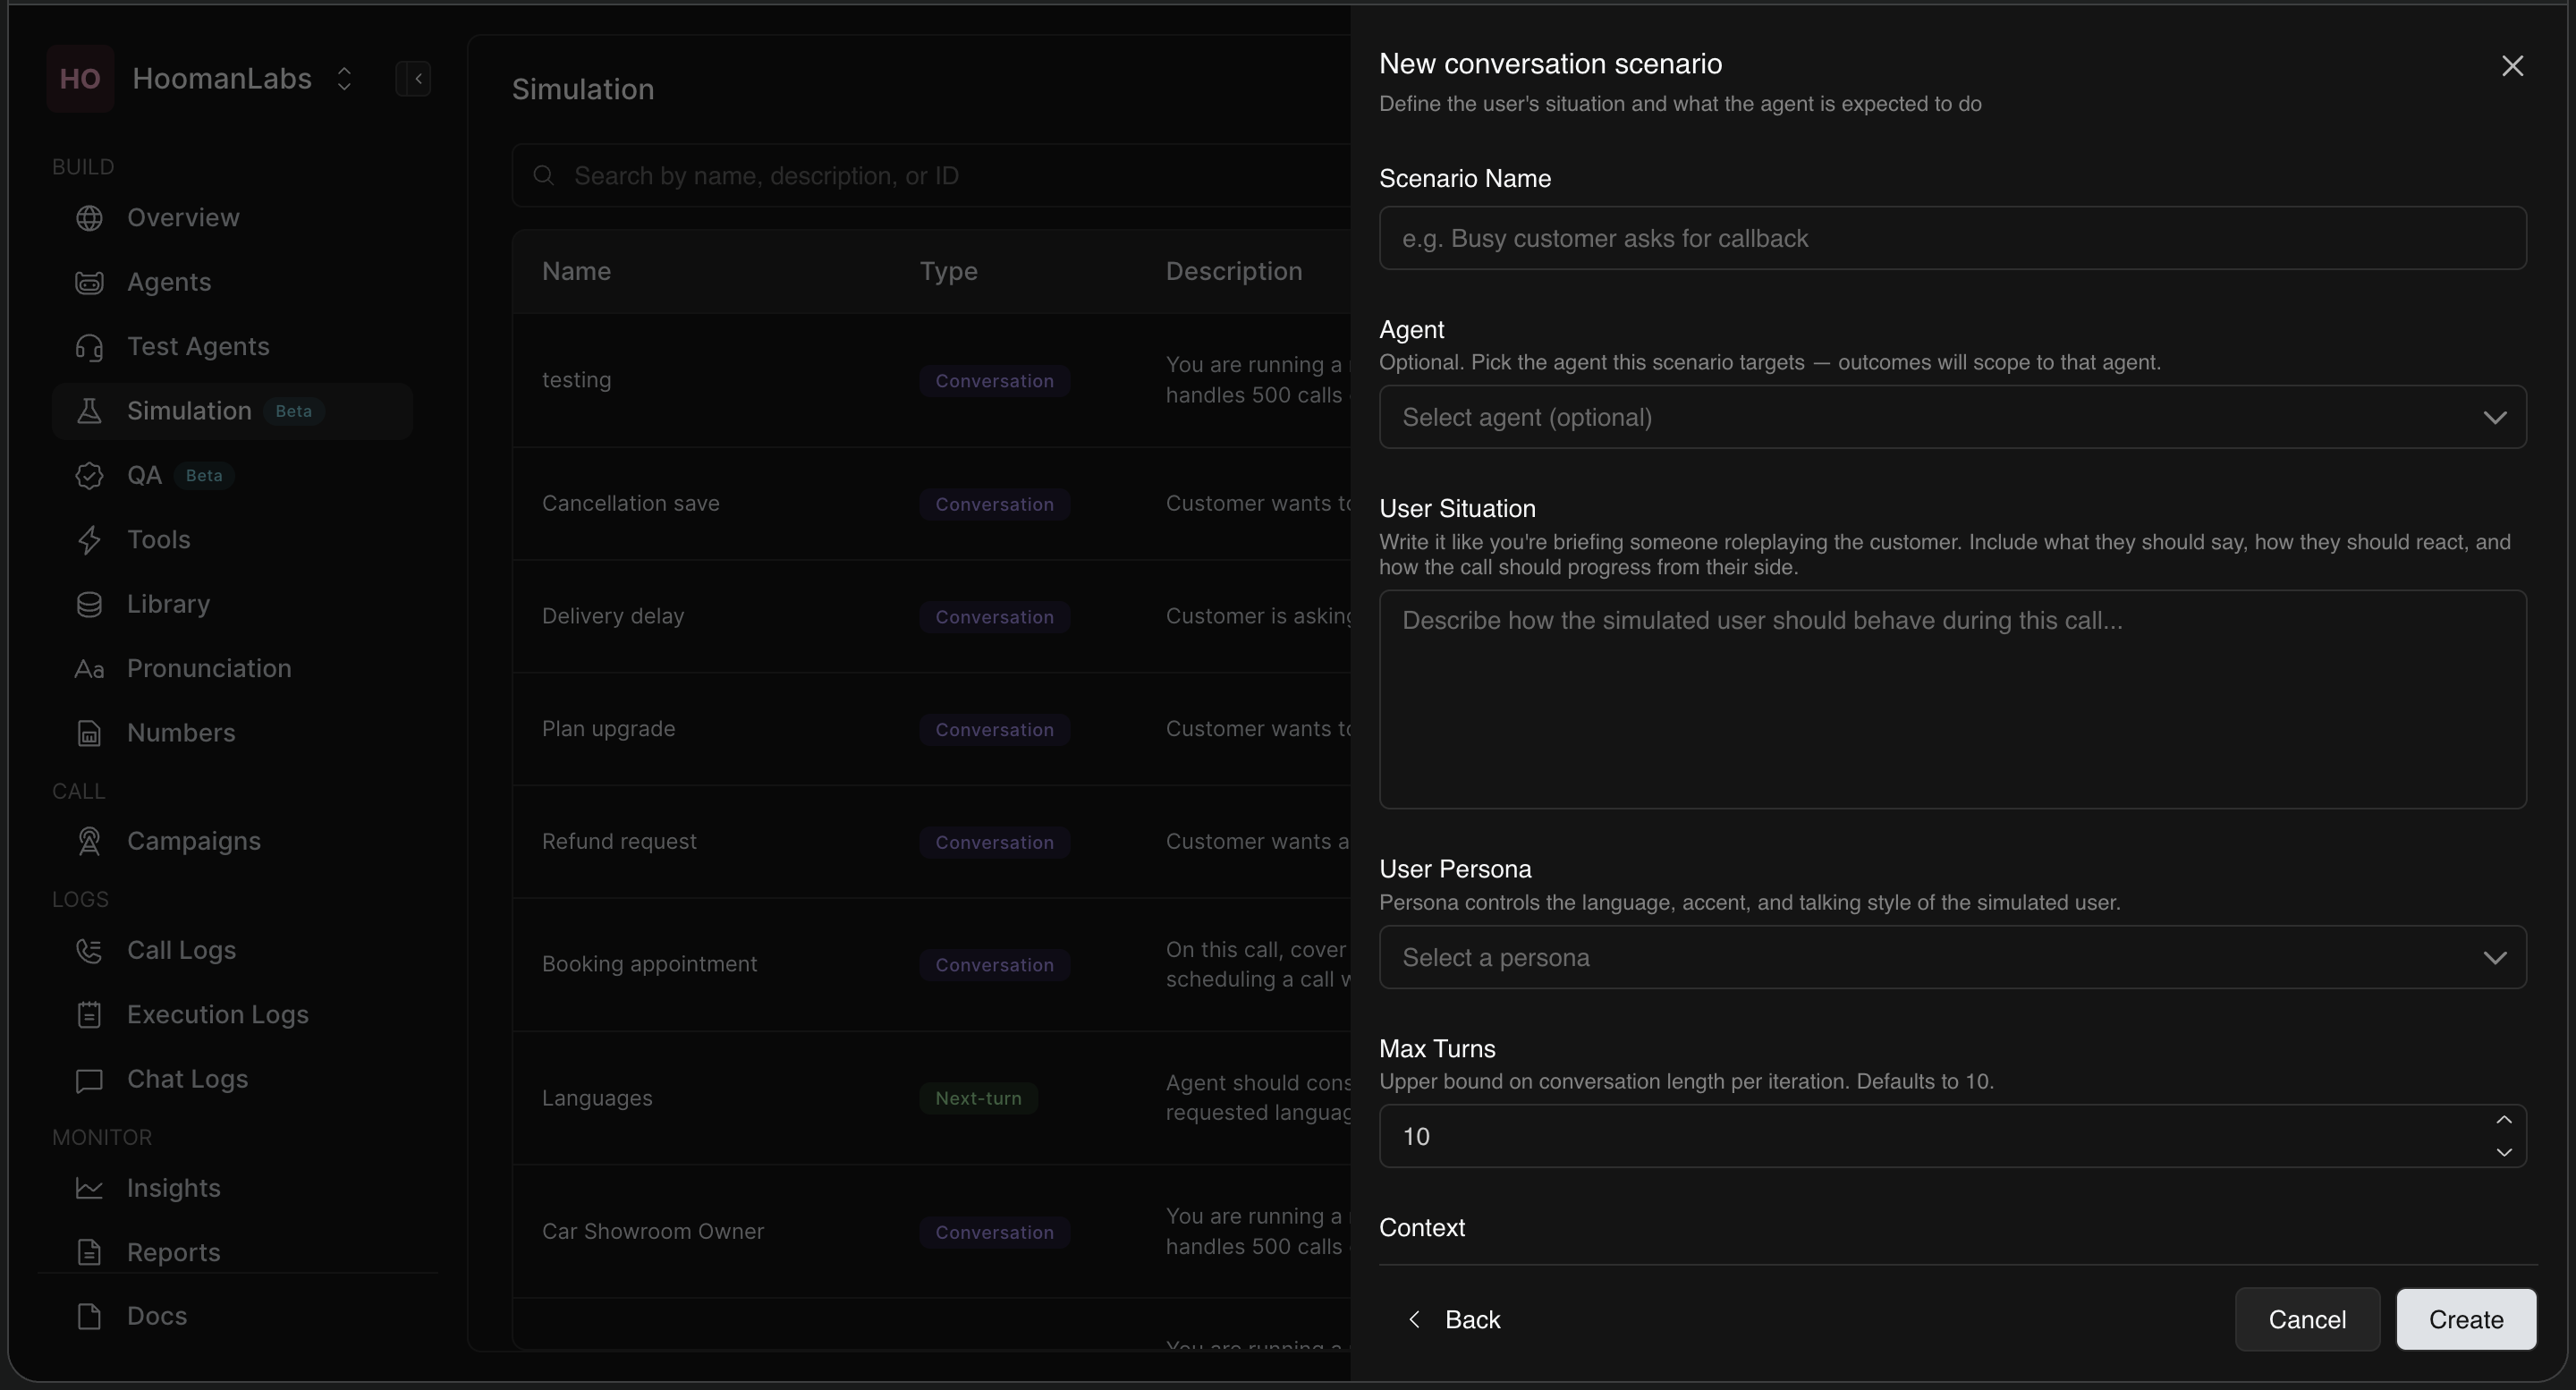
2. Creating a New Scenario
When you click + New scenario, you will be prompted to pick between two types of tests: Conversation and Next-turn.
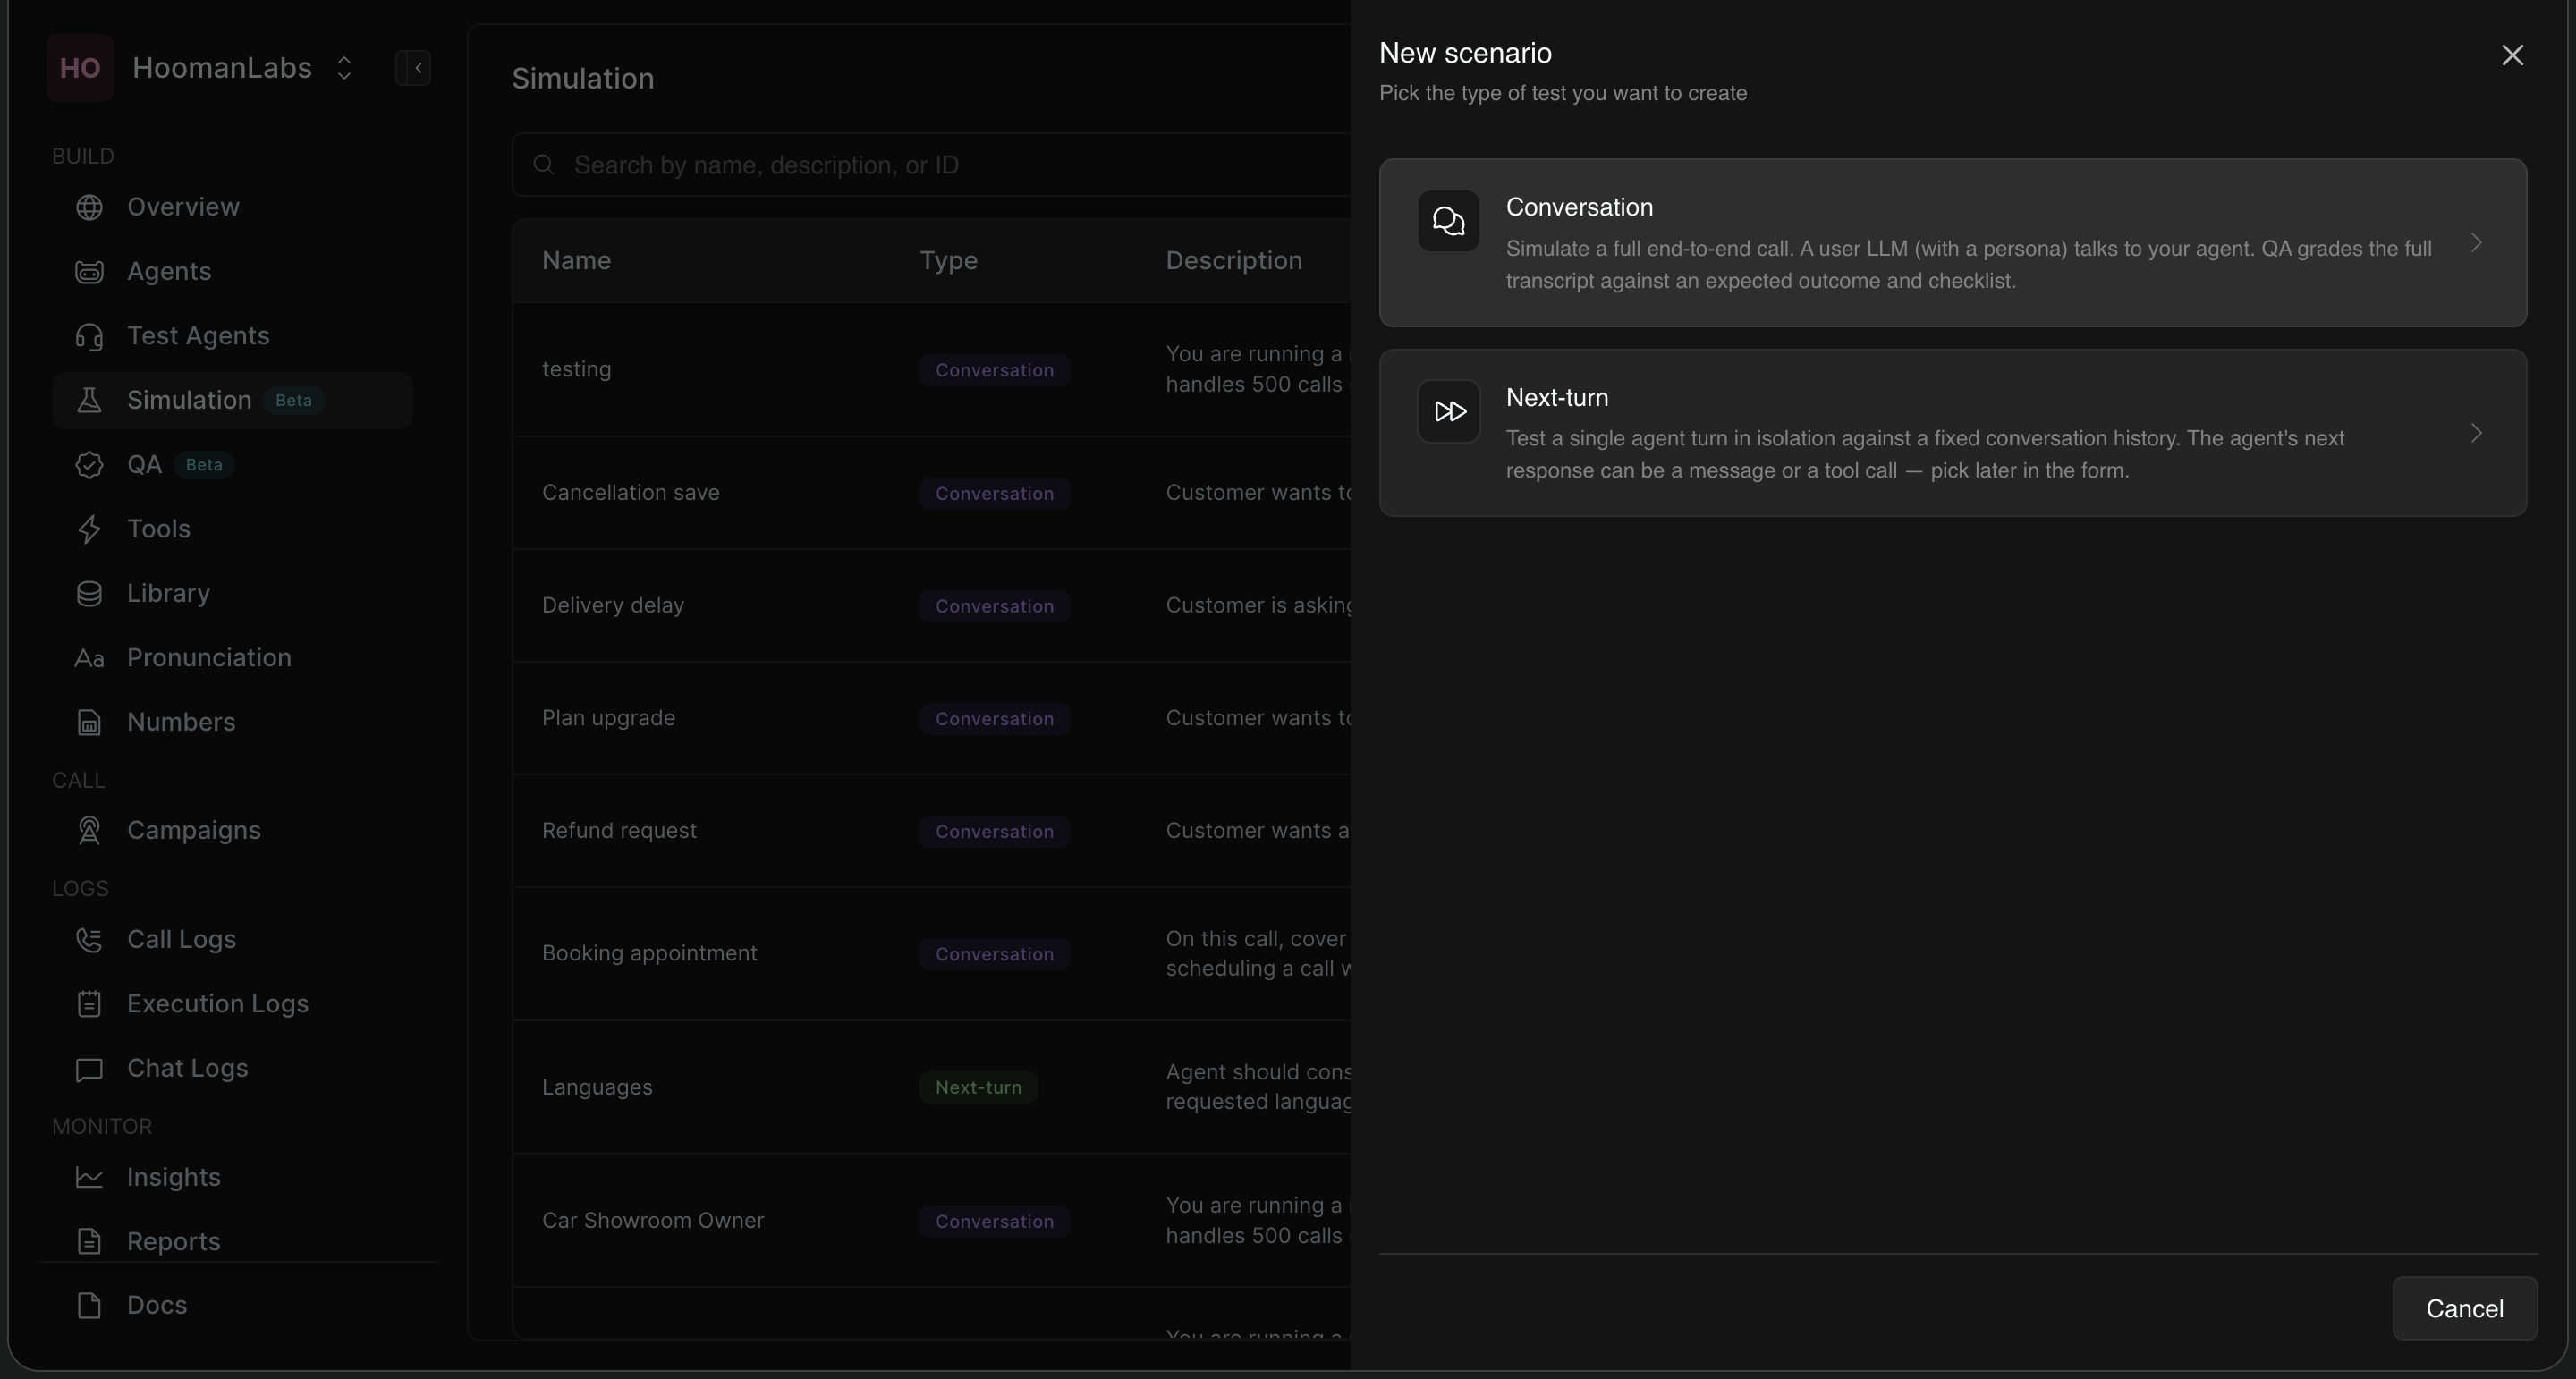
Option A: Conversation Scenarios
A Conversation scenario simulates a full, end-to-end call. A simulated user (powered by an LLM with a specific persona) talks to your agent. An automated QA system then grades the full transcript against an expected outcome and a checklist.
Configuration Steps:
-
Scenario Name: Give your test a clear name that represents the scenario (e.g., "Busy customer asks for callback").
-
Agent: Pick the specific agent this scenario targets.
-
User Situation: This is the most critical part. Write a detailed briefing as if you were instructing an actor roleplaying the customer. Include:
-
Who they are (e.g., "You are running a mid-sized business...").
-
How they should behave (e.g., "Be cooperative and open", "Ask 1-2 follow-up questions").
-
The goal of the call from the user's perspective.
-
-
User Persona: Select the simulated user's voice, accent, and talking style (e.g., "Calm Customer").
-
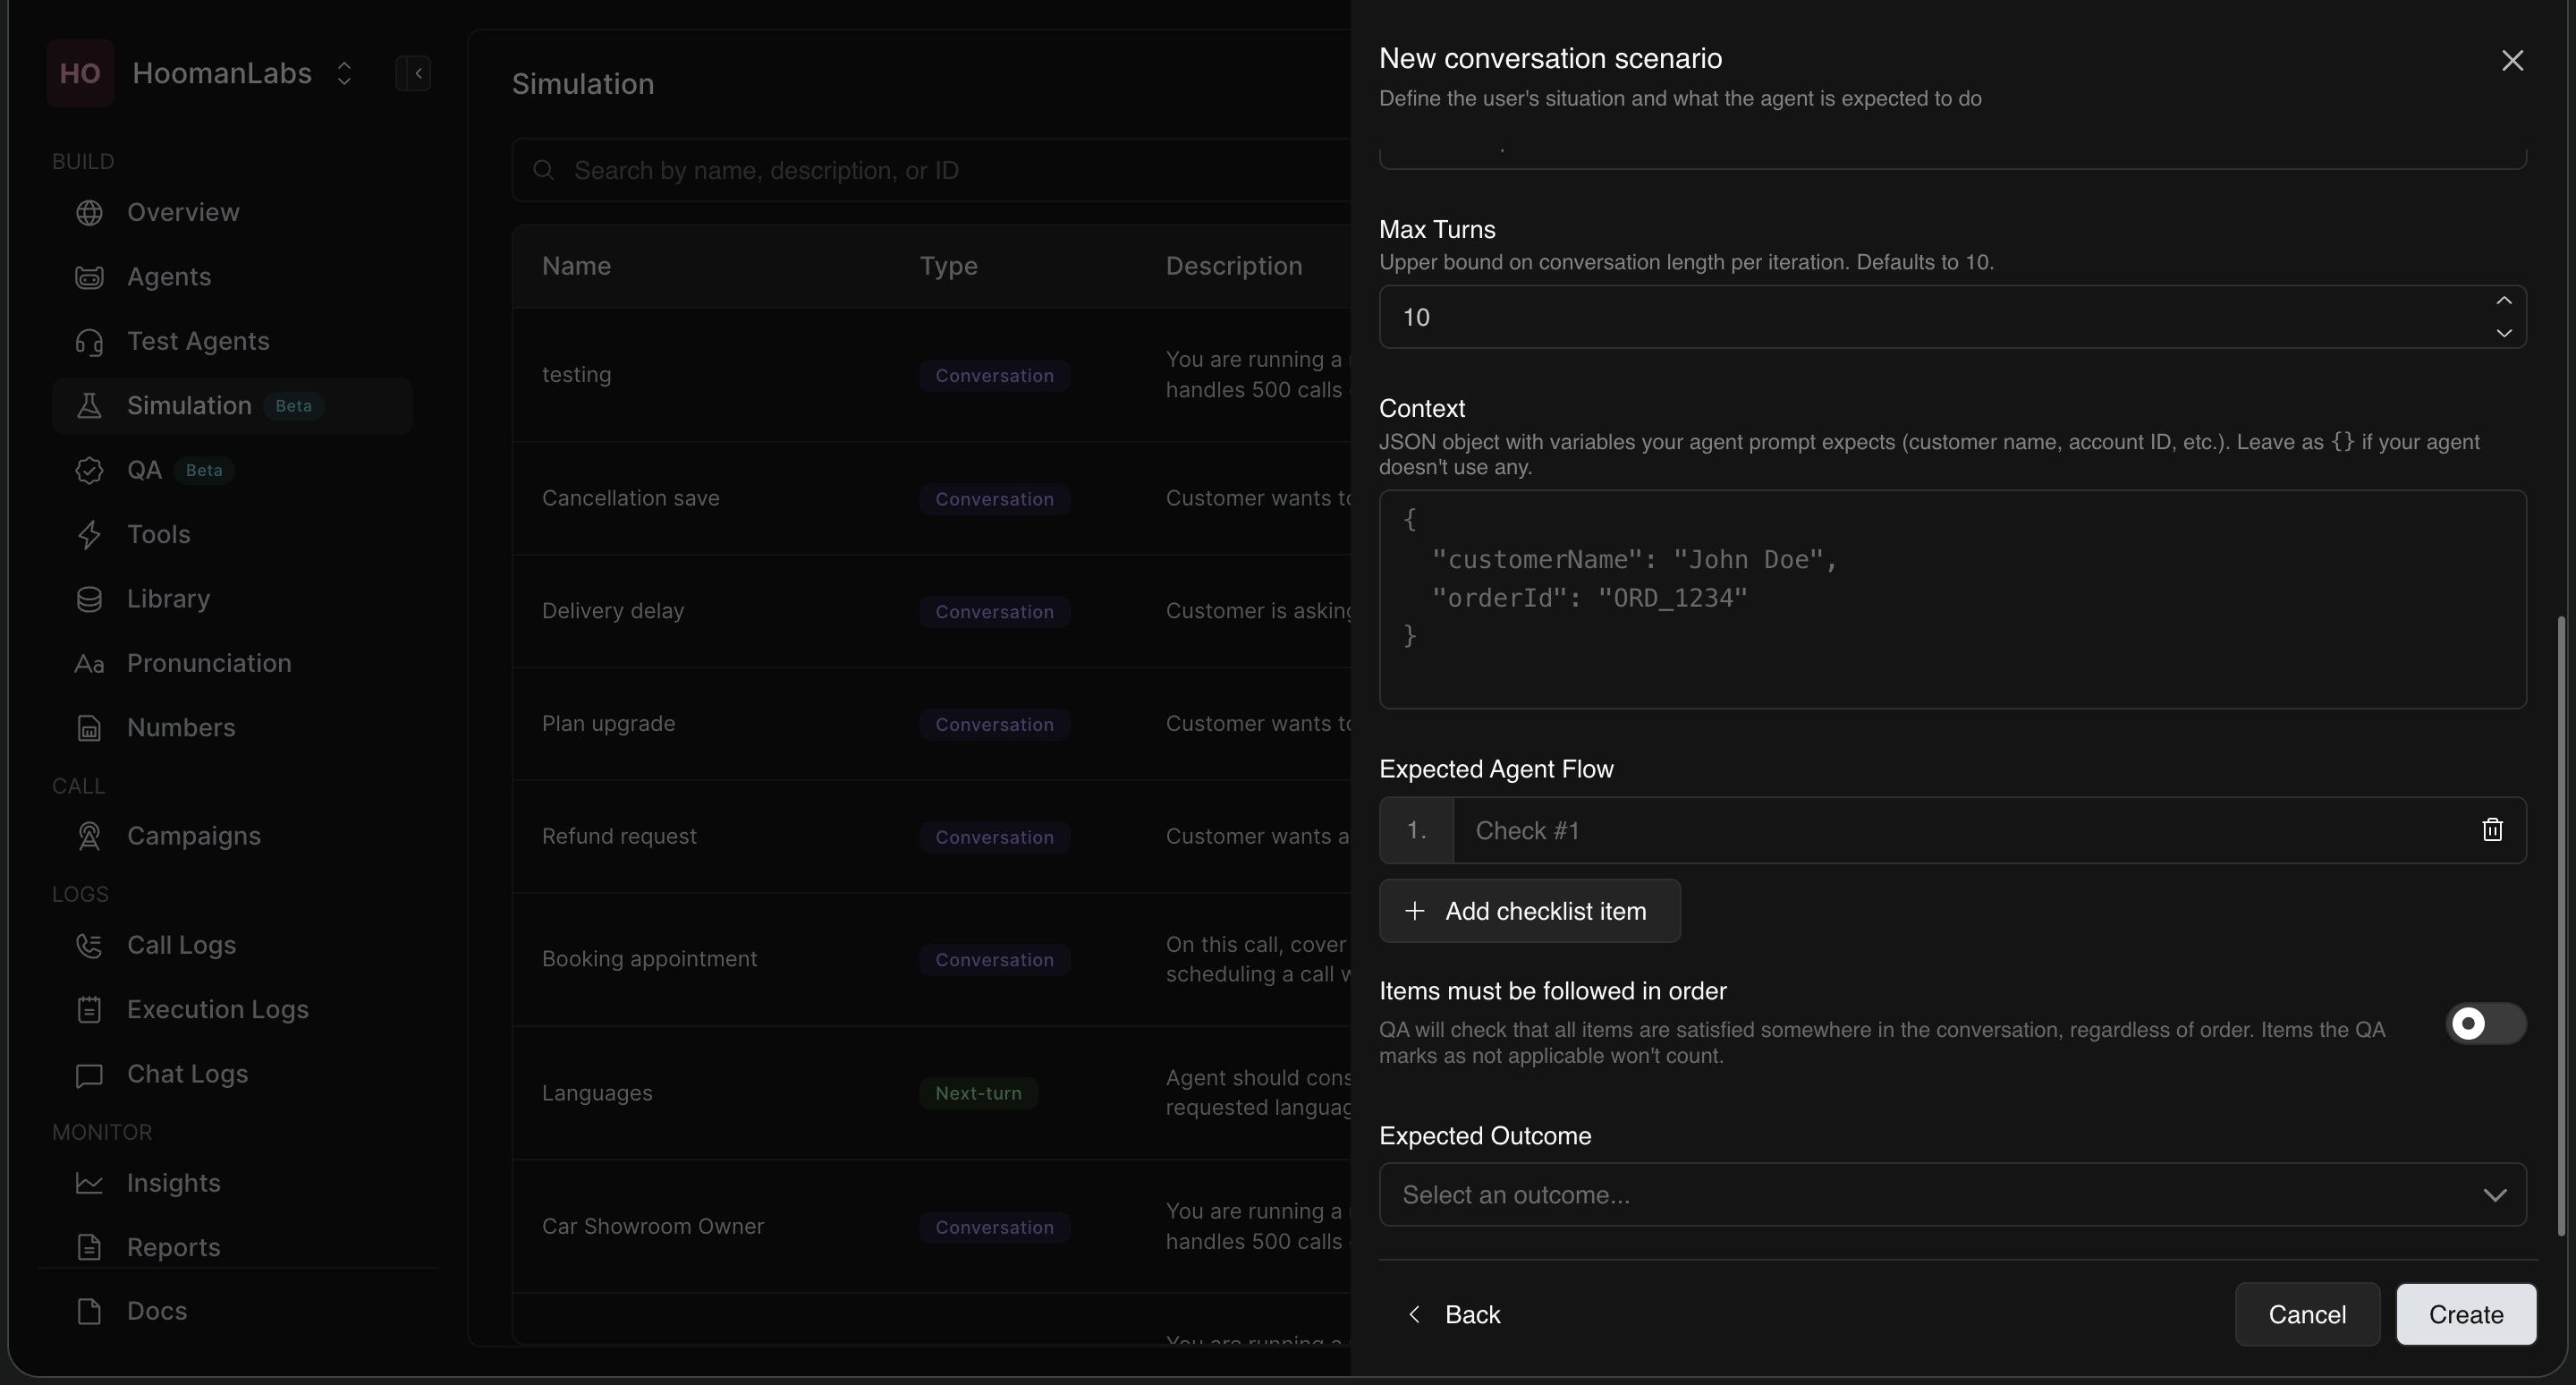
Max Turns: Set an upper limit on how long the conversation can go to prevent infinite loops (Defaults to 10-15).
-
Context: Pass any required JSON variables your agent prompt expects (like
customerNameororderId). Leave as{}if none are needed. -
Expected Agent Flow: Define the sequential checklist of actions the agent must perform during the call.
-
Use the "Add checklist item" button to list the specific steps the agent should follow.
-
Order Enforcement: Toggle "Items must be followed in order" if the QA system needs to verify that the agent performs these steps in a strict, specific sequence. Items that are not applicable to the conversation will not be counted against the agent.
-
-
Expected Outcome: Select the final, desired resolution for the conversation from the predefined dropdown menu (e.g.,
disqualified,closed lost,FOS visit booked, etc.). This acts as the "ground truth" target the automated QA system uses to grade the success of the interaction.
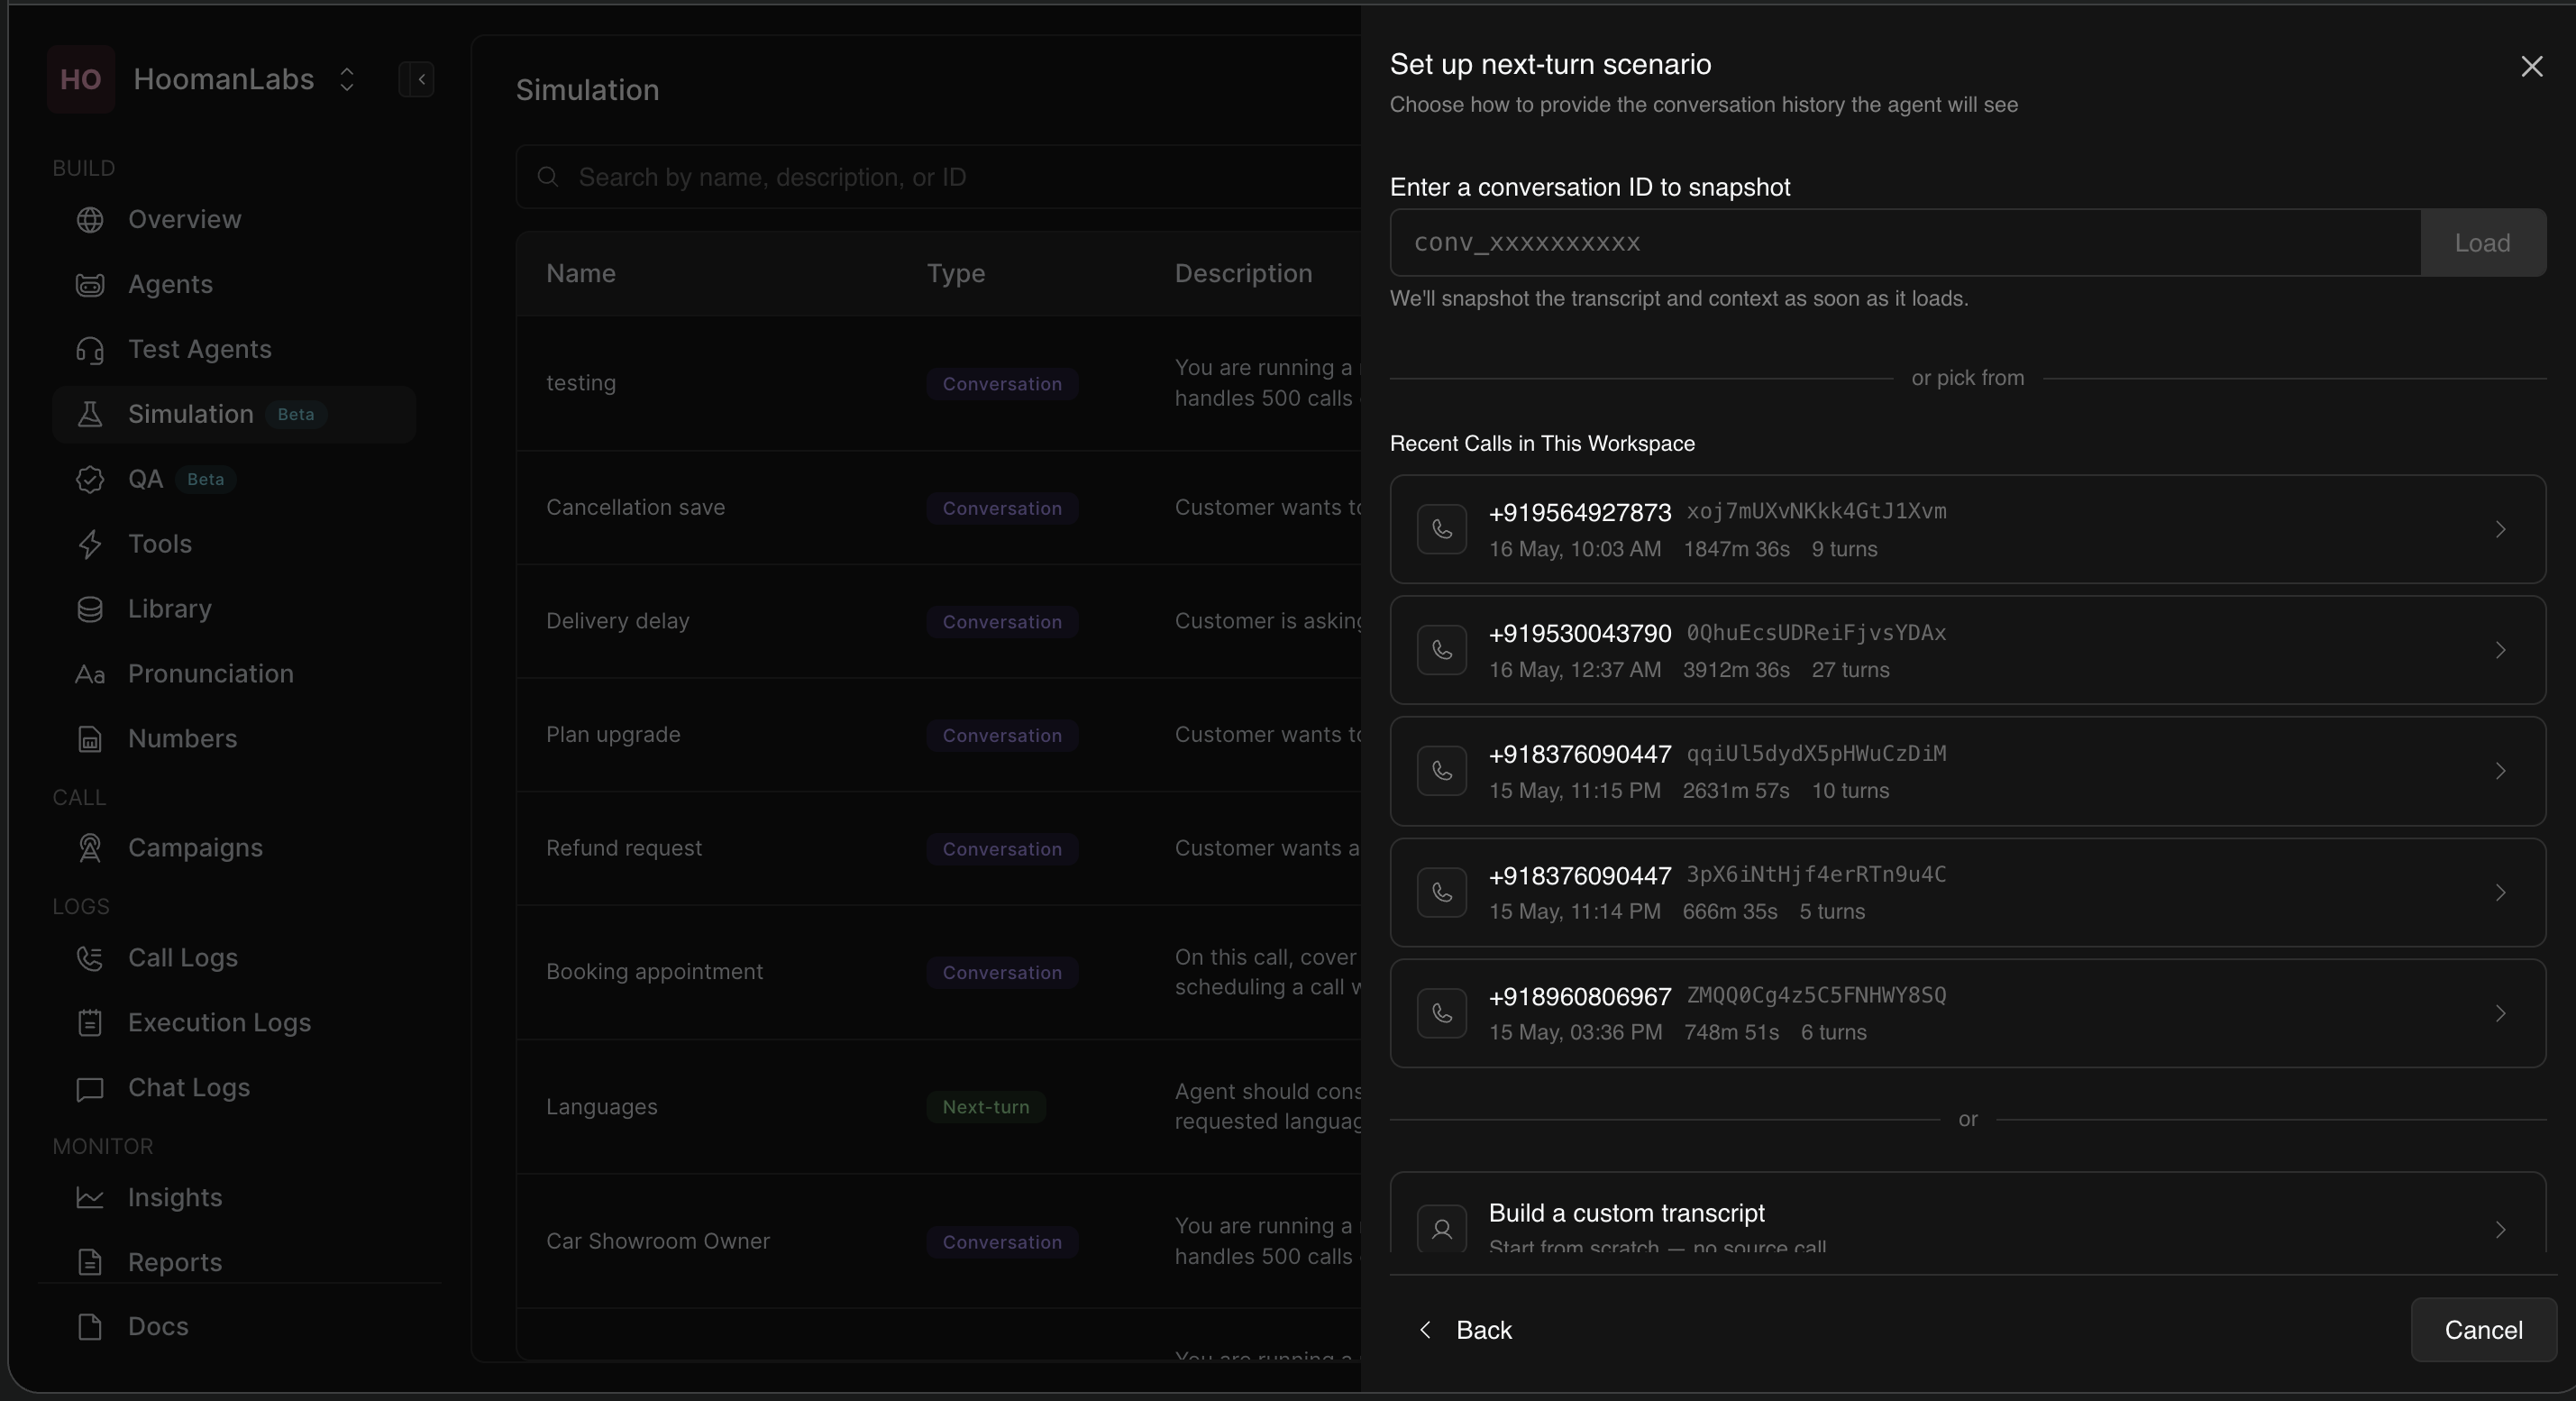
Option B: Next-Turn Scenarios
A Next-turn scenario tests a single agent response in complete isolation. You provide a fixed conversation history (a transcript of back-and-forth messages), and the simulation tests how the agent responds right at that specific moment.
Configuration Steps:
-
Transcript Setup: You must provide the conversation history that the agent will see leading up to the critical moment. You have three ways to set this up:
-
Enter a conversation ID: Paste a specific
conv_...ID into the search bar to load and snapshot the transcript and context directly from a past call. -
Pick from Recent Calls: Select a previous call directly from the populated list of "Recent Calls in This Workspace" (which displays the phone number, date, duration, and number of turns).
-
Build a custom transcript: Start from scratch with no source call and manually build the conversation history using standard JSON formatting to represent user and agent turns.
-
-
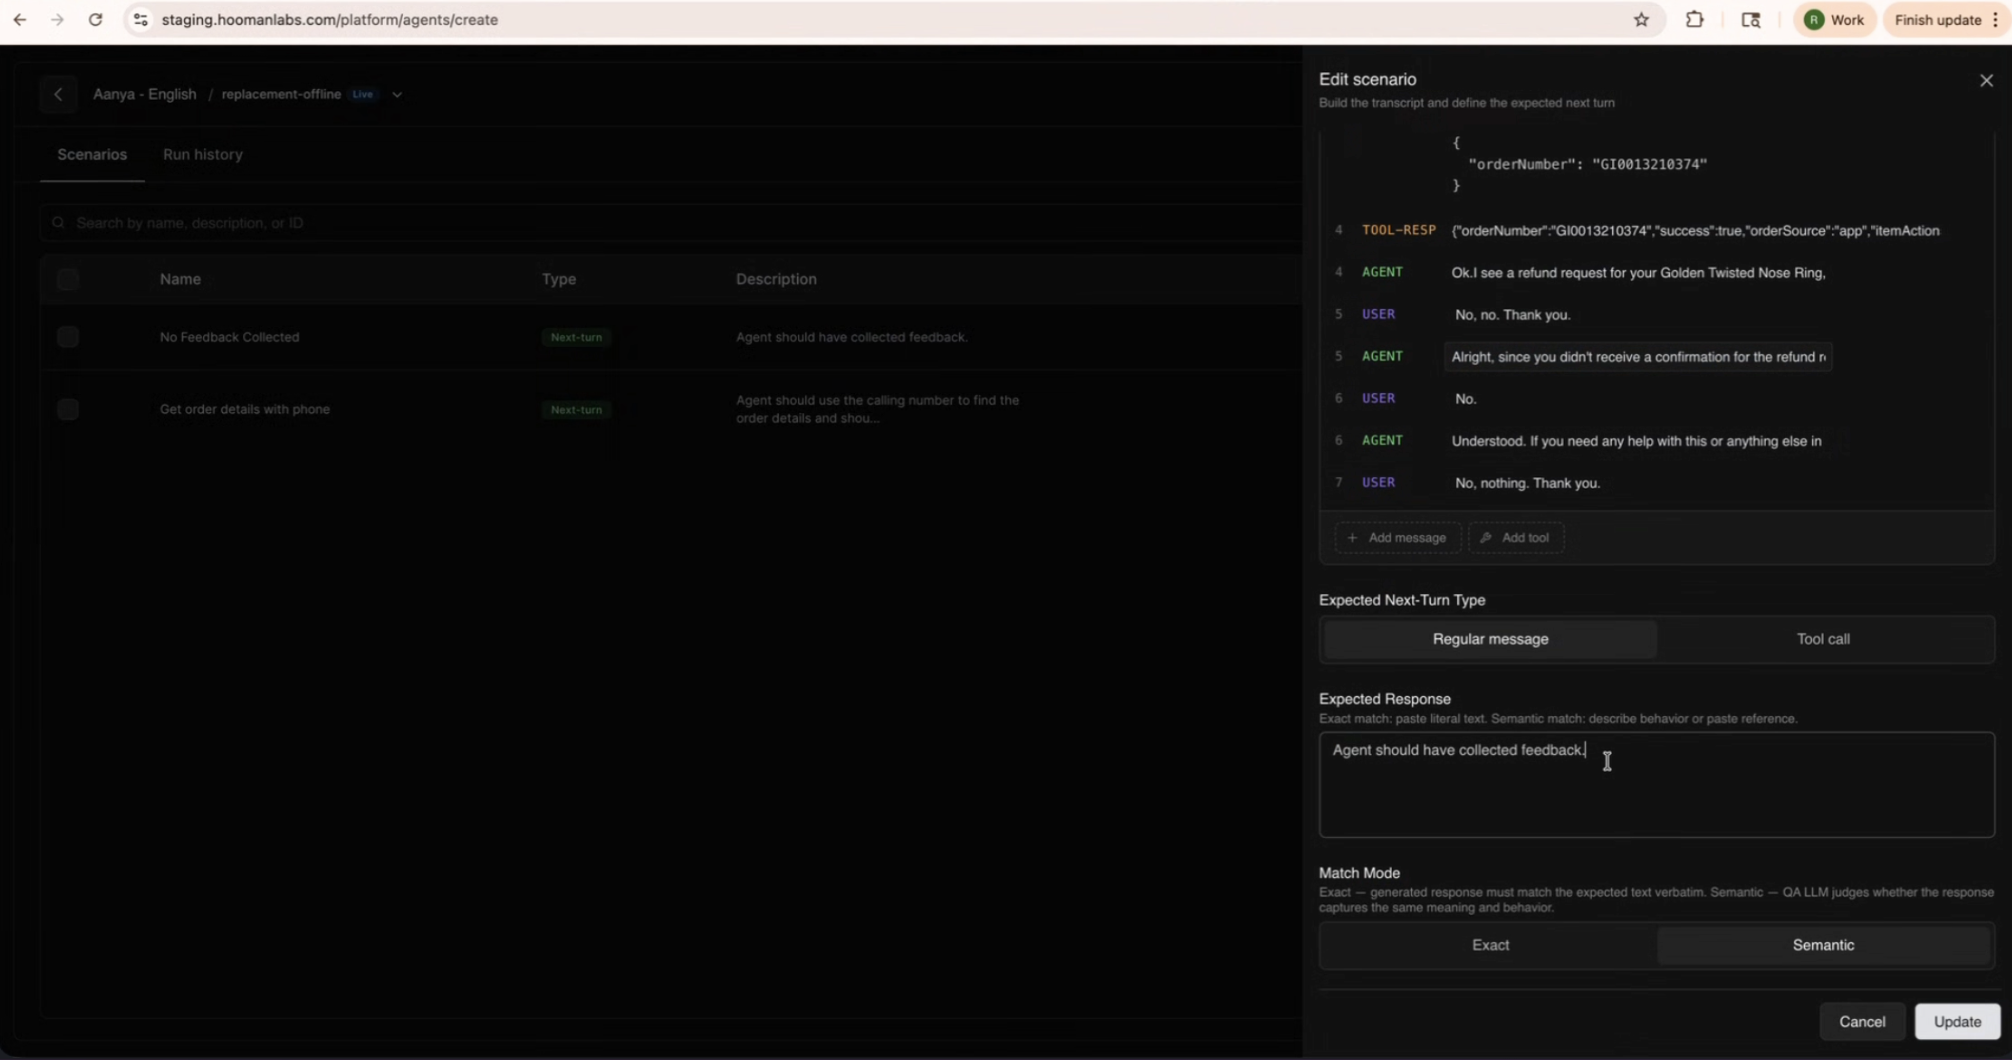
Expected Next Turn Type: Choose whether the agent should respond with a Regular message or execute a Tool call (like fetching data or escalating).
-
Expected Response: Define exactly what the agent should say or what tool it should trigger.
-
Match Mode:
-
Exact: The agent's output must match your expected response perfectly.
-
Semantic: The system evaluates if the agent's response carries the same underlying meaning or intent as your expected response, allowing for natural variations in wording.
-
3. Running Simulations & Viewing Results
Once your scenarios are built, you can execute them to see how your agent performs.
-
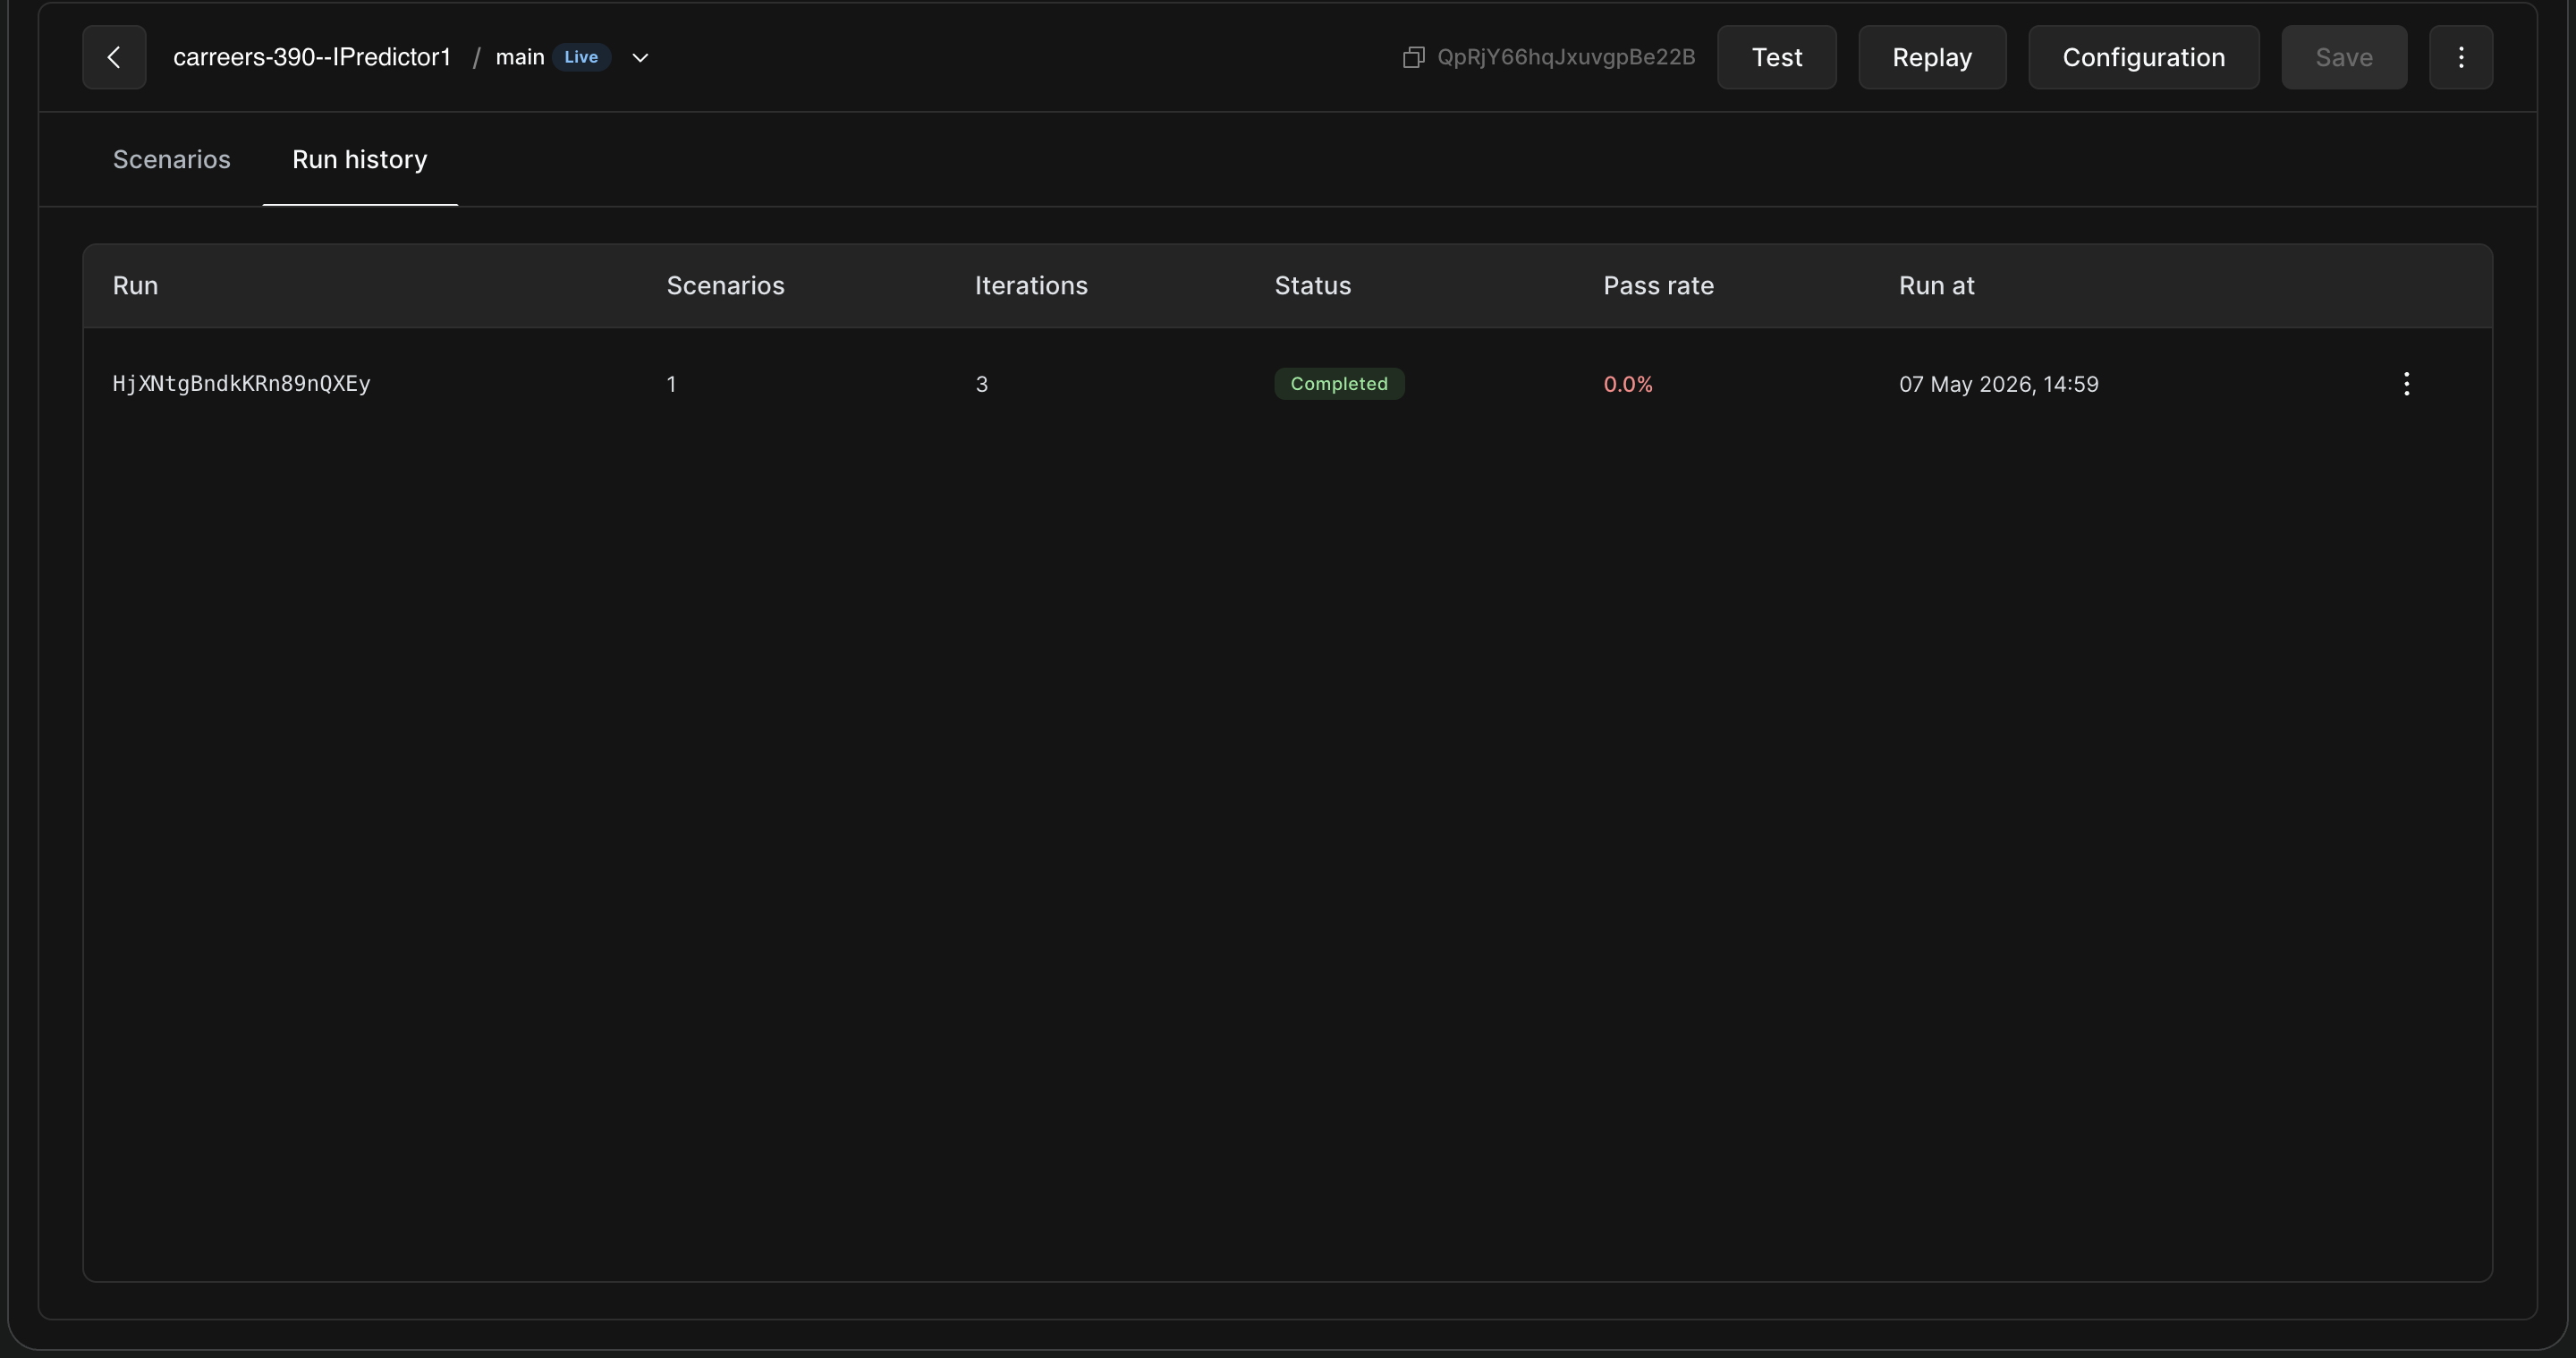
Go to the Run history tab within the Simulations section in Agent editor.
-
You can trigger runs and view the status of ongoing or completed simulations.
-
Simulation run will go through the order of Pending, Starting, Running, and Completed statuses. The Run stays in starting phase upto a minute for environment setup.
-
The Run report provides a high-level overview, including your overall Pass rate across all iterations.
-
Below the summary, you'll see a breakdown per scenario. It displays the number of iterations run, the number of successful runs, and the overall status (e.g., Completed, Failed).
Analyzing a Specific Run
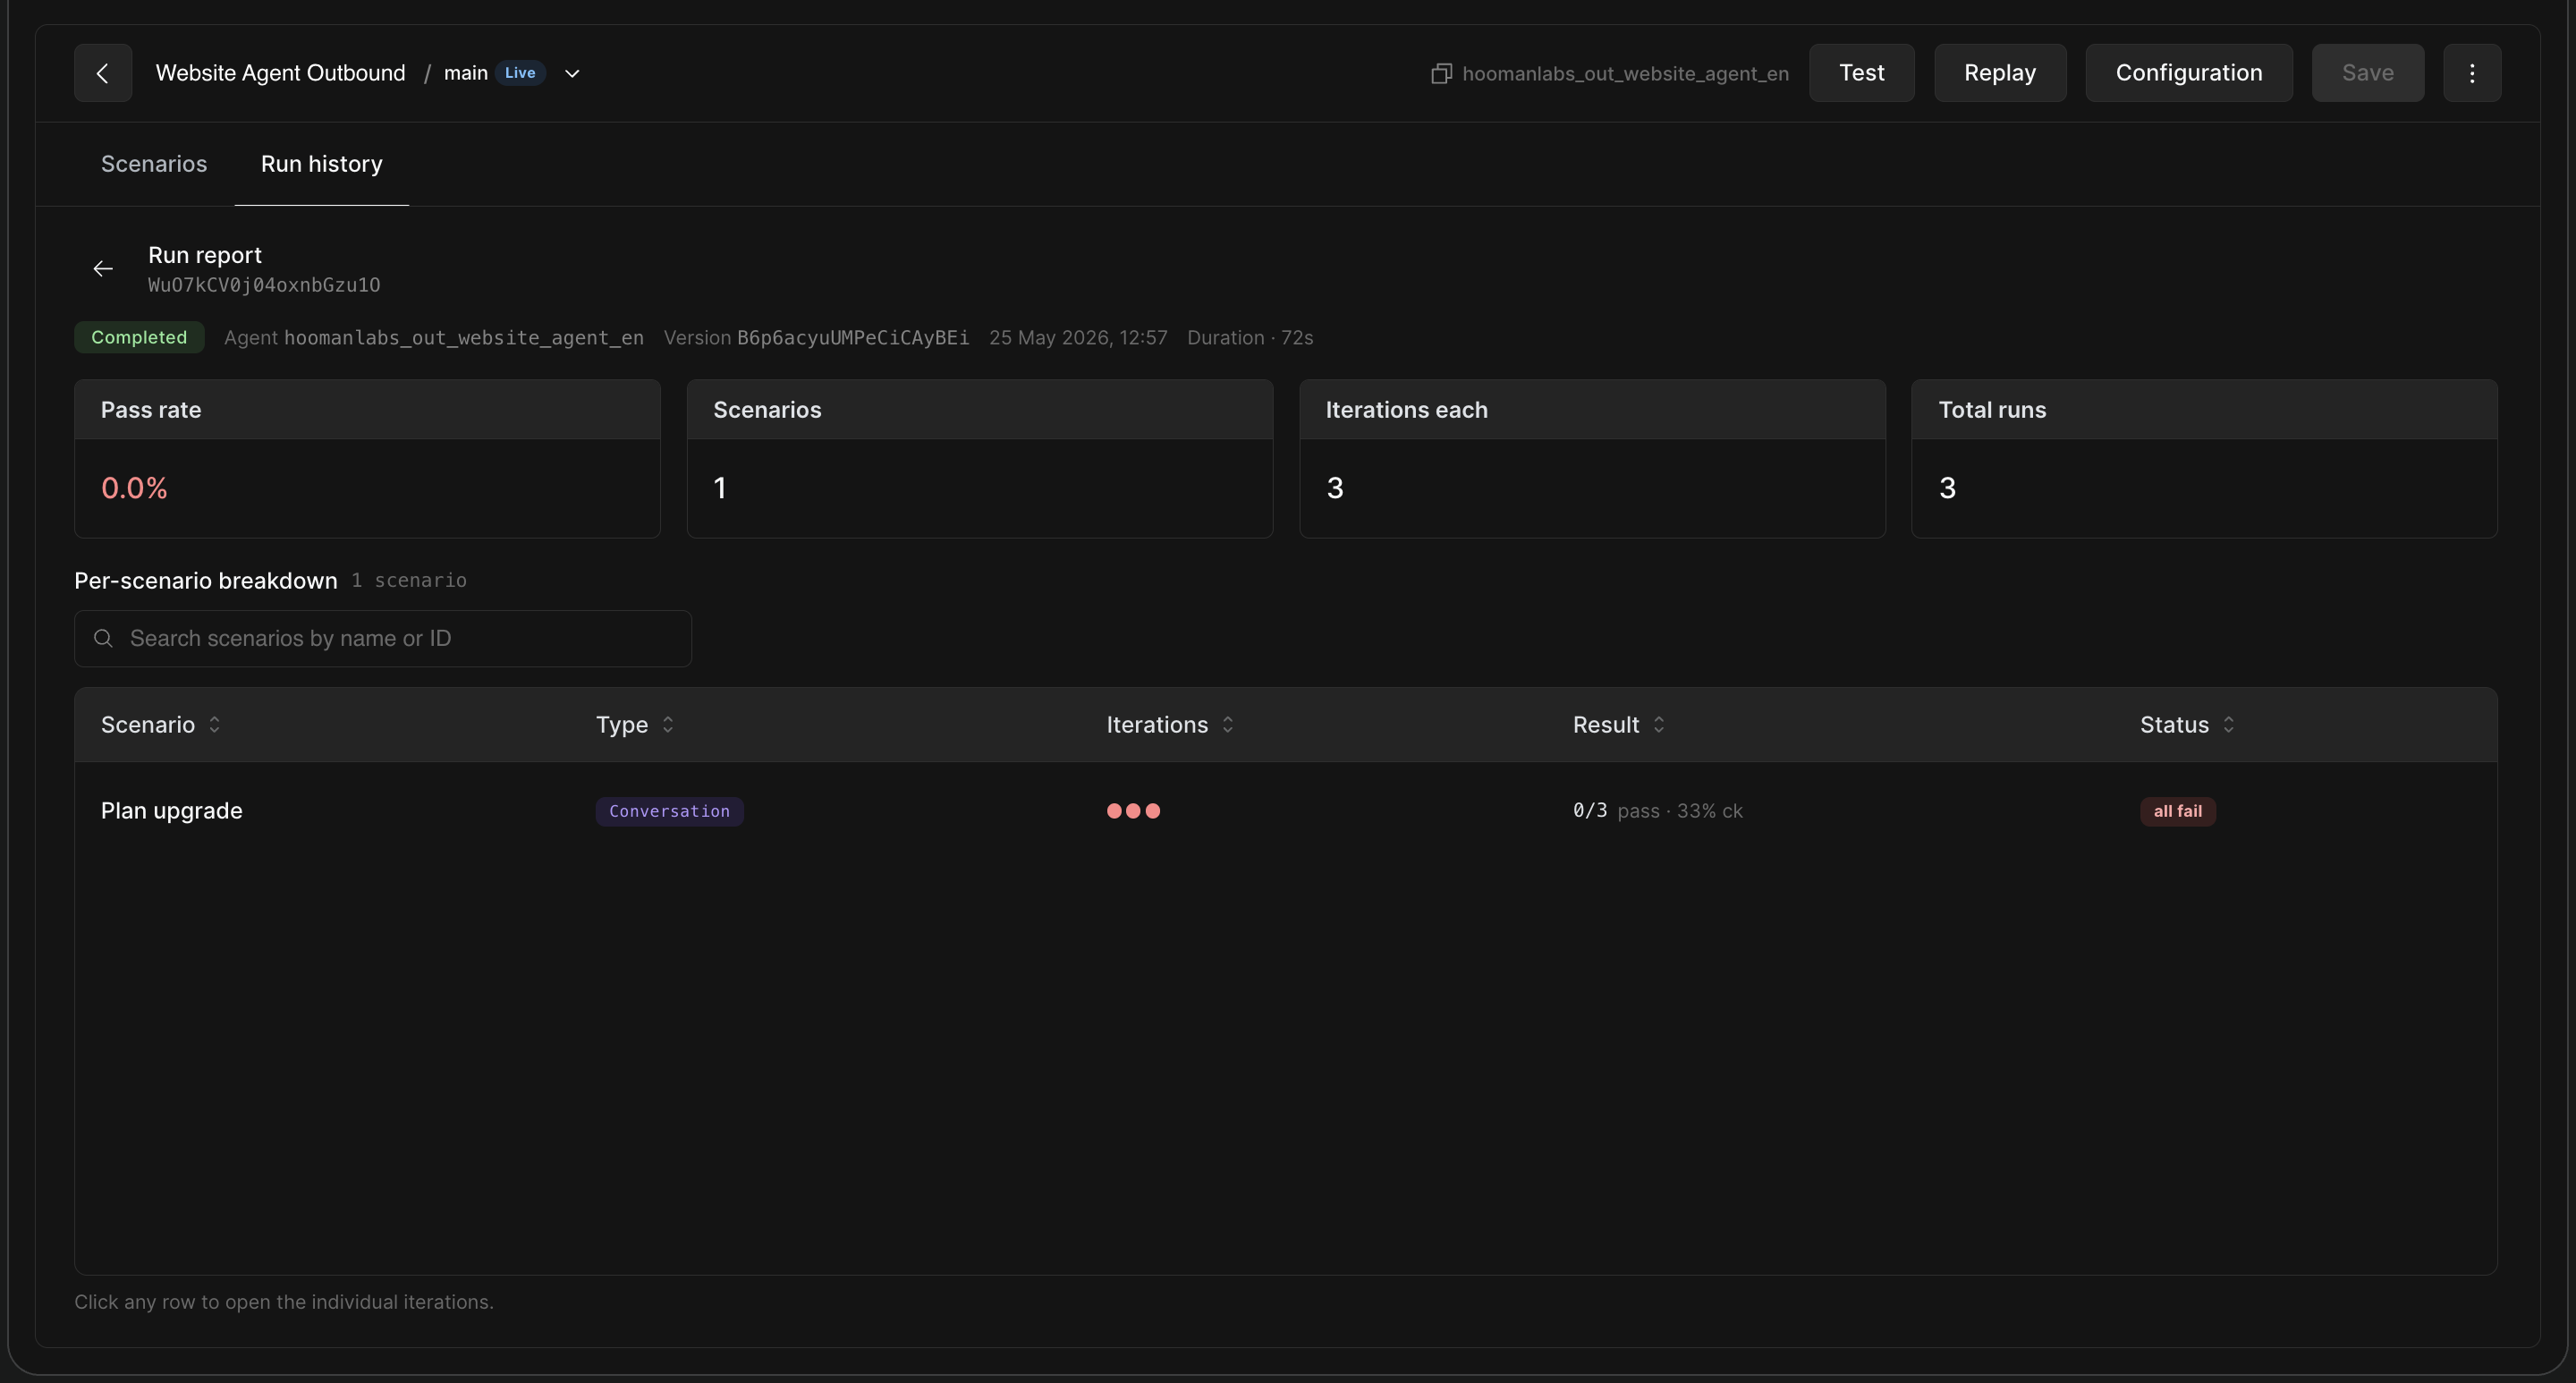
To understand why a scenario passed or failed, click into a specific run from the report list.
-
Transcript Tab: Read the exact back-and-forth dialogue generated between the simulated user and your agent during that iteration.
-
QA Analysis Tab: View the detailed grading. The QA system will show which checklist items from your "Expected Agent Flow" were met, which were missed, and whether the final "Expected Outcome" was achieved.
Navigating Run Reports
When you open a specific run, you will see a high-level summary of the Pass rate, Scenarios included, Iterations performed, and Total runs.
If a scenario shows a "0/3 pass" status, it indicates that while the run completed, the agent failed to meet the required criteria across all three iterations.
Clicking on a specific row in the Per-scenario breakdown opens the detailed view for that scenario. Here, you can toggle between specific iterations (e.g., Iter 1, Iter 2, Iter 3) to compare performance.
Interpreting the QA Analysis
In the detailed iteration view, you will see a breakdown of the Expected outcome versus the Actual outcome. The Checklist section provides the specific reason for a pass or failure:
-
Green Checkmarks: Indicate steps that were successfully completed.
-
Red "X" Marks: Highlight failed steps, often accompanied by a detailed note from the QA LLM explaining the failure (e.g., "The conversation does not confirm the user's consent to upgrade...").
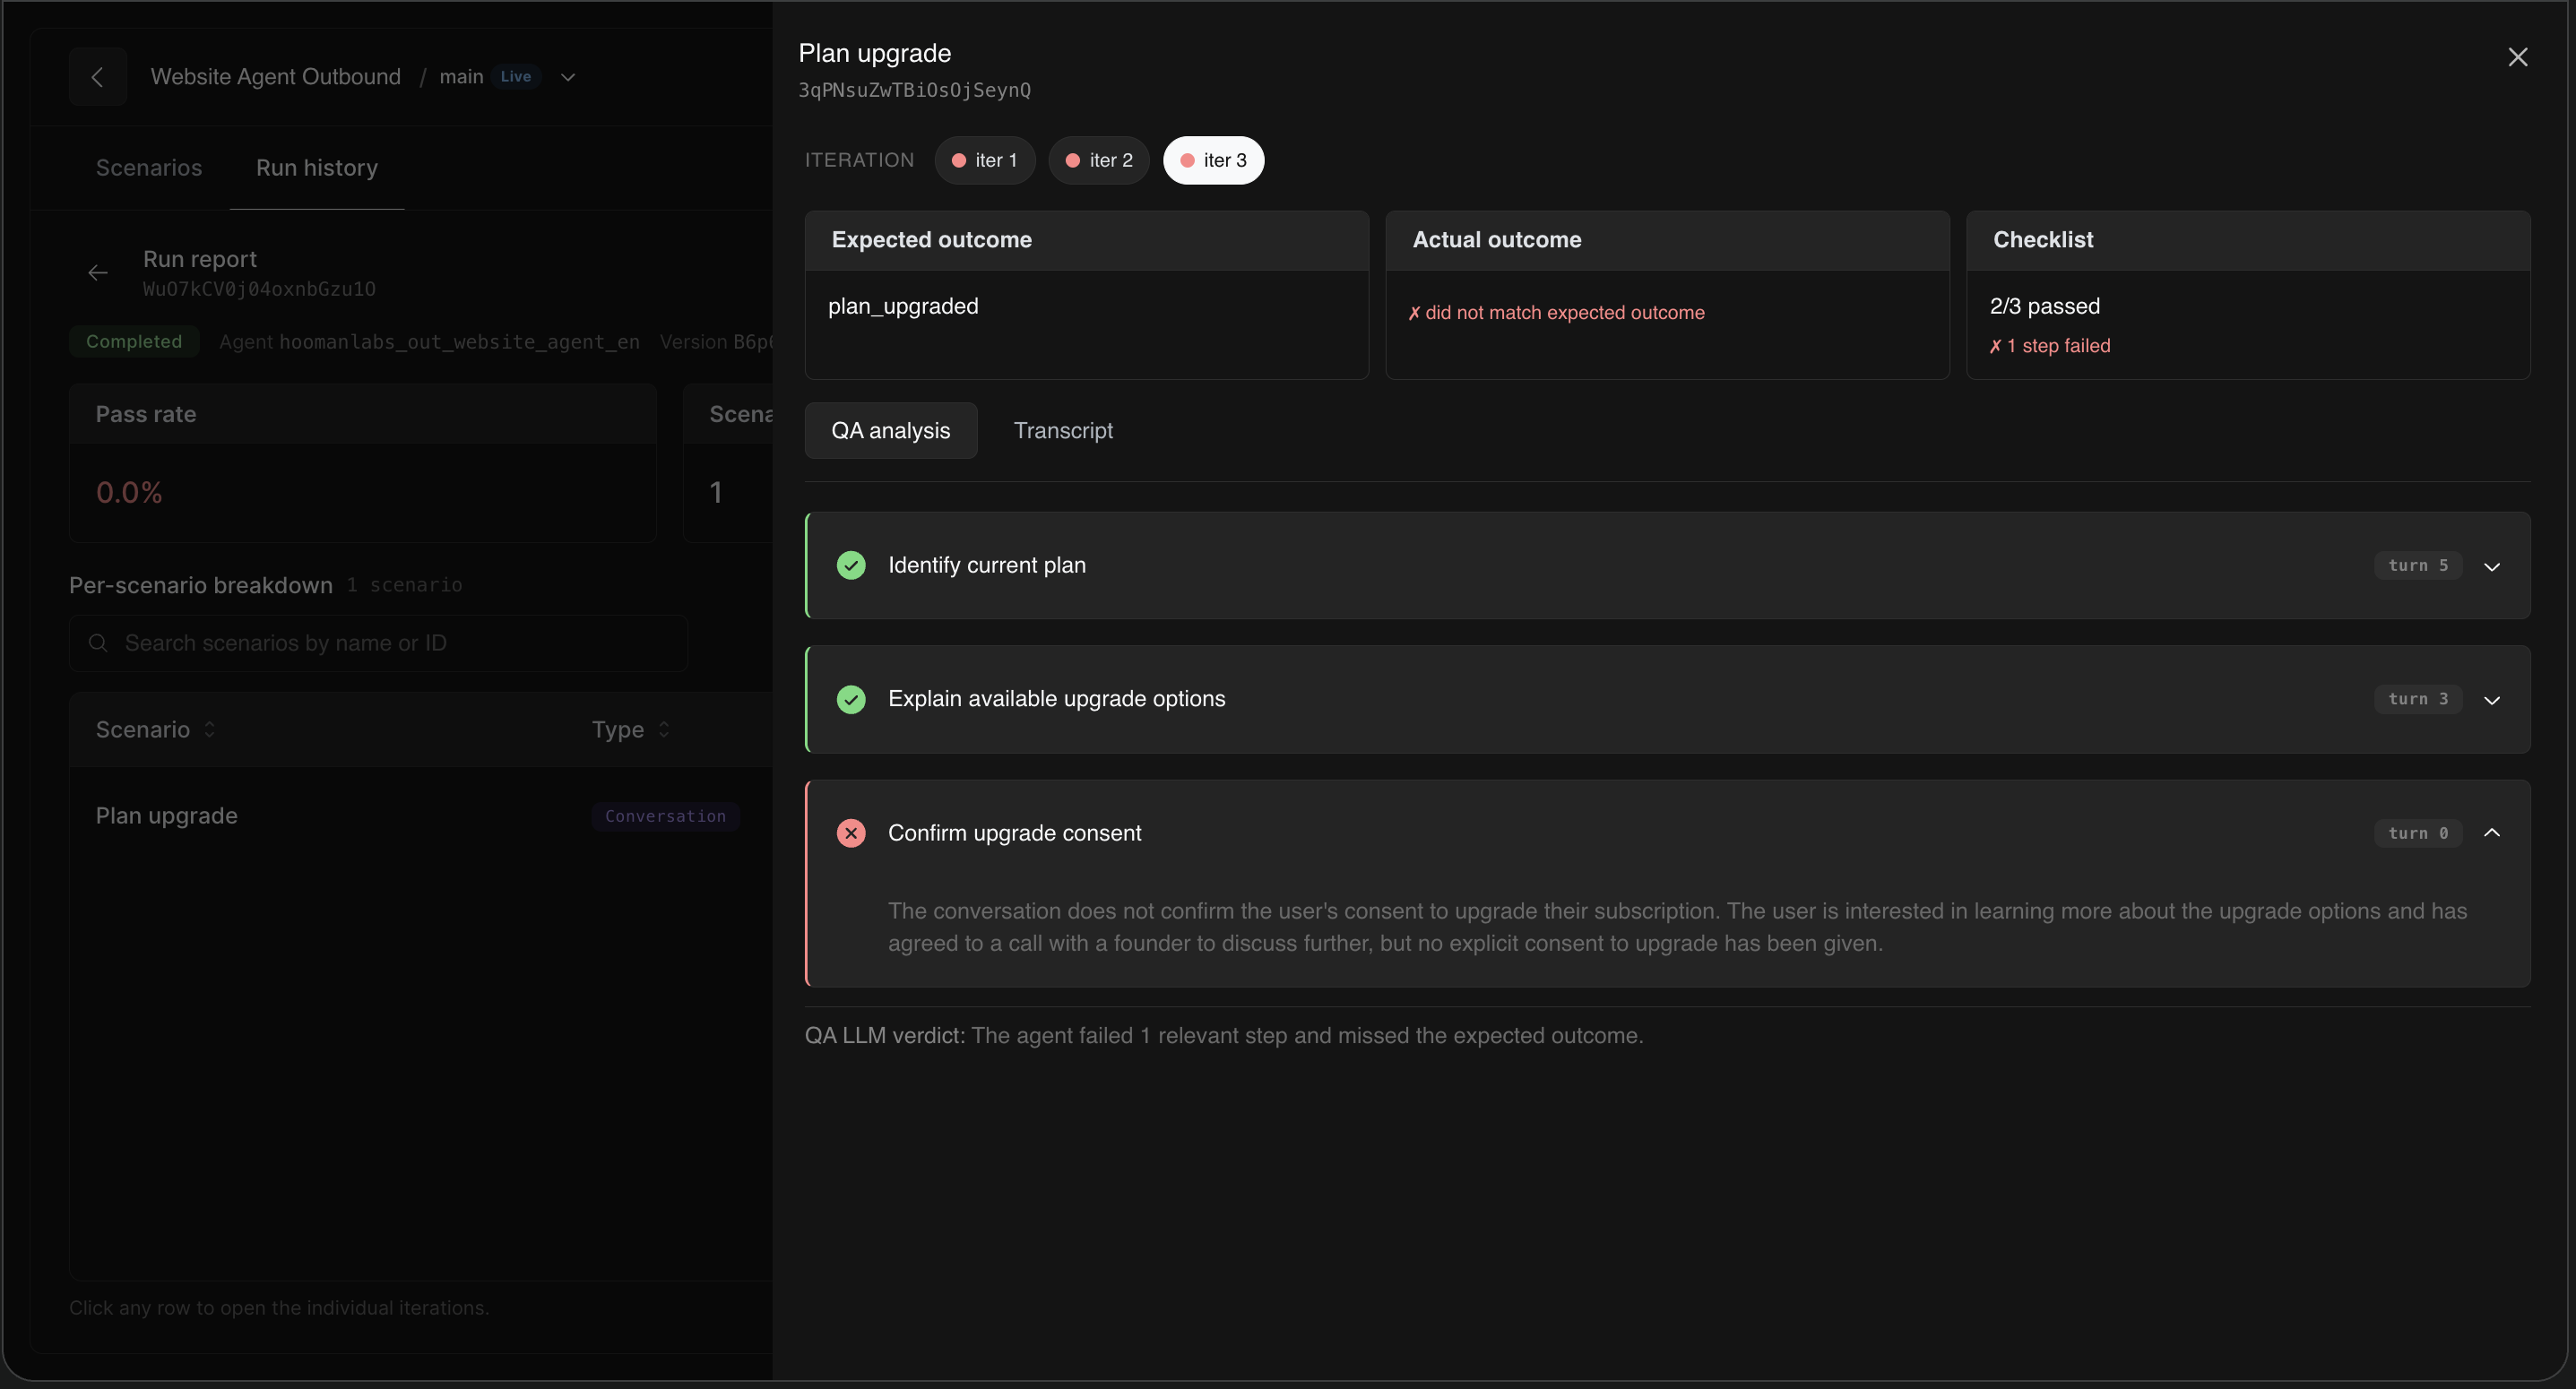
This granular feedback allows you to pinpoint exactly where your agent is deviating from the desired behavior, enabling faster prompt engineering and configuration updates.