Exotel
How to Connect an Exotel Telephony Account & Build Call Flows
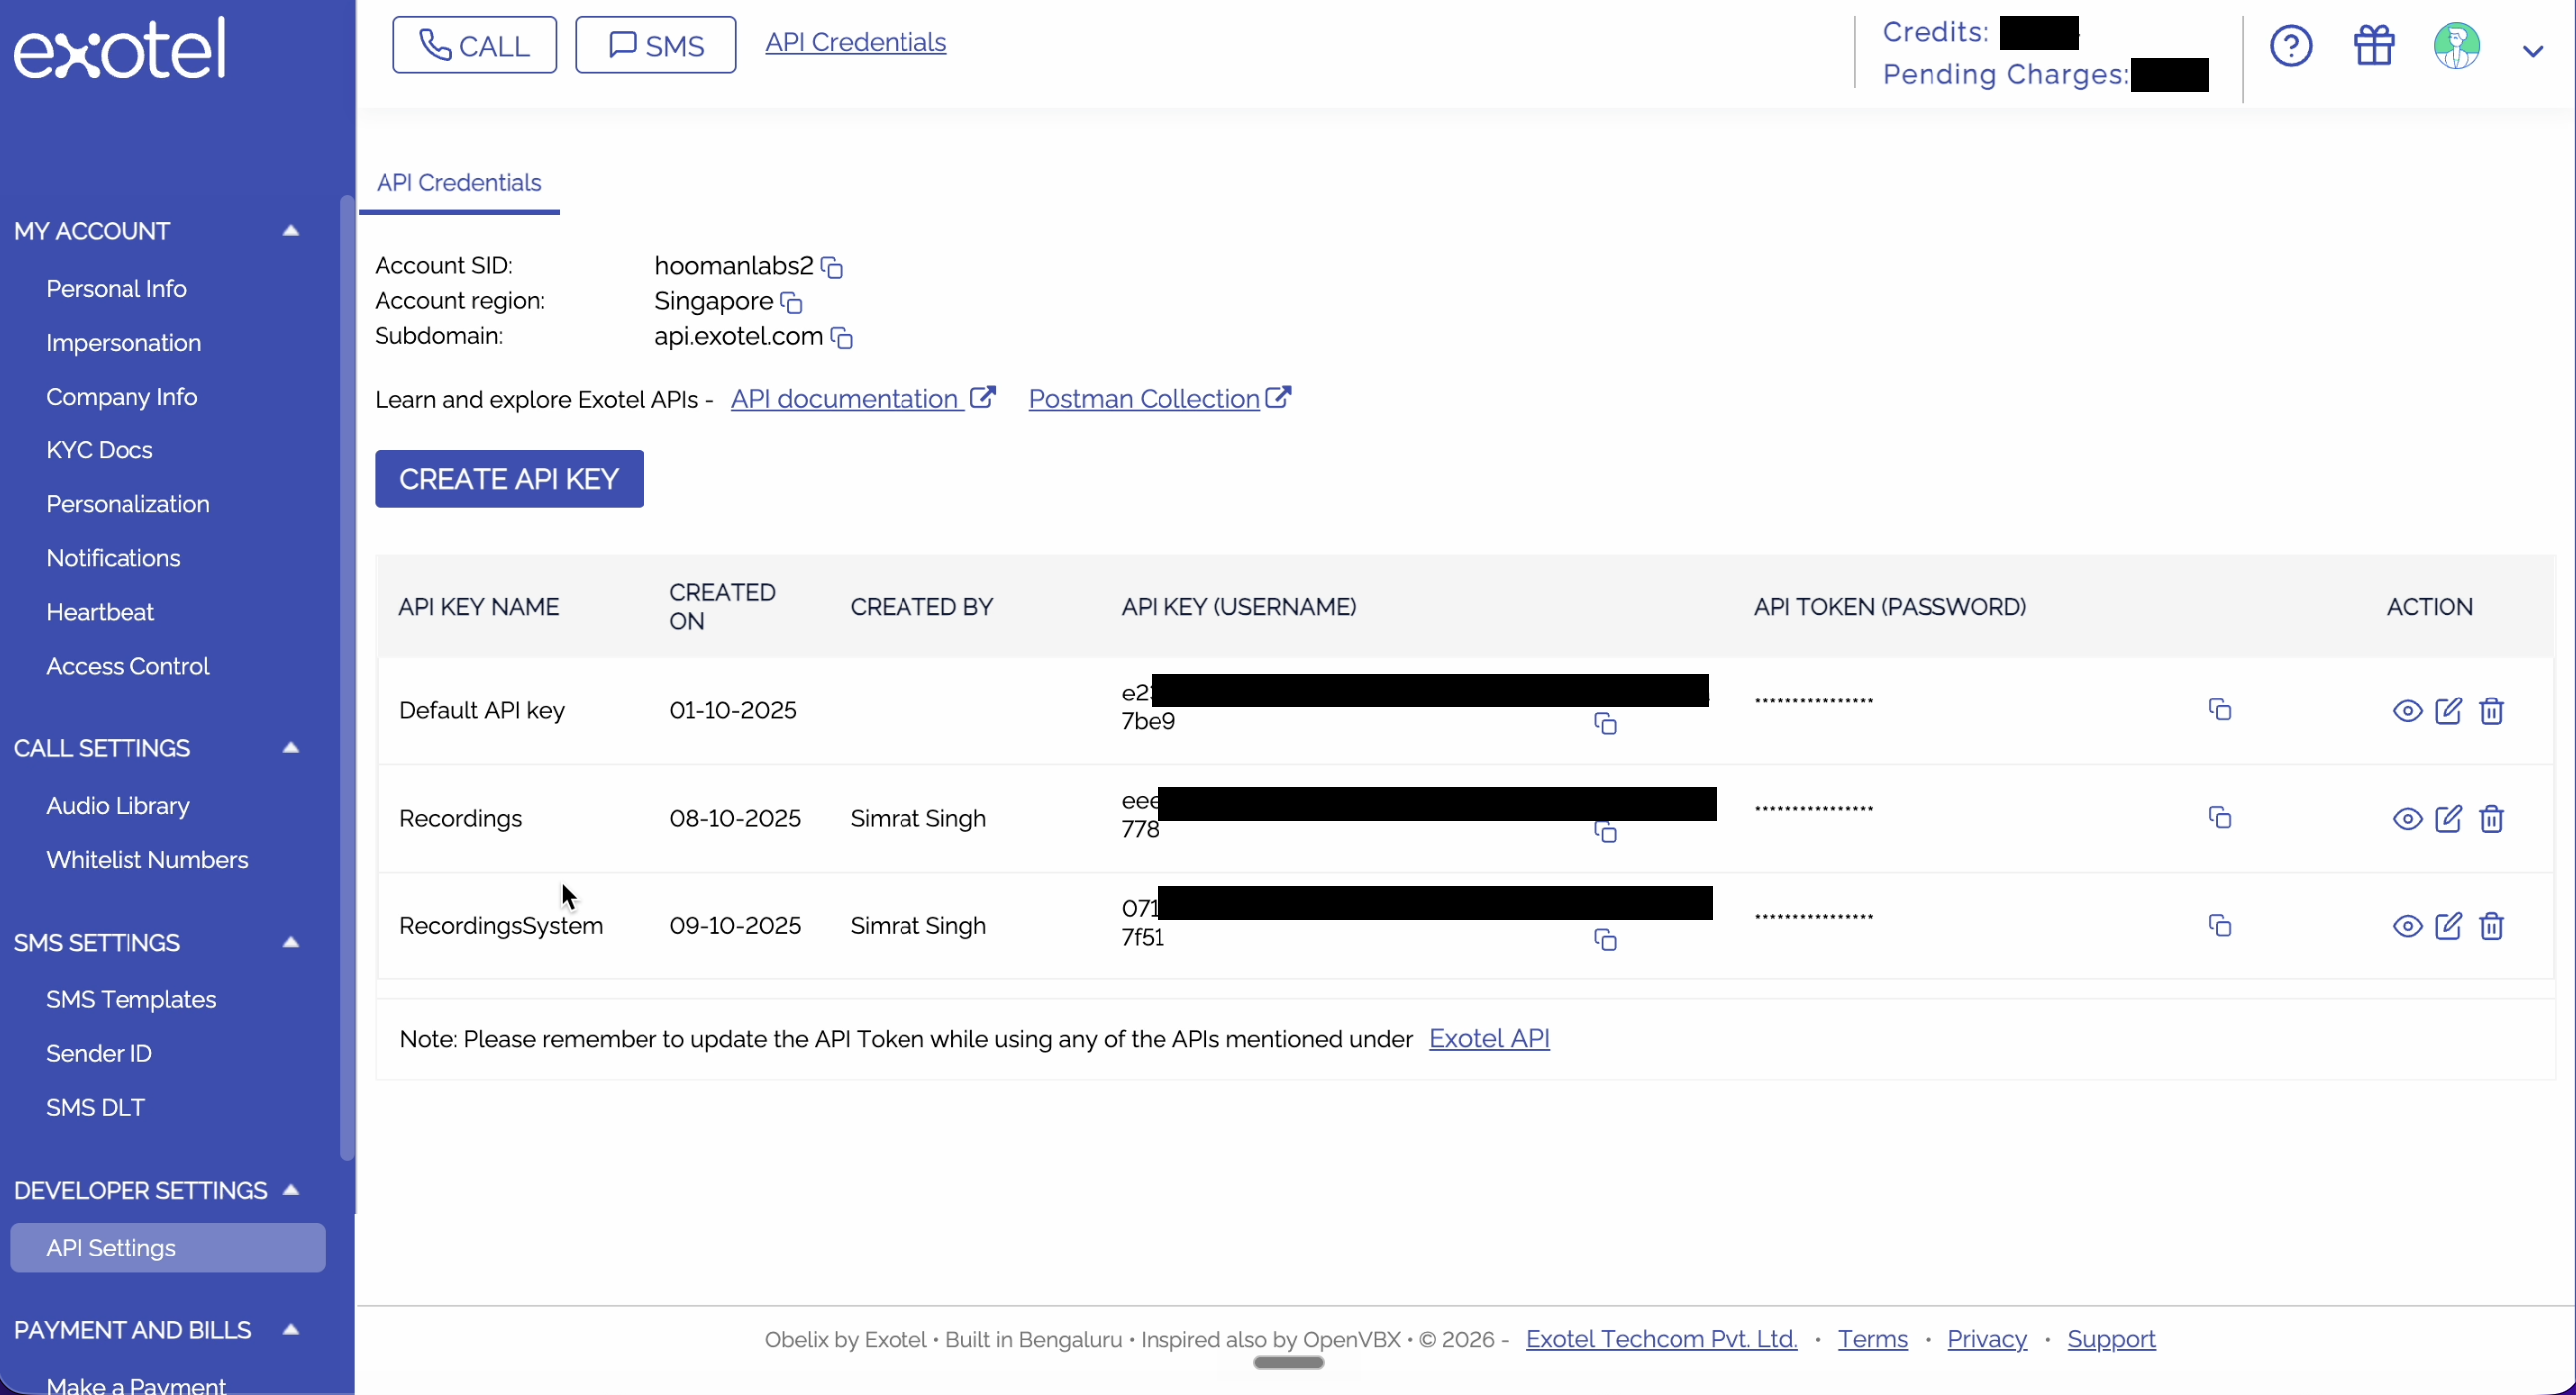
Phase 1: Gather Exotel API Credentials
-
Log in to your Exotel dashboard.
-
In the left-hand menu, navigate to the Developer section (or click on API Credentials).
-
Here, you will find your Account SID, API Key, and API Token. Keep this tab open, as you will need to copy these details, along with your subdomain, into your workspace.
Phase 2: Initial Setup in Your Workspace
-
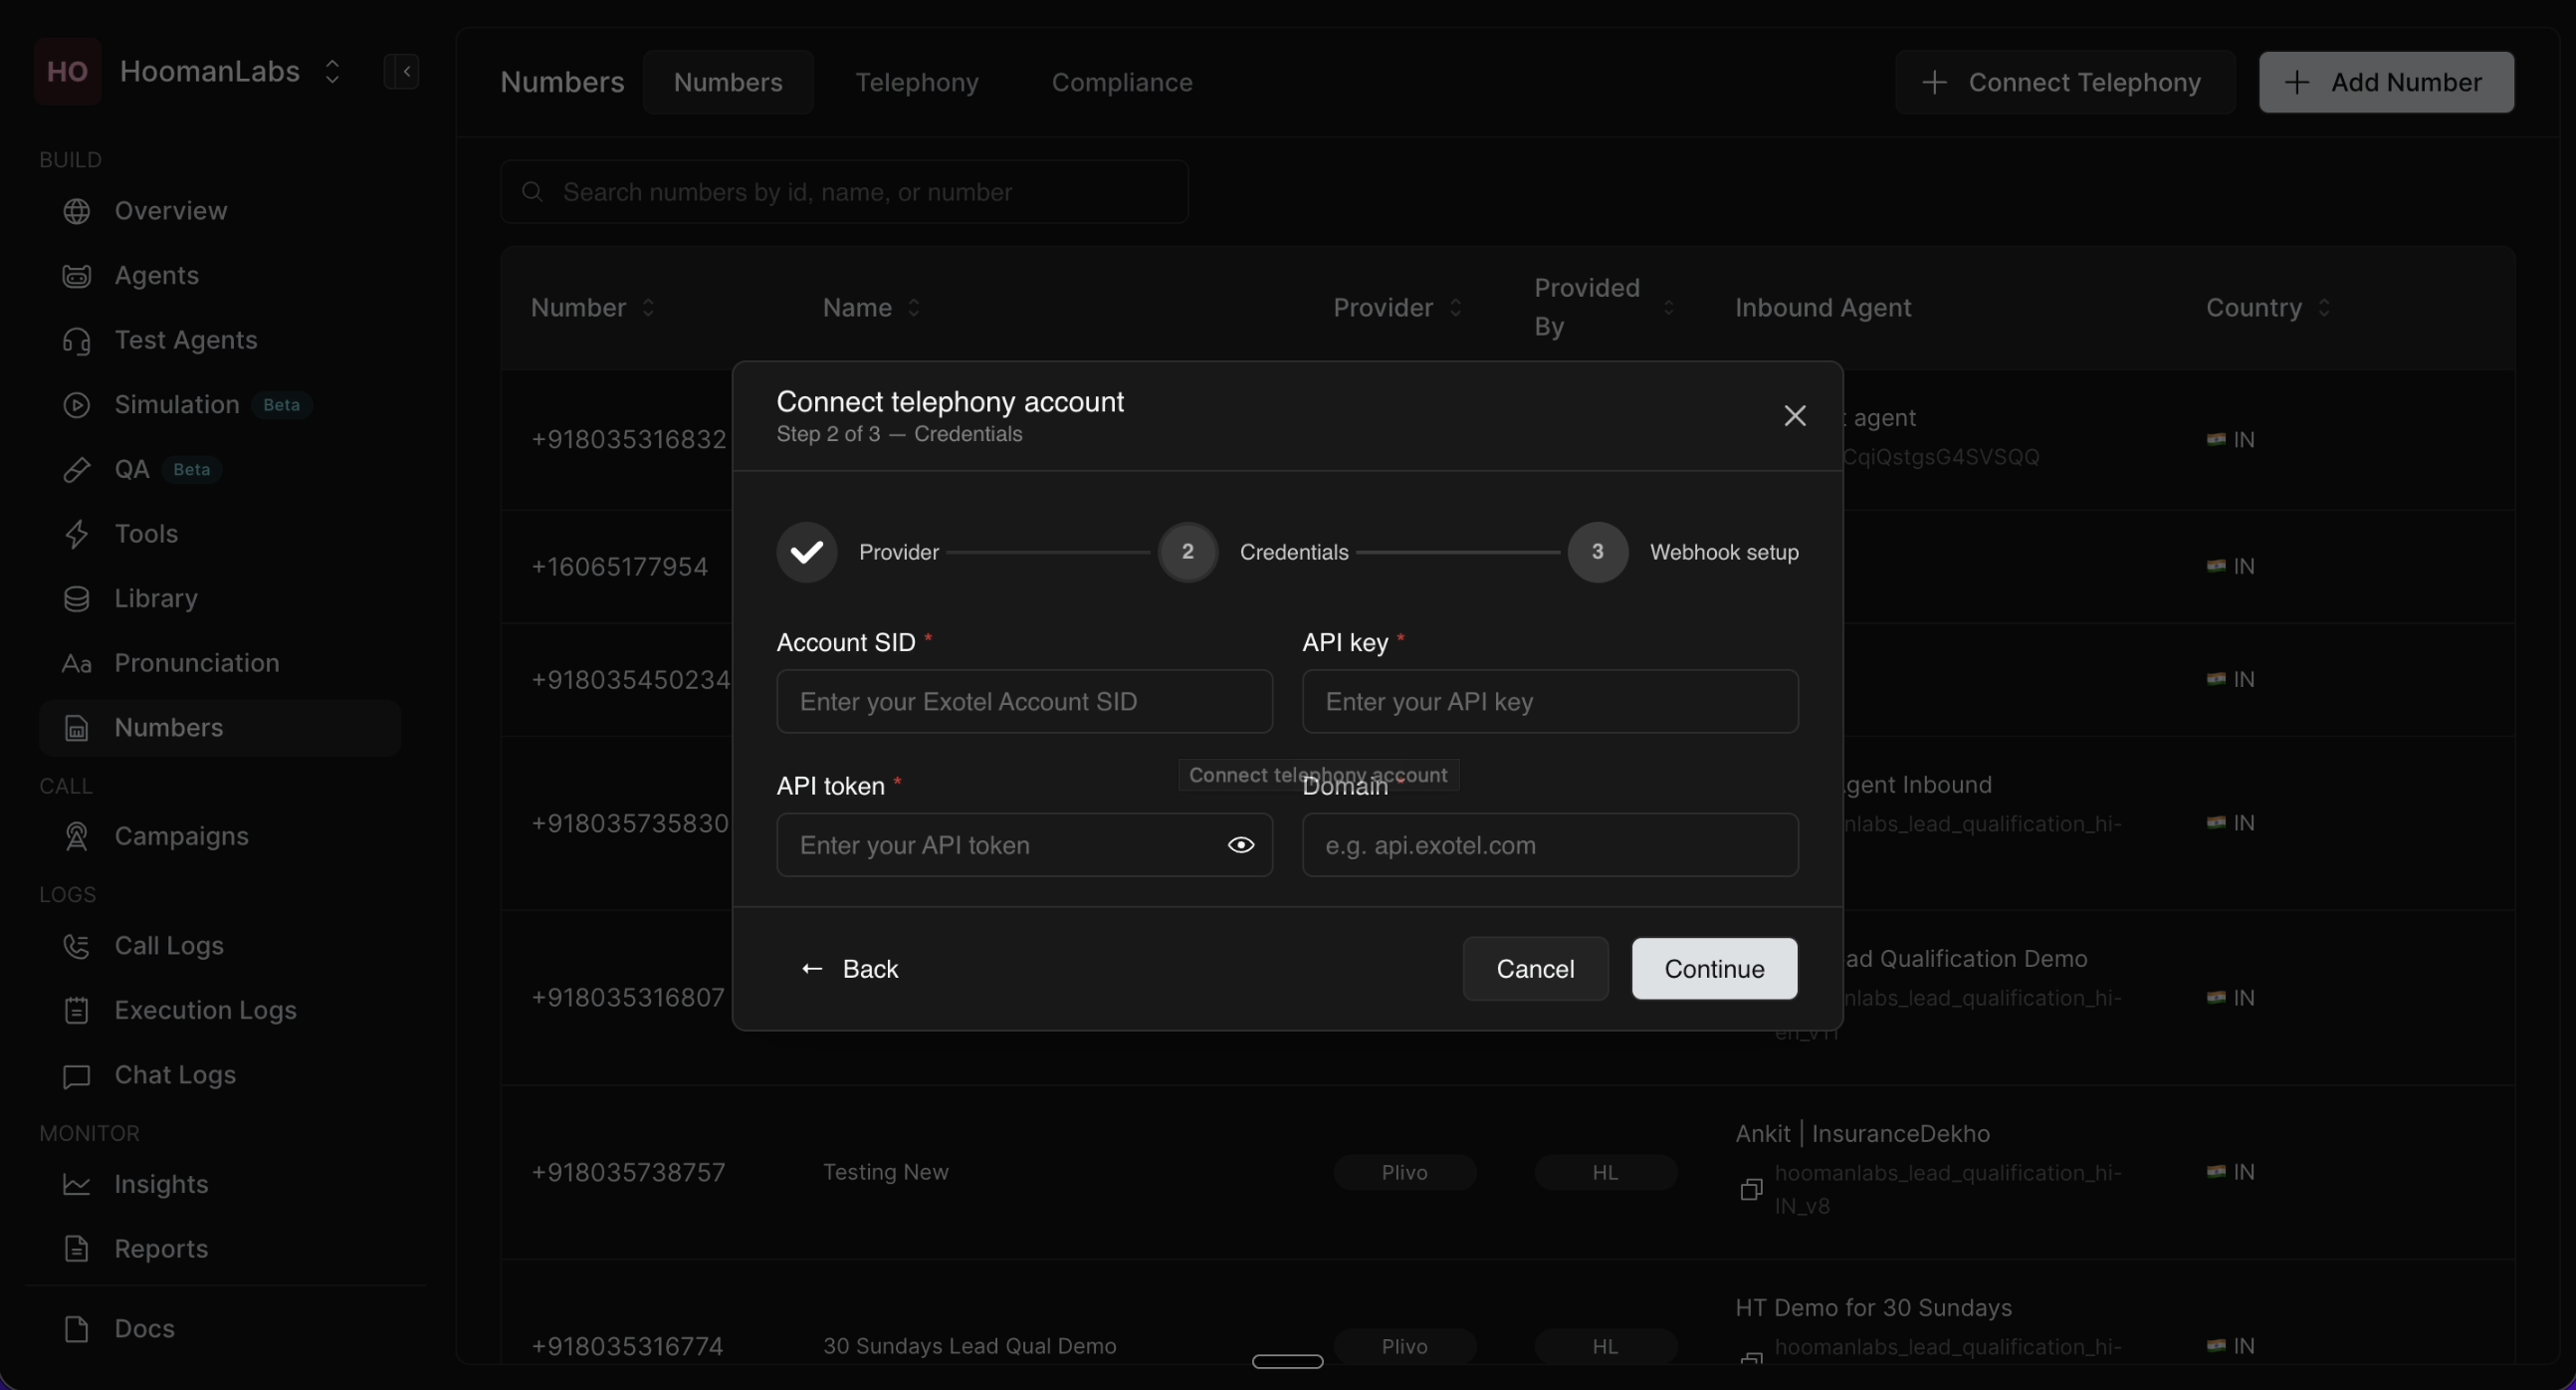
Open your application/workspace and navigate to the Connect telephony account modal.
-
Select Exotel from the Provider dropdown.
-
Enter an Account name (e.g., "xyz").
-
Paste the Account SID, API key, API token, and Domain you found in Exotel during Phase 1. Click Continue.
-
Copy the generated Outbound Voice URL.
Phase 3: Build the Outbound Flow in Exotel
-
Switch back to the Exotel dashboard and navigate to App Bazaar in the left menu.
-
Click Create under "Custom Apps". Give your flow a name (e.g., "outbound test flow").
-
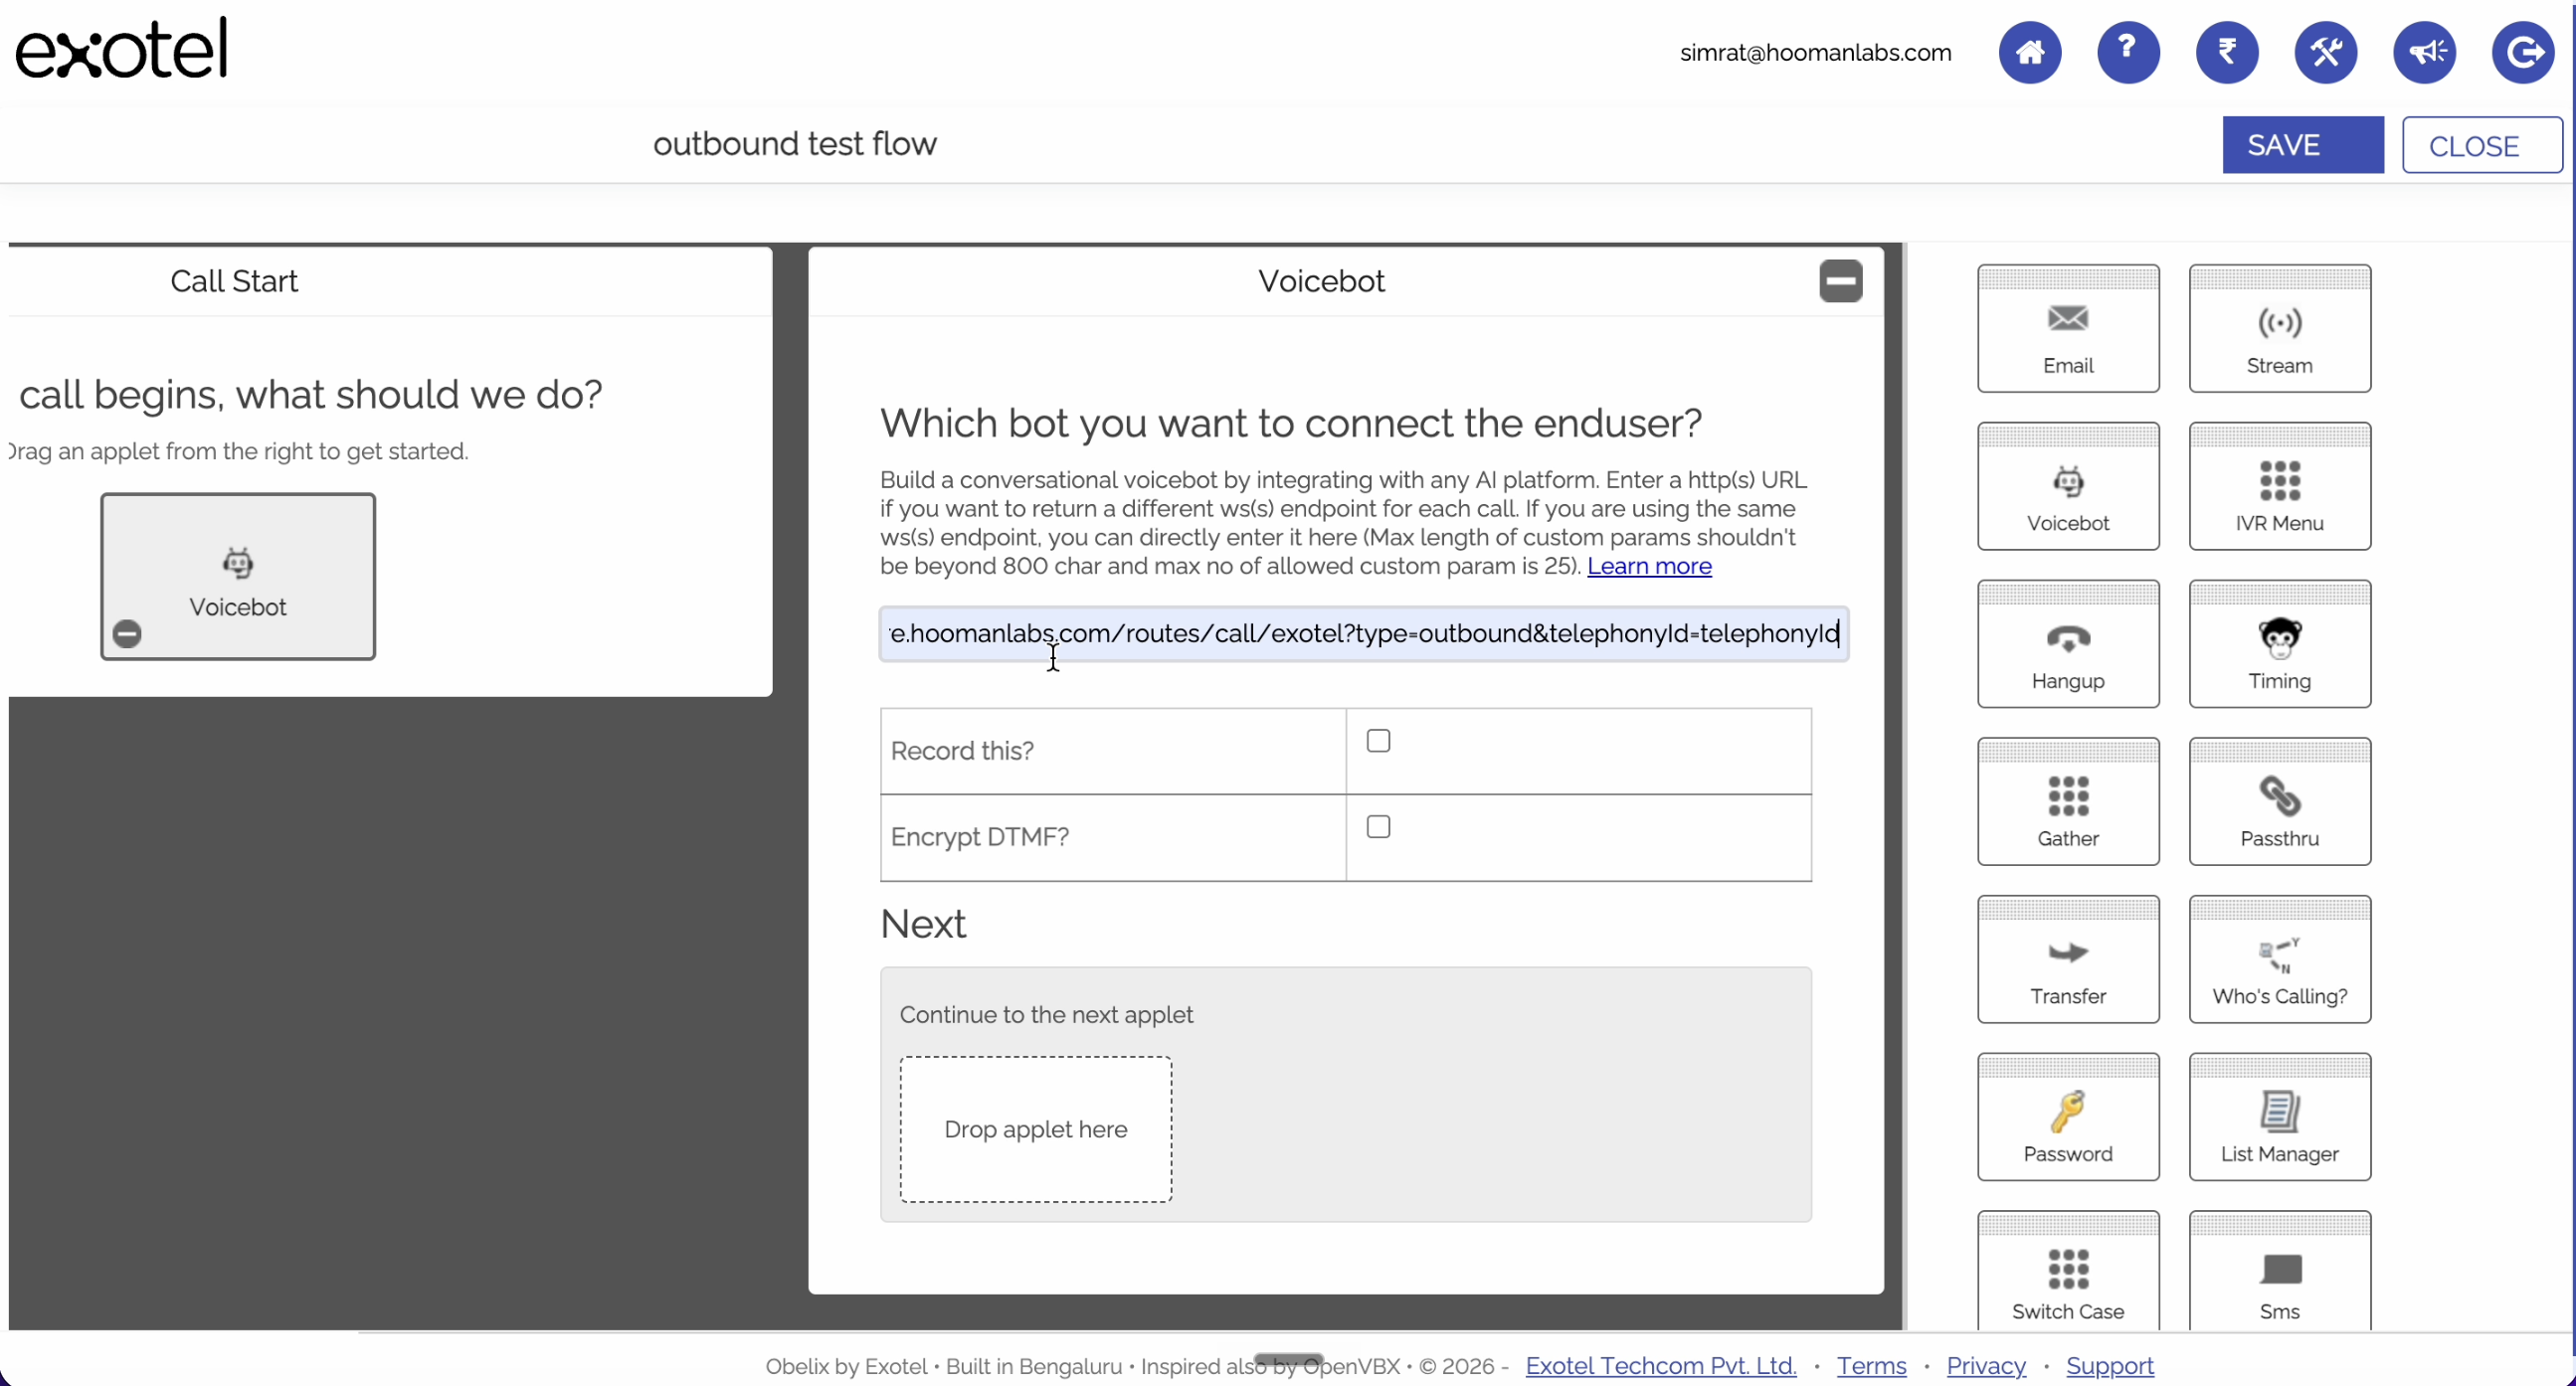
In the flow builder, under "Call Start", drag and drop the Voicebot applet.
-
Paste the Outbound Voice URL (copied in Phase 2) into the Voicebot URL field.
-
Scroll down in the Voicebot applet settings and uncheck the "Record this?" box.
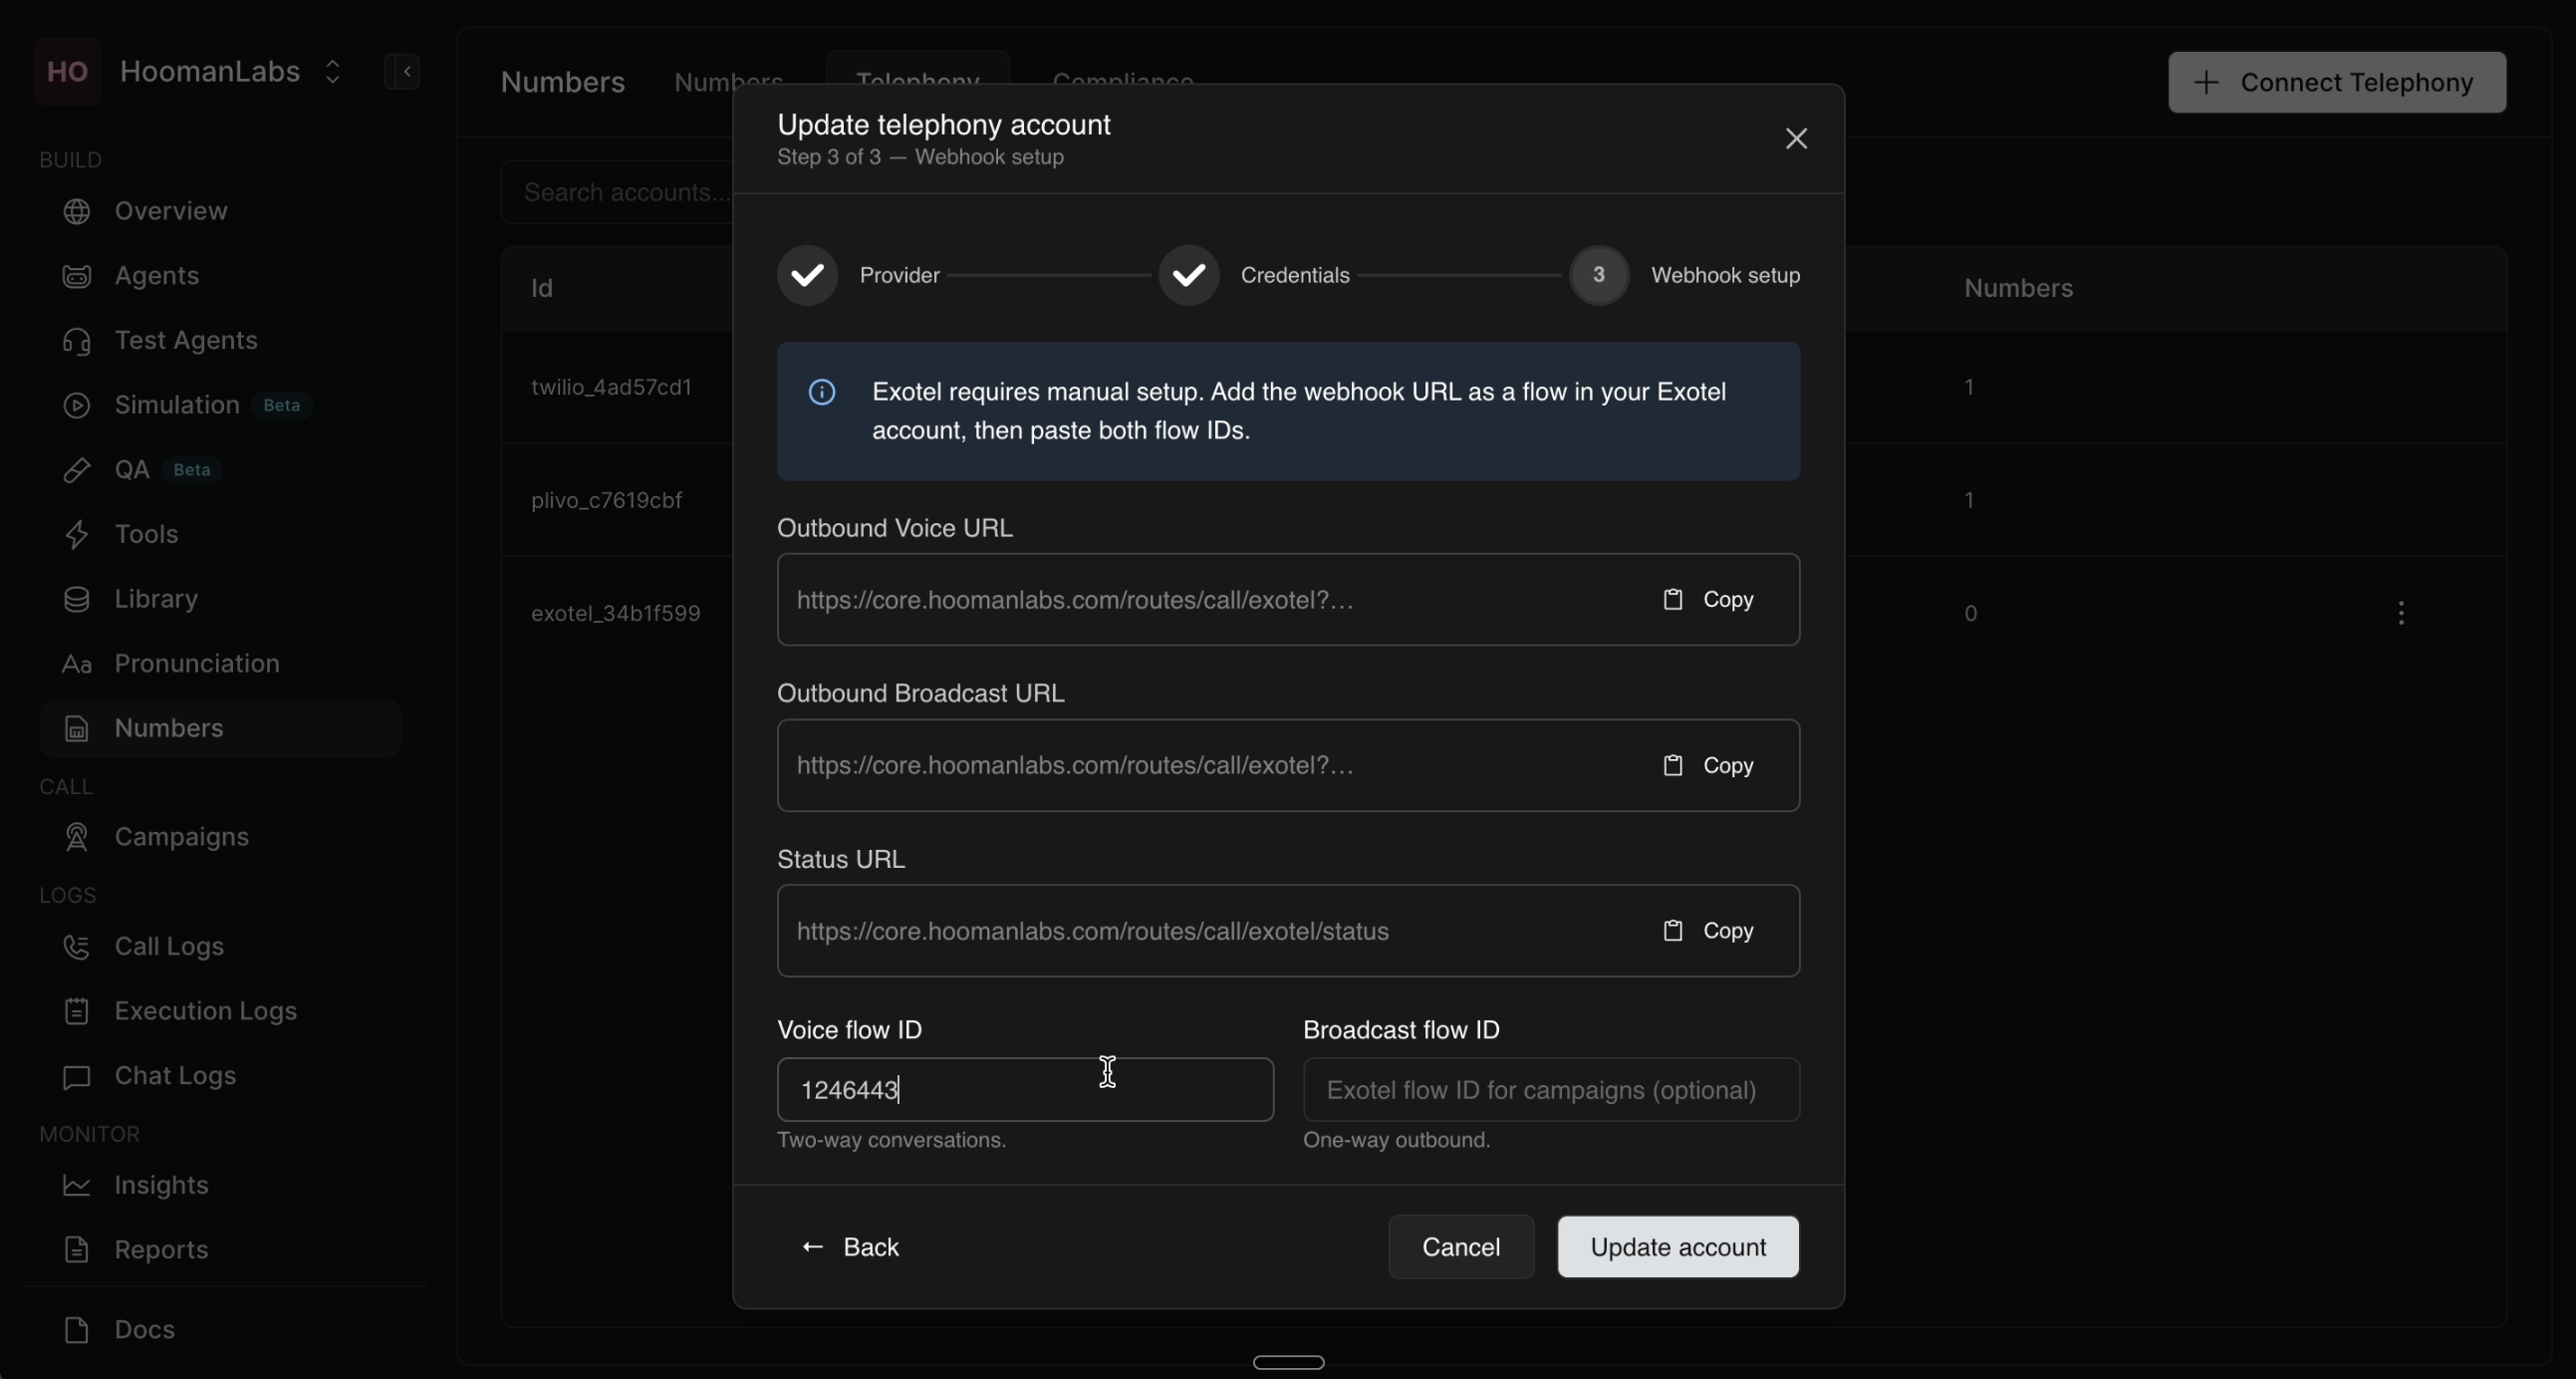
Phase 4: Update Telephony ID & Configure Connection
-
Switch to your workspace, go to the Telephony tab, and locate the Exotel account you just created. Copy its specific ID (e.g., exotel_34b...).
-
Back in the Exotel flow builder, locate the URL you pasted in the Voicebot applet. Replace the
telephonyIdplaceholder at the end of the URL with the actual ID you just copied. -
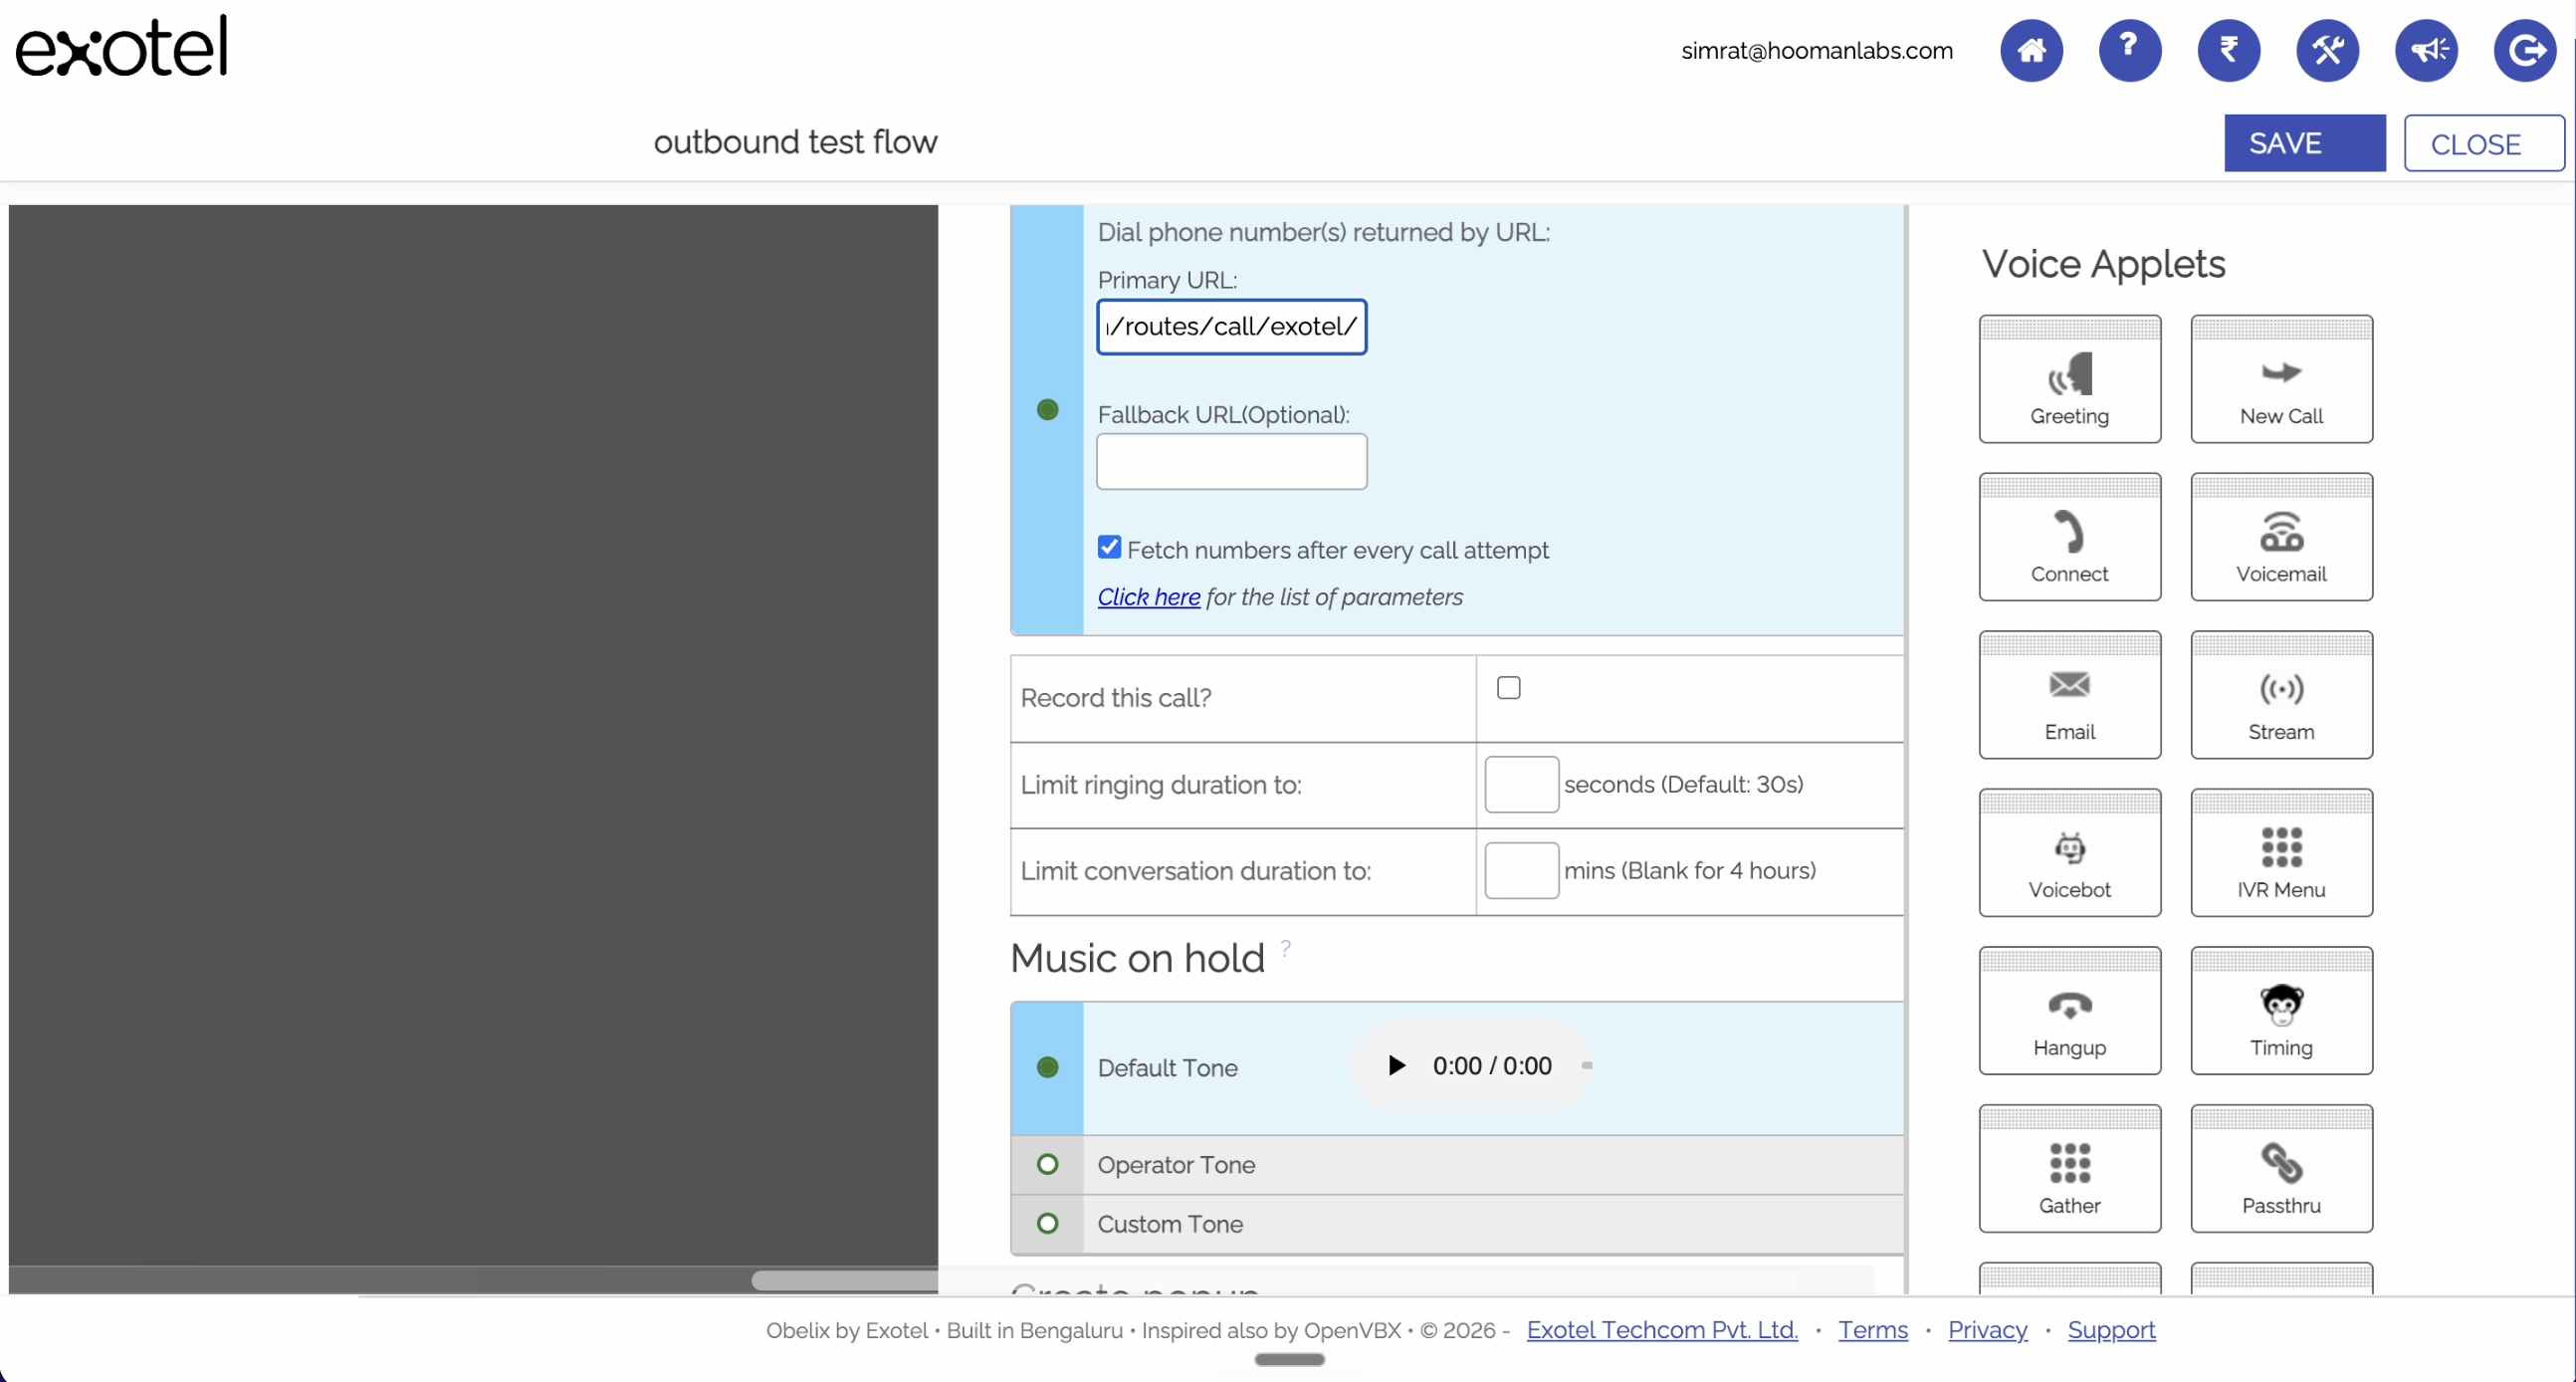
Under the "Next" section of the Voicebot applet, drag and drop the Connect applet.
-
In the Connect applet, scroll down to the "Dial Whom" section and select Dial a user or group, then choose Dial by a URL.
-
Paste your Outbound Voice URL into the Primary URL field, but you must edit it: delete the parameters at the end (everything from
?type=outbound...) and change the final endpoint to/status. -
Uncheck the "Fetch numbers after every call attempt" box.
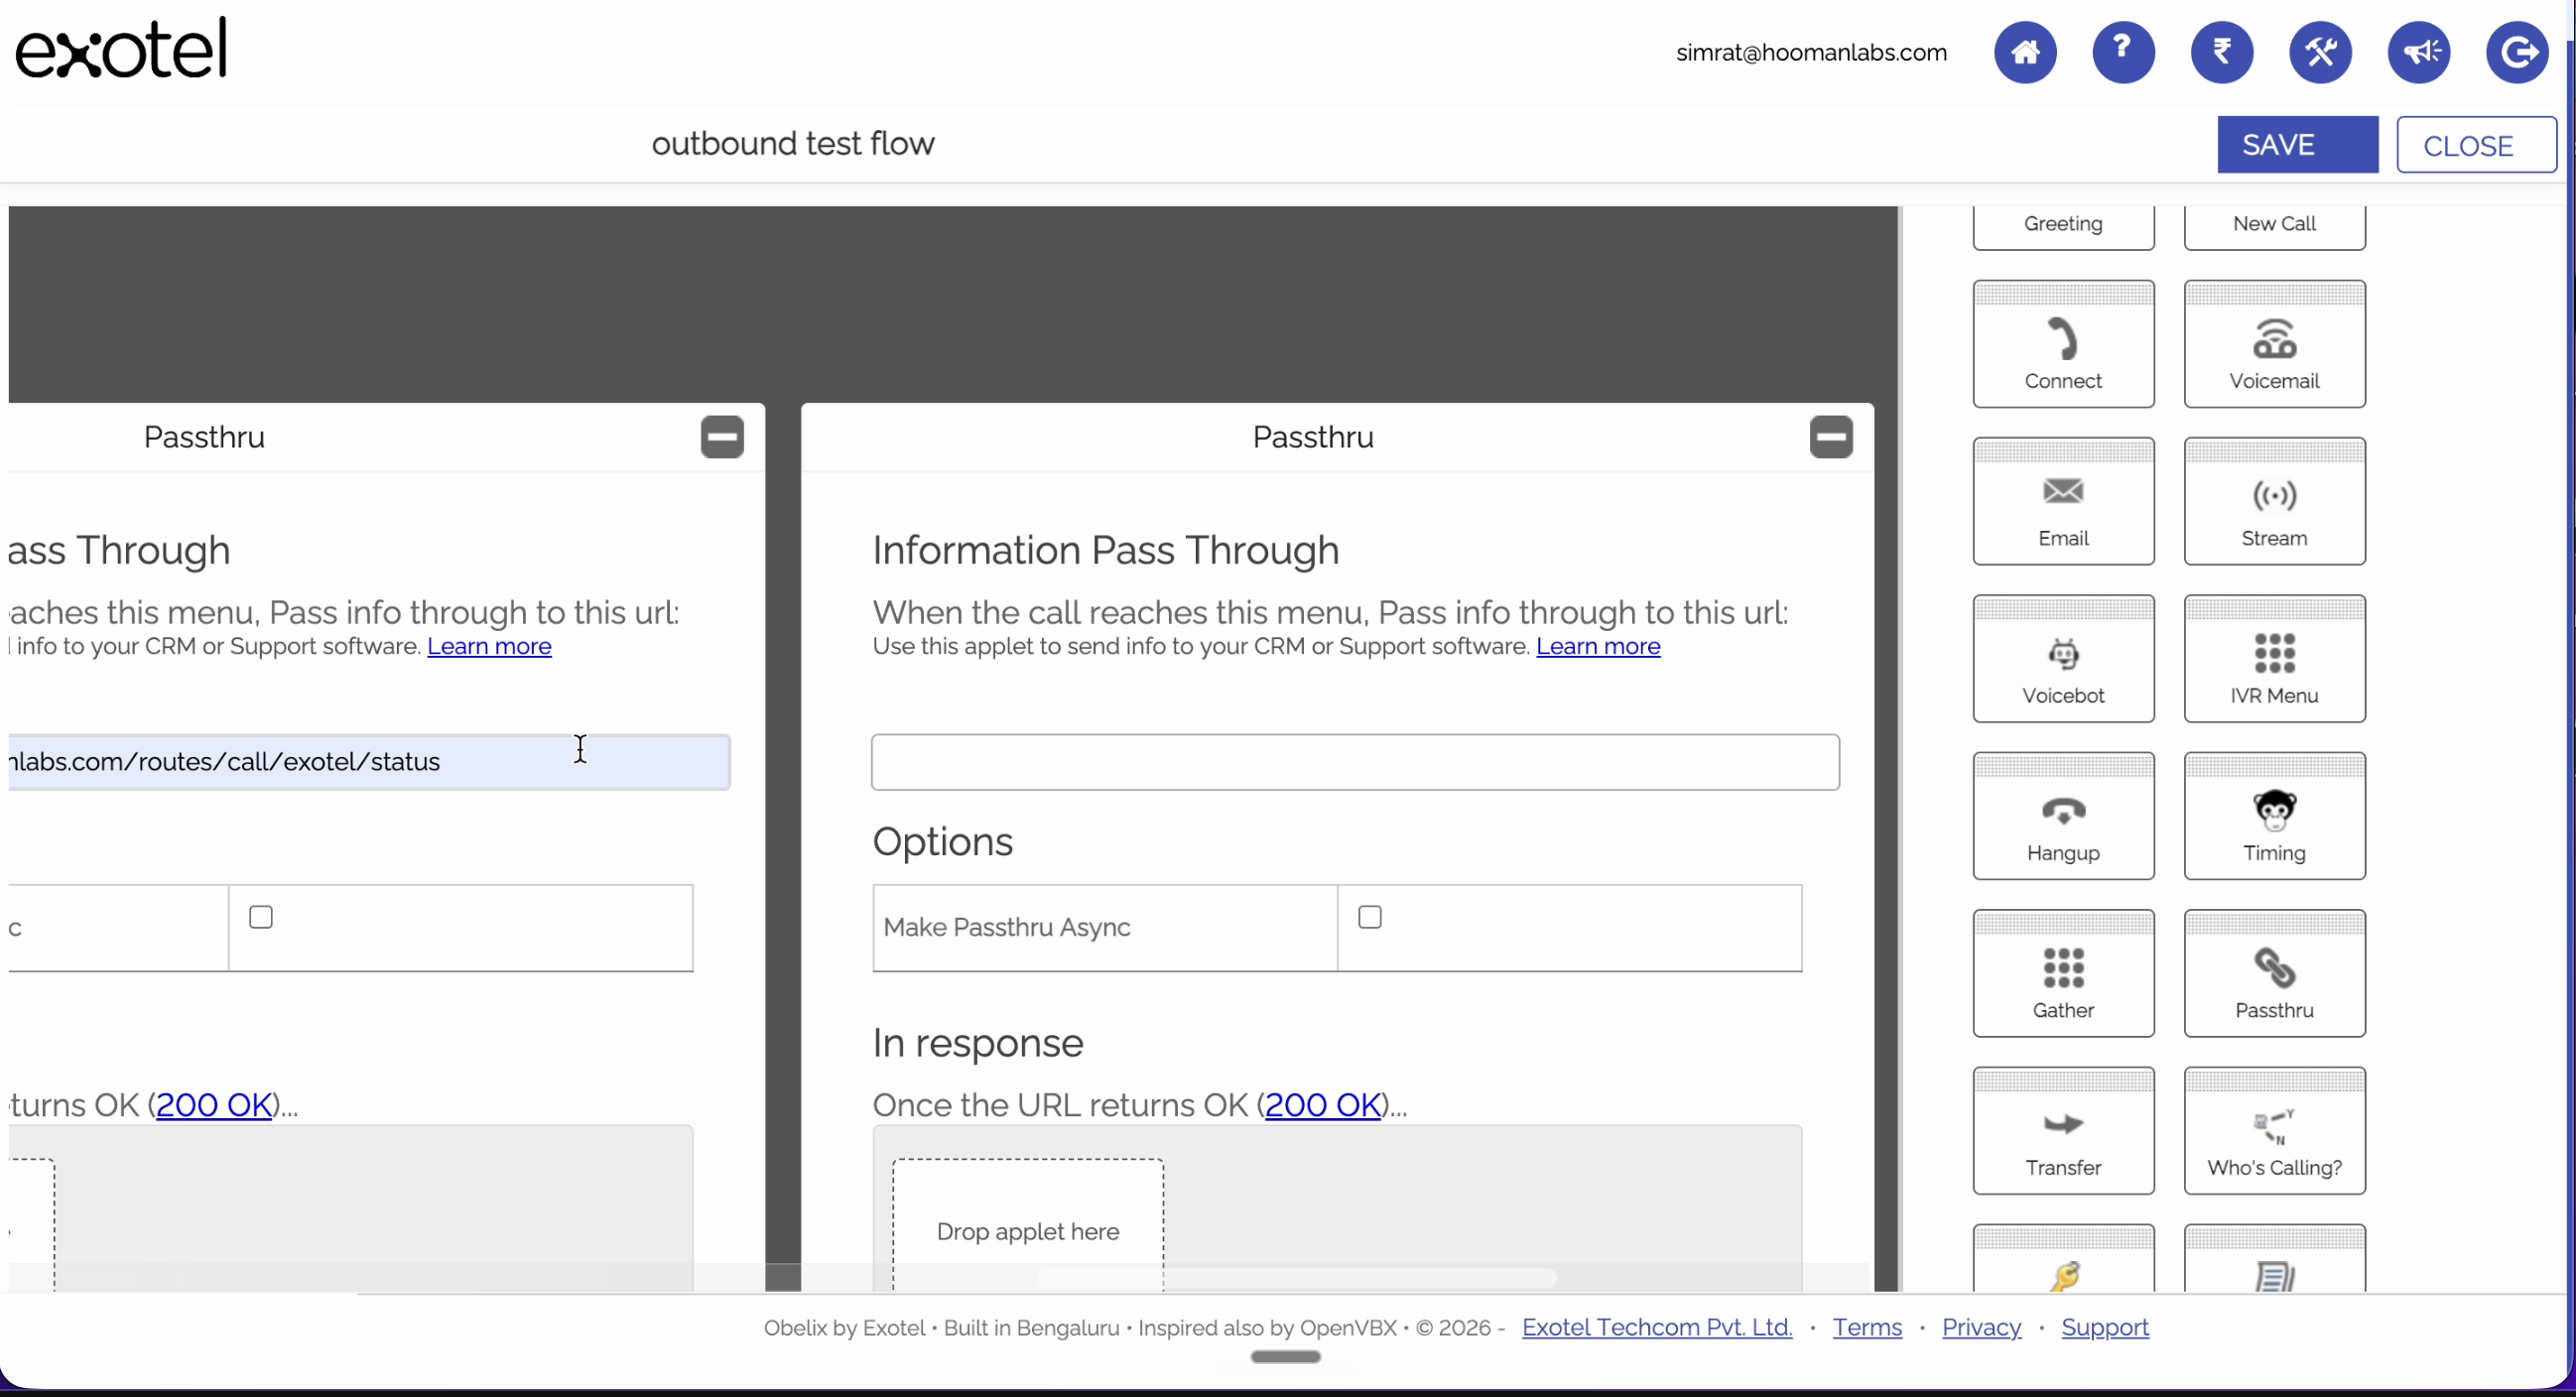
Phase 5: Configure Status Webhooks (PassThru)
-
Scroll down to the bottom of the Connect applet. Under "After the call conversation ends...", drag and drop a PassThru applet.
-
Do the same under "If nobody answers...".
-
Scroll back to the top of the flow builder and click on the newly created PassThru blocks.
-
Paste the exact same
/statusURL (from Phase 4, Step 5) into the "Information Pass Through" URL field. -
Check the box for Make PassThru Async.
-
Under "In response", drag and drop a Hangup applet.
-
Click Save in the top right corner to save your flow, then close the flow builder.
Phase 6: Link the Exotel Flow to Your Workspace
-
Back on the Exotel App Bazaar dashboard, locate your newly created app in the list and copy its APP ID (e.g., 1246443).
-
Return to your workspace, go to the Telephony tab, and edit your Exotel connection.
-
Paste the APP ID into the Voice flow ID field and click Update account.
The steps above cover the Outbound call flow. To set up an Inbound flow, the process is nearly identical, with two key differences:
-
You will use the Inbound URL (which contains specific agent IDs) instead of the Outbound URL.
-
In Exotel, under "ExoPhones", you must ensure that your numbers are assigned to "Install an App" and leave the app selection blank if you only want outbound, or route it to your specific inbound app flow if you want to receive calls.