Plivo
How to Connect a Plivo Telephony Account
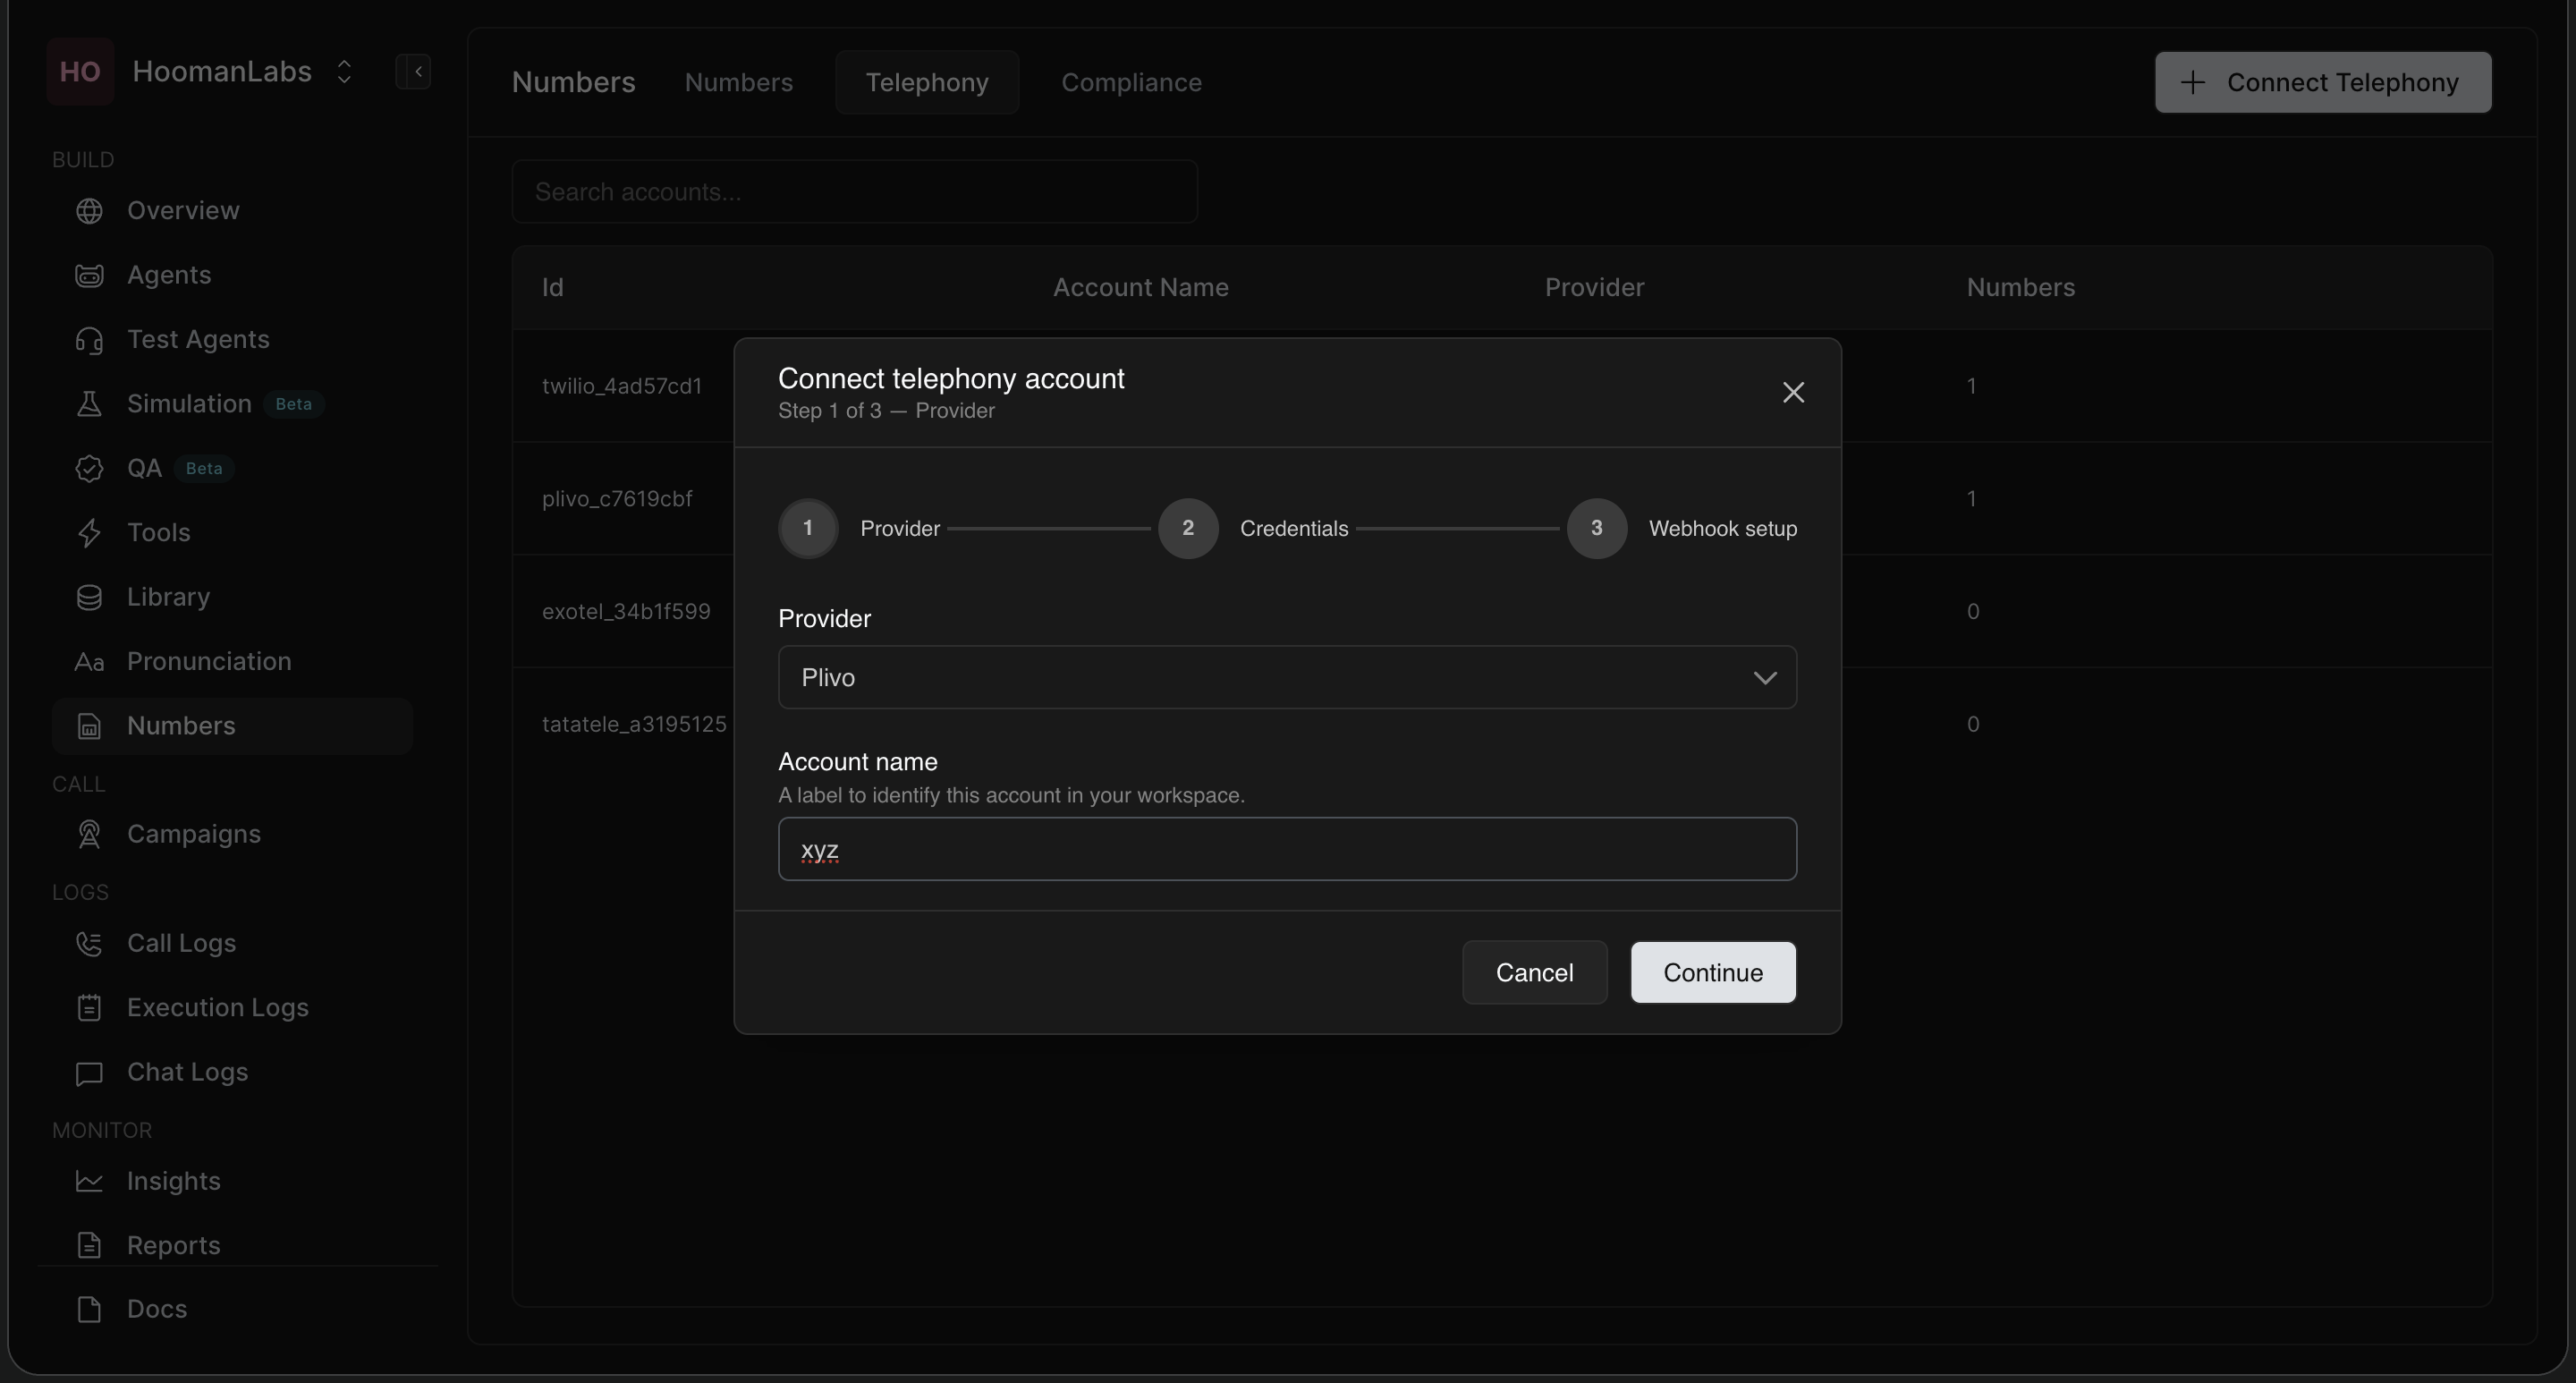
Phase 1: Initiate Setup in the Application
-
In your workspace, navigate to the Numbers section on the left-hand menu, then click the Telephony tab at the top.
-
Click the + Connect Telephony button in the top right corner.
-
In the modal that appears, select Plivo from the Provider dropdown menu.
-
Enter an Account name (e.g., "s" or a descriptive name) to identify this connection in your workspace.
-
Click Continue.
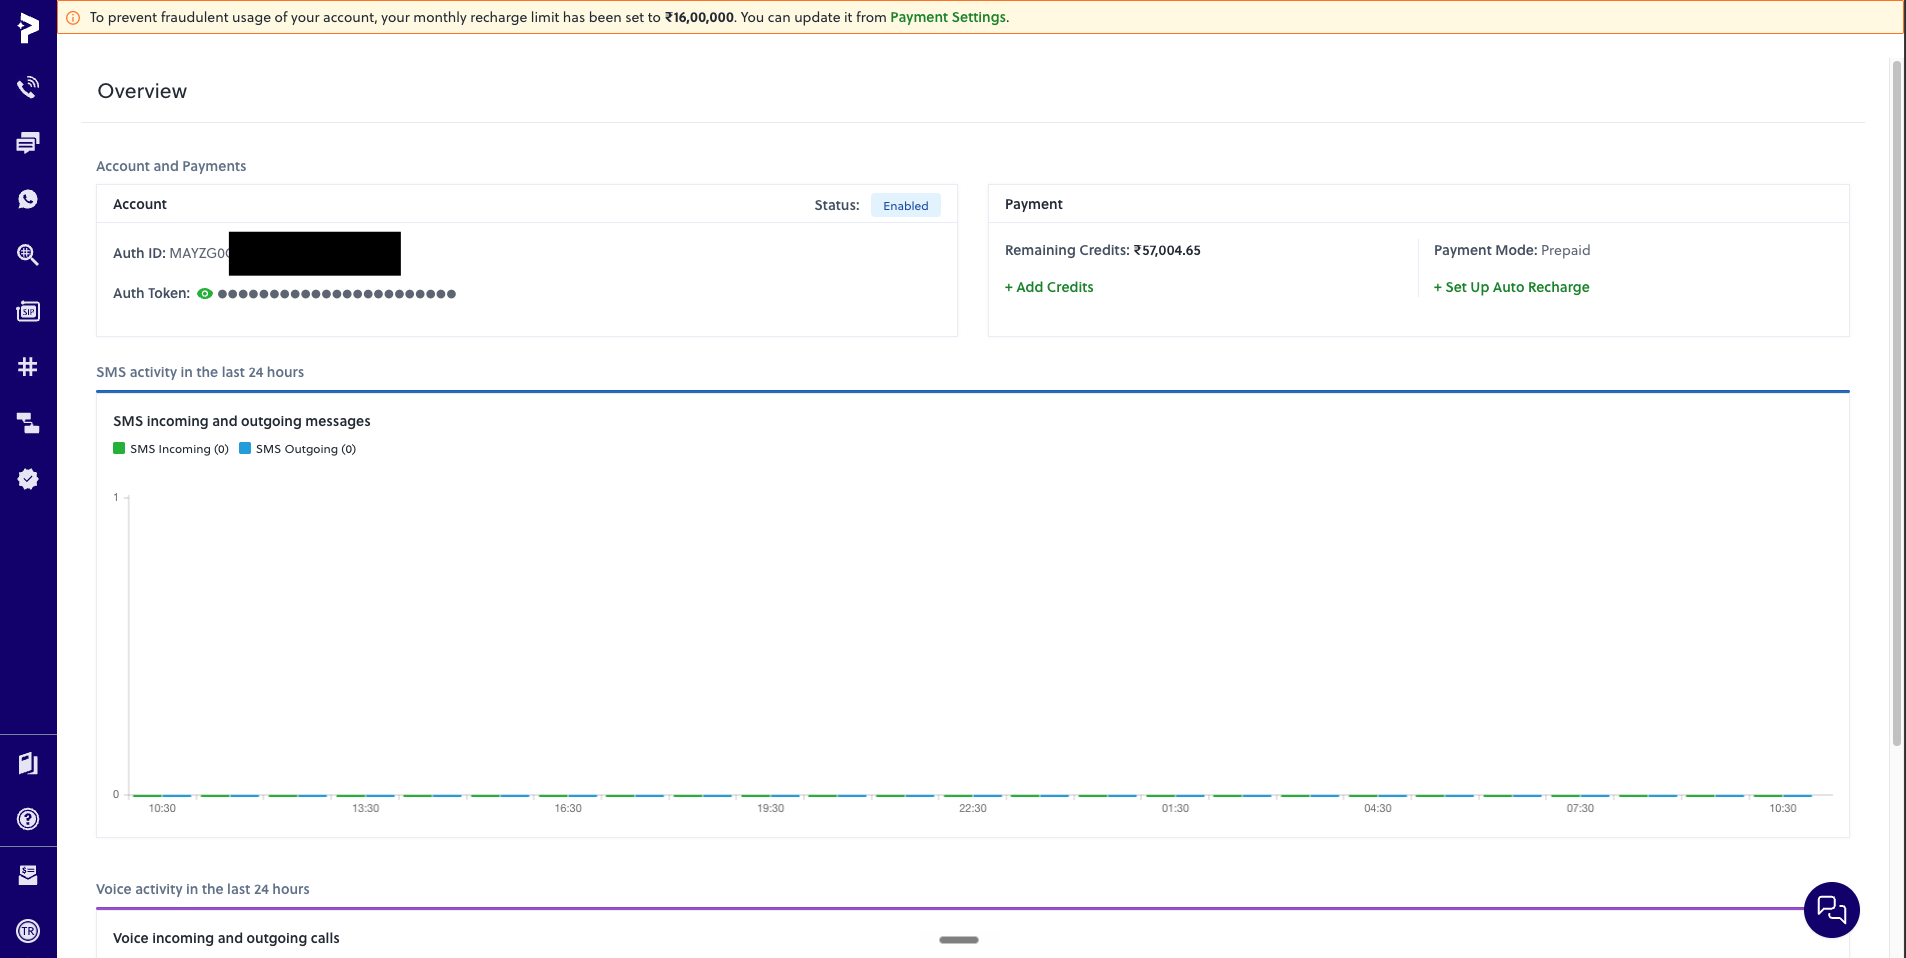
Phase 2: Retrieve Credentials from Plivo
-
In a separate browser tab, log in to your Plivo account.
-
Navigate to your main Overview dashboard.
-
Locate the Account and Payments section at the top of the page.
-
Here, you will find your Auth ID and Auth Token. You may need to click the green eye icon next to the Auth Token to reveal it. Copy both of these credentials.
Phase 3: Finalise the Connection
-
Switch back to your application's setup window.
-
In "Step 2 - Credentials" of the setup modal, paste the Auth ID and Auth Token you just copied into their respective fields.
-
Click Continue or Connect to finalize the setup.
Phase 4: Completion
-
You are done! Unlike other telephony providers, Plivo does not require you to manually configure voice flows, endpoints, or webhooks. Once the account is connected using the Auth ID and Token, you can proceed to directly purchase, connect, and use your numbers within the application.