Call Logs
Overview
The Call Logs page gives you a comprehensive view of all your team's interactions. You can use this space to review transcripts, analyze conversational data, provide feedback to agents, and export highly customizable reports.
Navigating and Reviewing Call Logs
To get started, go to Call Logs under the Logs section on the left-hand main menu.
1. View Categories
At the very top of the page, you can easily toggle between different types of interactions using the tabs: Overall, Inbound, Outbound, Web, and Broadcast.
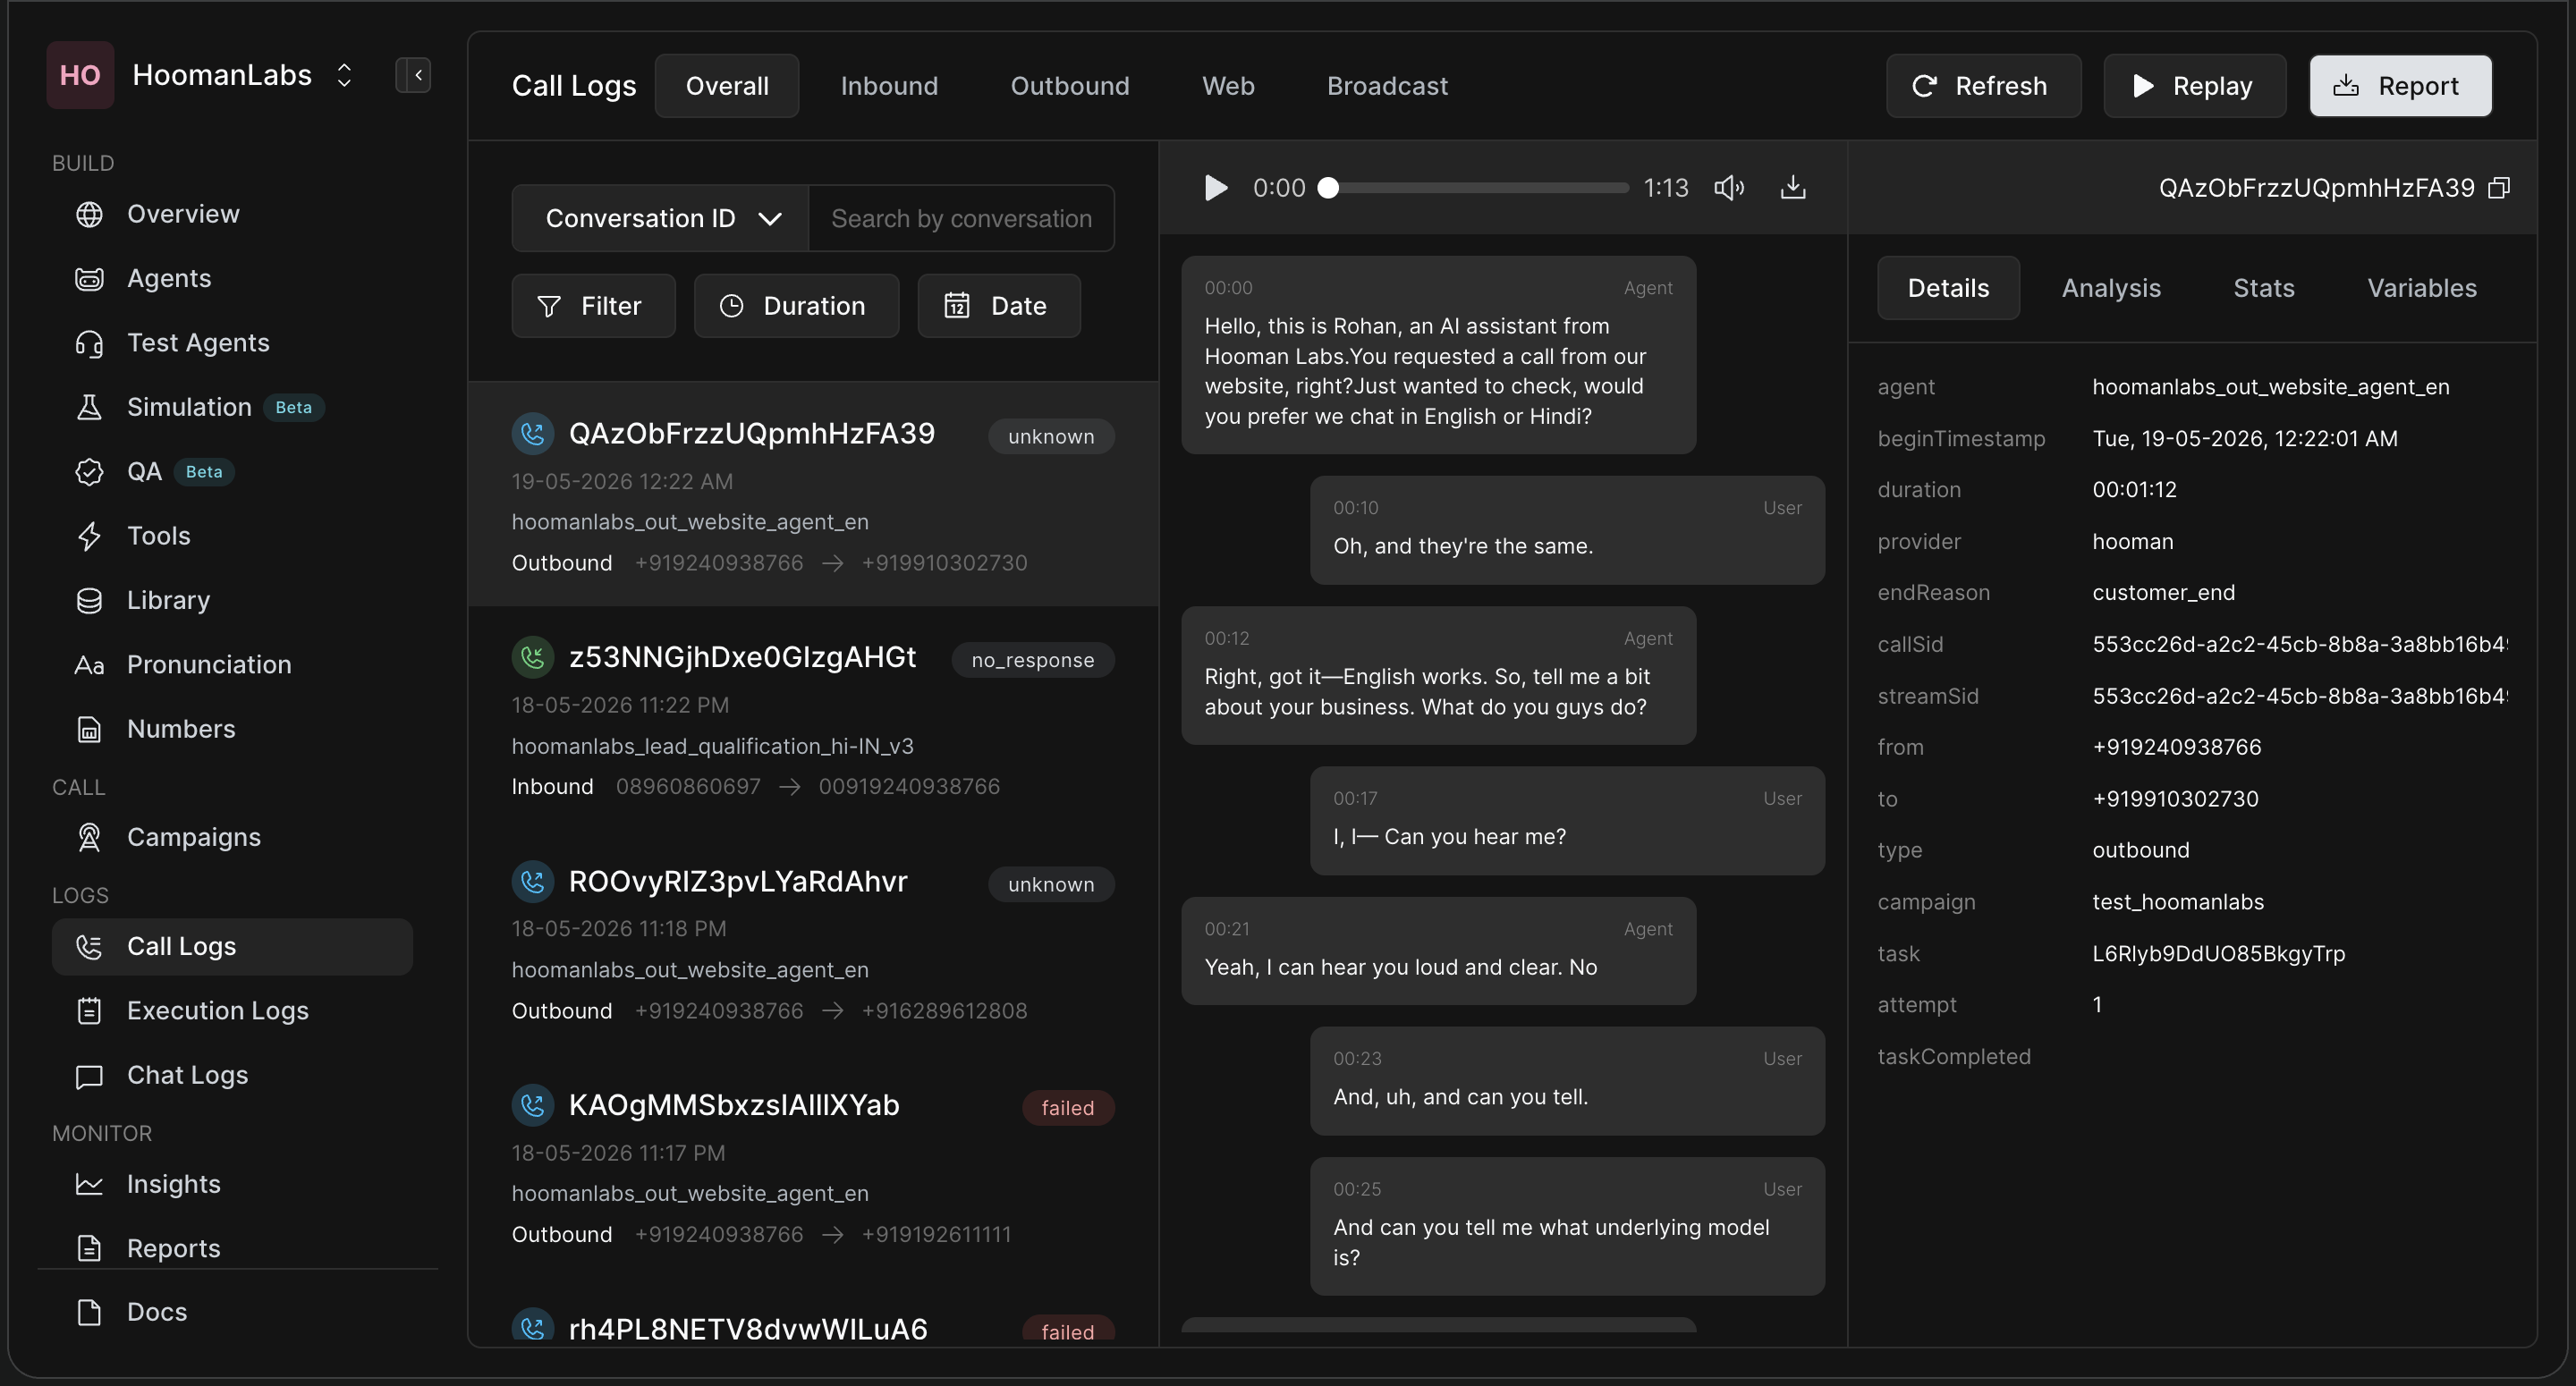
2. Conversation List (Left Panel)
On the left side, you'll see a scrollable list of all conversations for the selected category. Each card acts as a quick summary, displaying:
-
The phone number or web identity used.
-
The type of call (Inbound, Outbound, or Web).
-
The outcome or status (e.g.,
unknown,no_response,failed). -
The exact timestamp of the call.
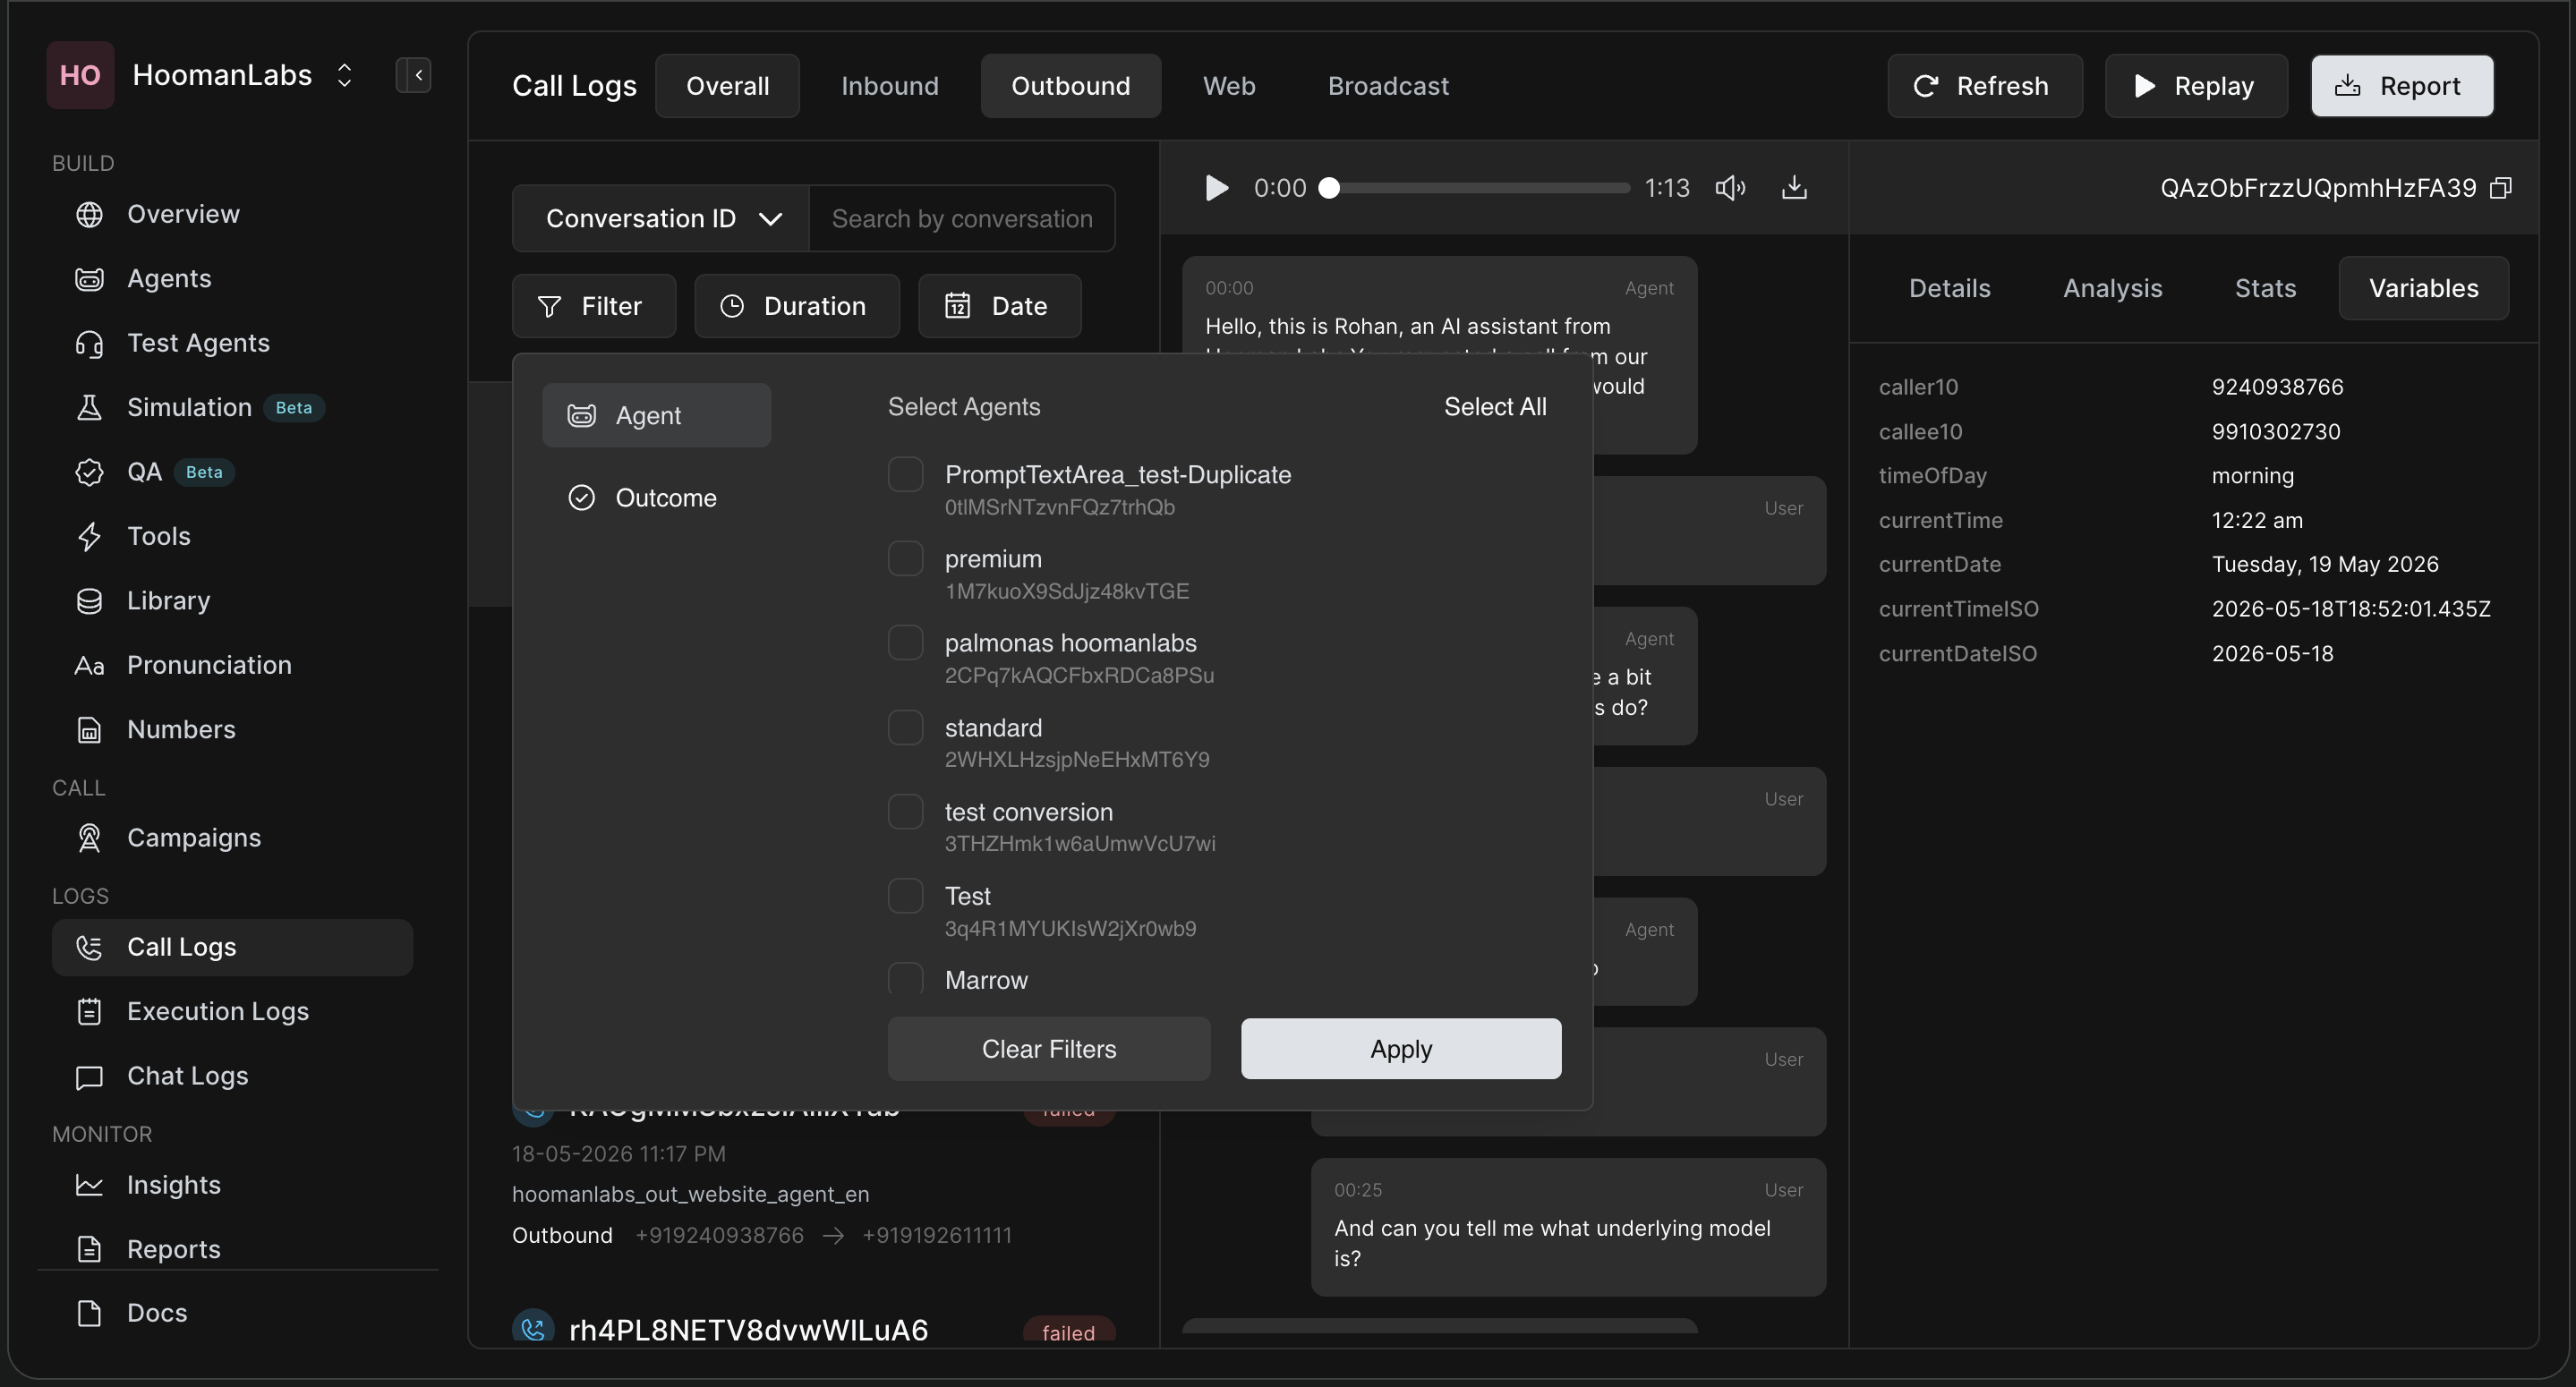
3. Searching & Filtering
You can easily track down specific conversations using the search and filter tools right above the conversation list:
-
Search Bar: Click the "Conversation ID" dropdown to change your search parameter. You can search by Conversation ID, Call SID, Task ID, To, or From numbers.
-
Filters: Use the Filter button to narrow down interactions by Agent and Outcome. You can also use the neighboring buttons to filter by Duration and Date.
Transcript & Audio Player (Center Panel)
Selecting any conversation from the list populates the center panel.
-
Audio Recording: If the call was connected and recorded, an audio player will appear at the top. You can play it directly or download the audio file.
-
Transcript: Below the player, you can read the turn-by-turn text transcript of the interaction between the Agent and the User.
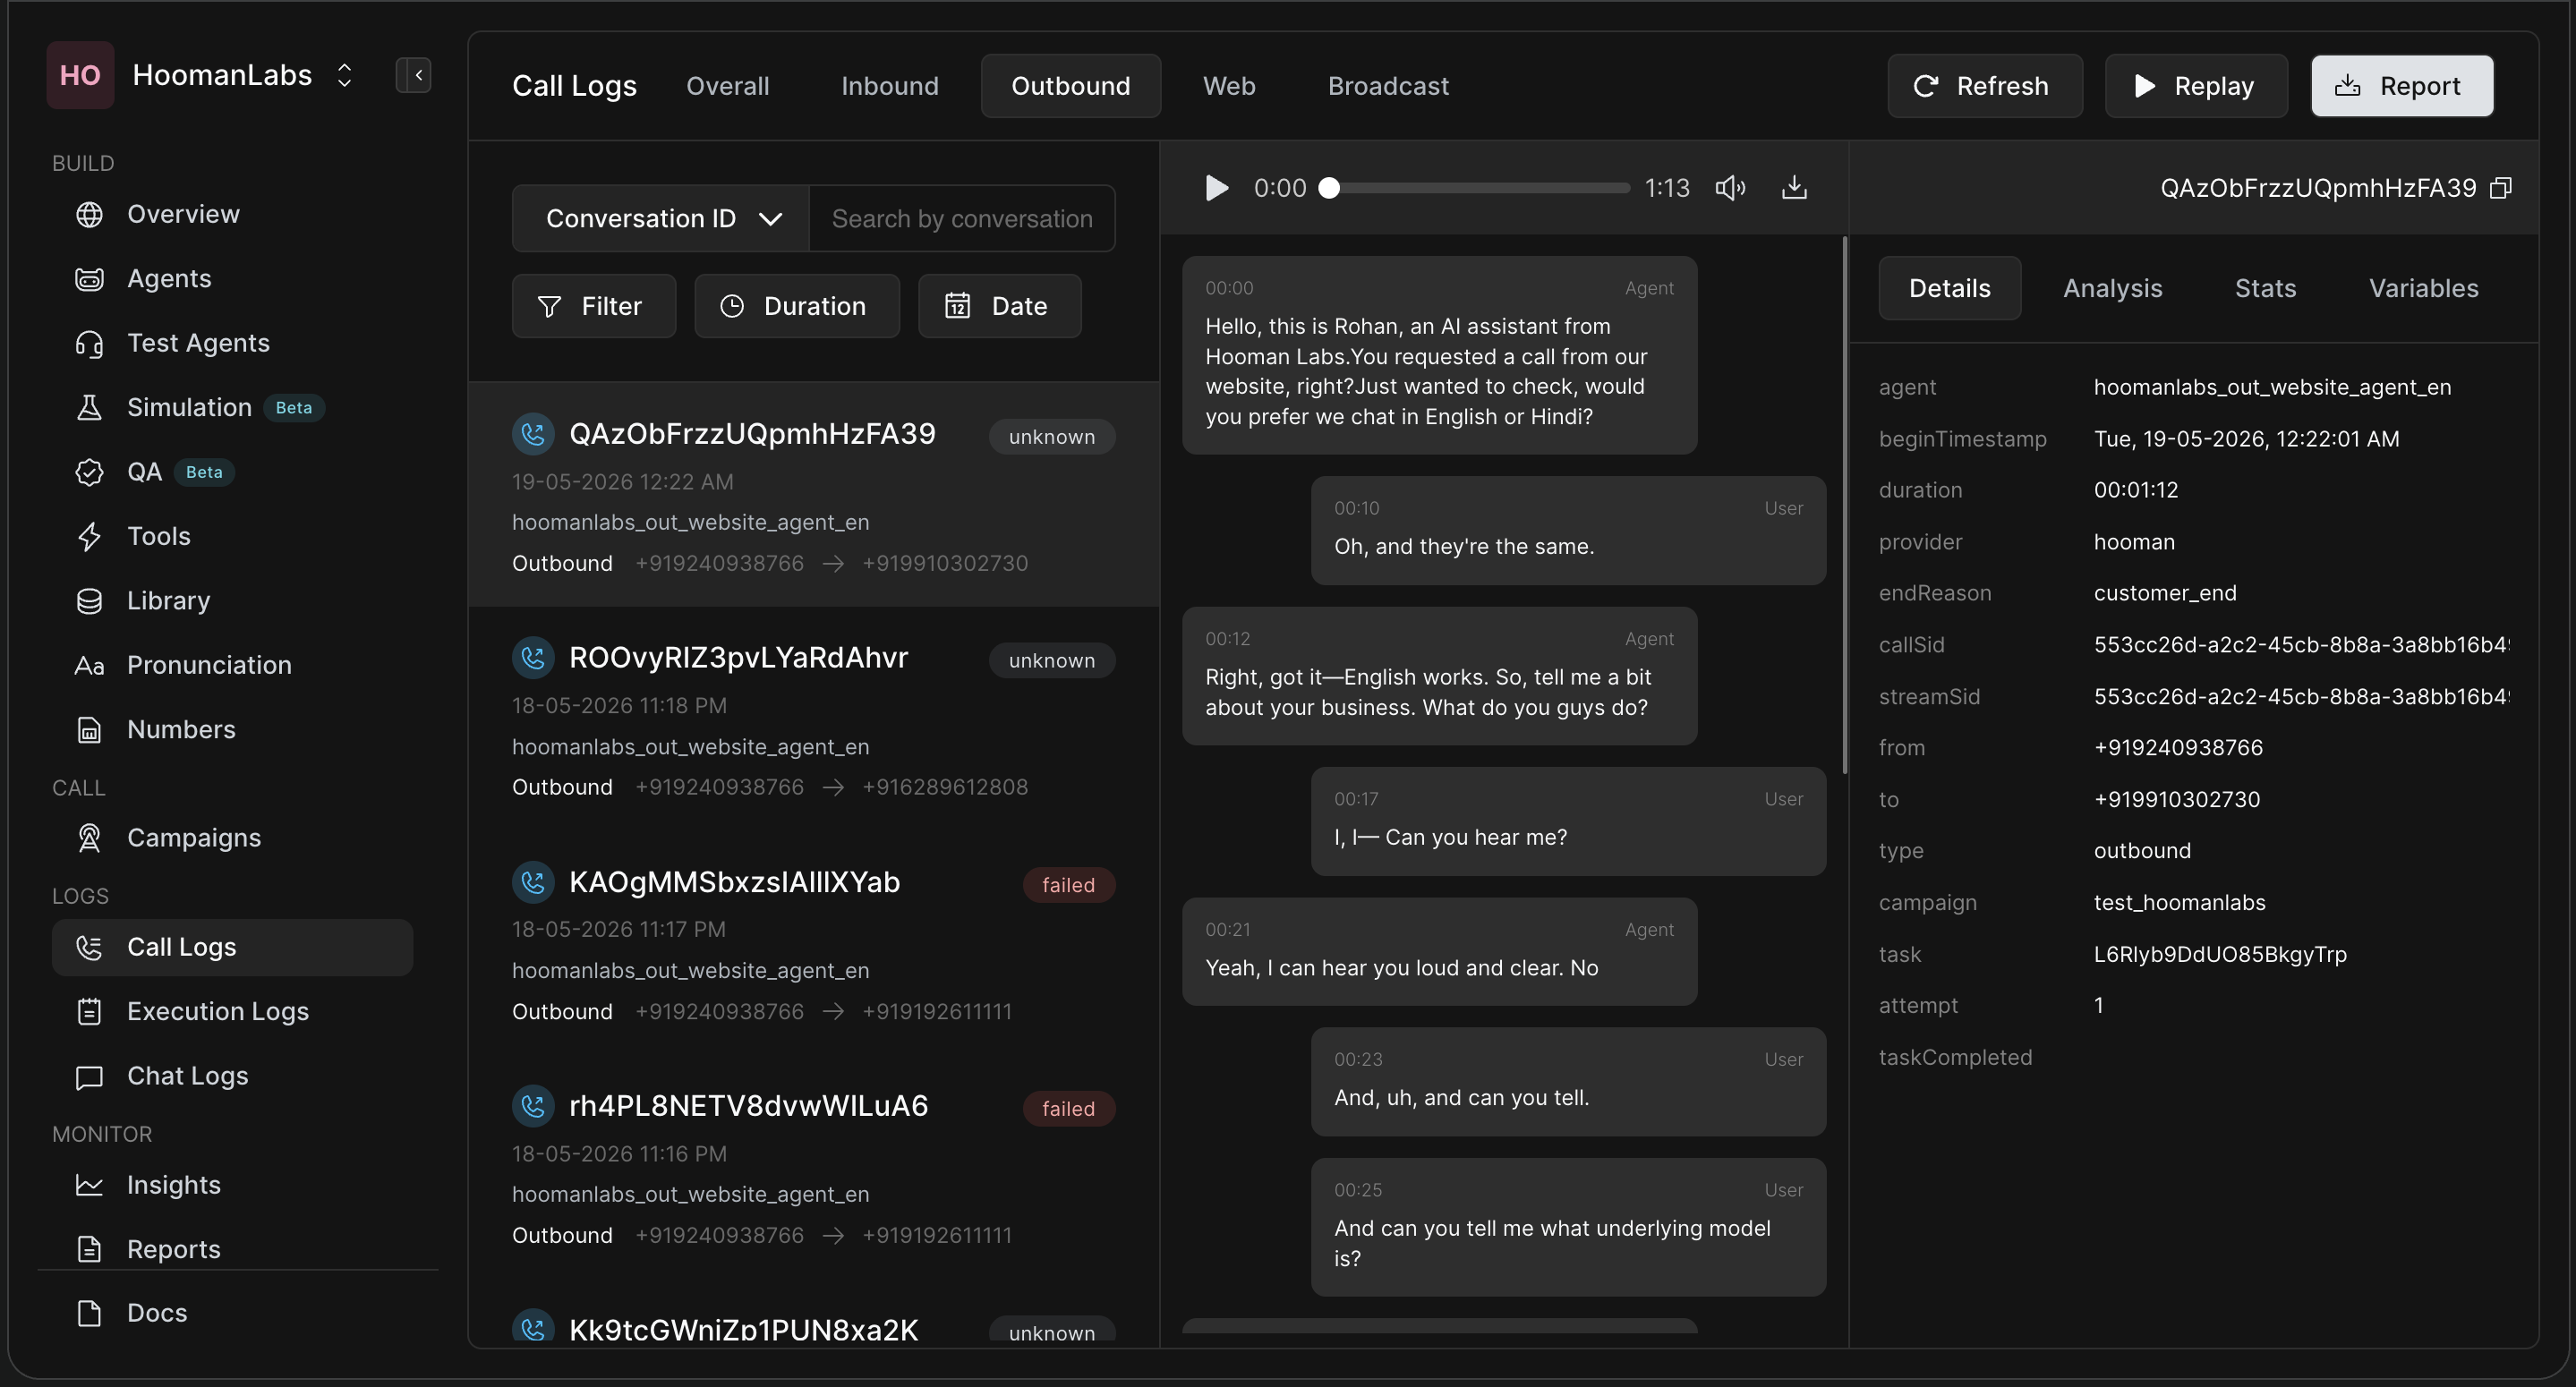
5. Detailed Analytics & Variables (Right Panel)
The right-hand panel gives you an under-the-hood look at the selected conversation, broken down into four tabs:
-
Details: Basic metadata including call duration, telephony provider, agent ID, and technical timestamps.
-
Analysis: Post-call analytics, summary, and extracted information.
You can manually update the call's outcome here and add subjective notes (e.g., "Opening could be more personalized"). This feedback trains your agent for future calls!
-
Stats: Technical statistics such as latency, number of turns, and interruptions.
-
Variables: View any context variables (like Name or Lead ID) that were passed to the agent during an outbound task.
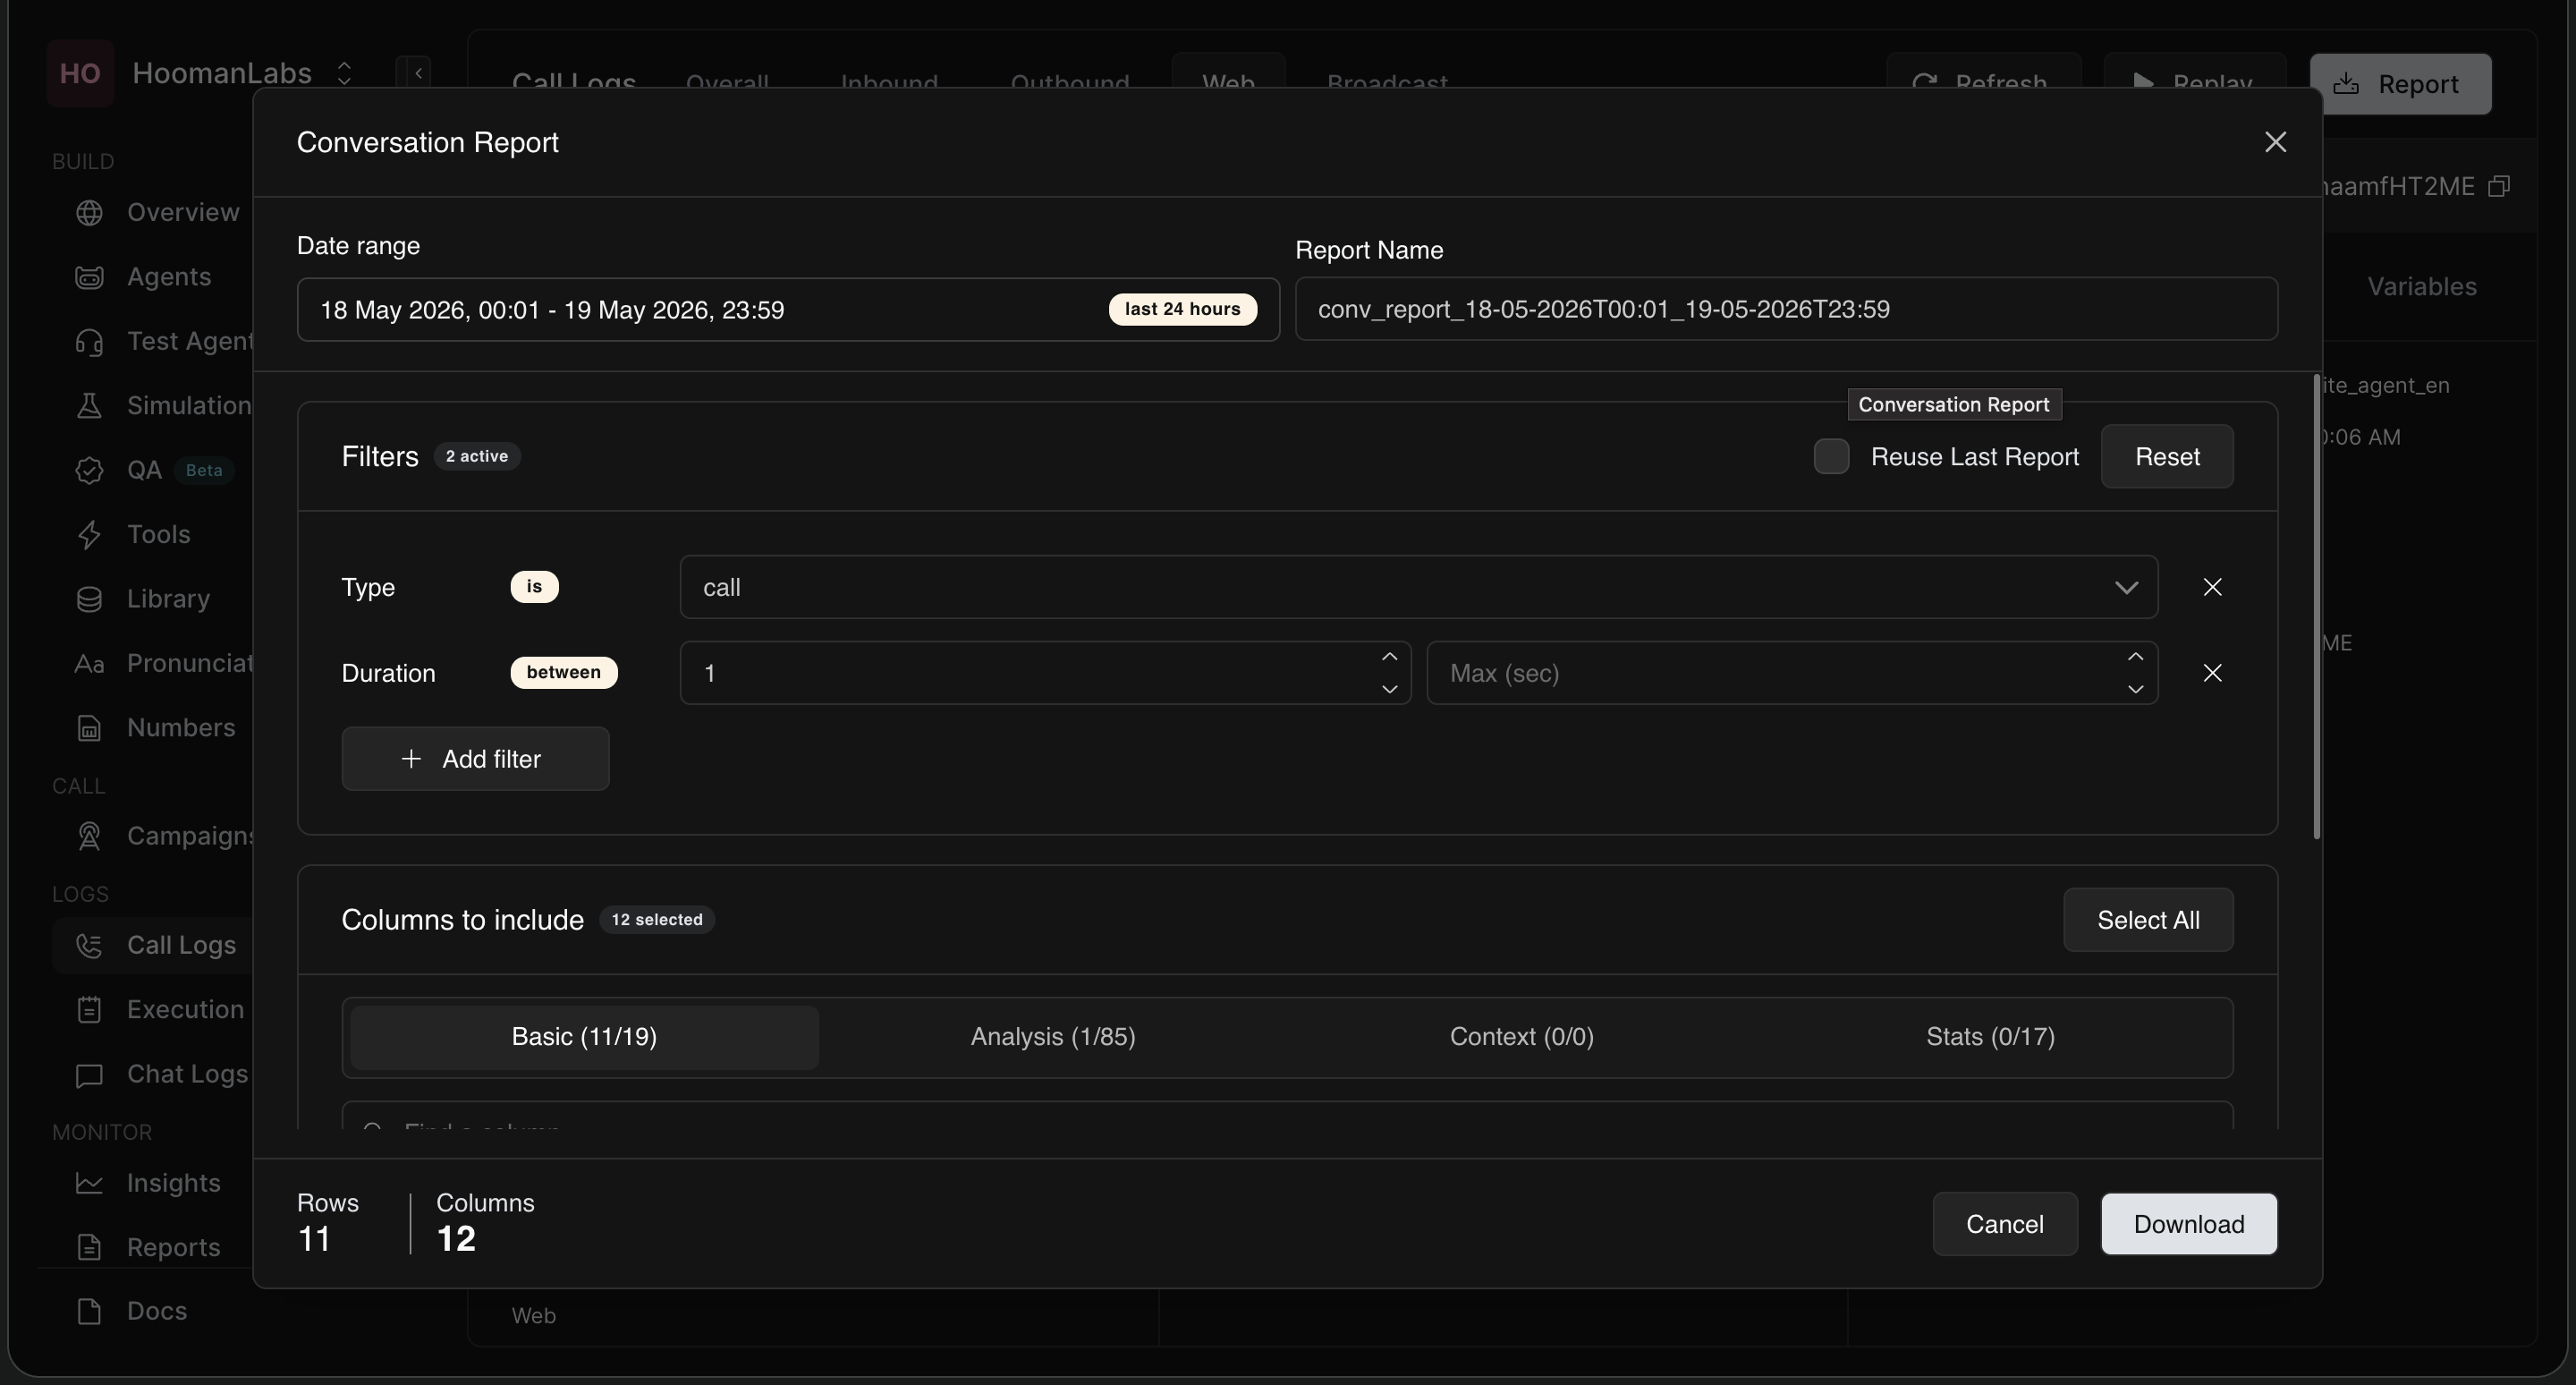
2. Customize Your Export
In the report modal, you can fine-tune exactly what goes into your CSV file:
-
Date Range & Name: Choose a specific date block and time range. You can also give your report a custom name.
-
Filters: Add specific rules, such as limiting the report to a certain "Type" (e.g., calls) or a minimum "Duration" (e.g., calls longer than 30 seconds).
-
Columns to Include: Hand-pick your data points. You can select or remove individual columns under Basic, Analysis, Context, and Stats. If you passed specific context variables to the agent (like Lead ID) and want them in the CSV, make sure to add them here.
-
Reuse Last Report: If you have a standard reporting format, simply toggle the "Reuse Last Report" switch. This automatically re-applies the filters and columns from your previous download, saving you setup time.
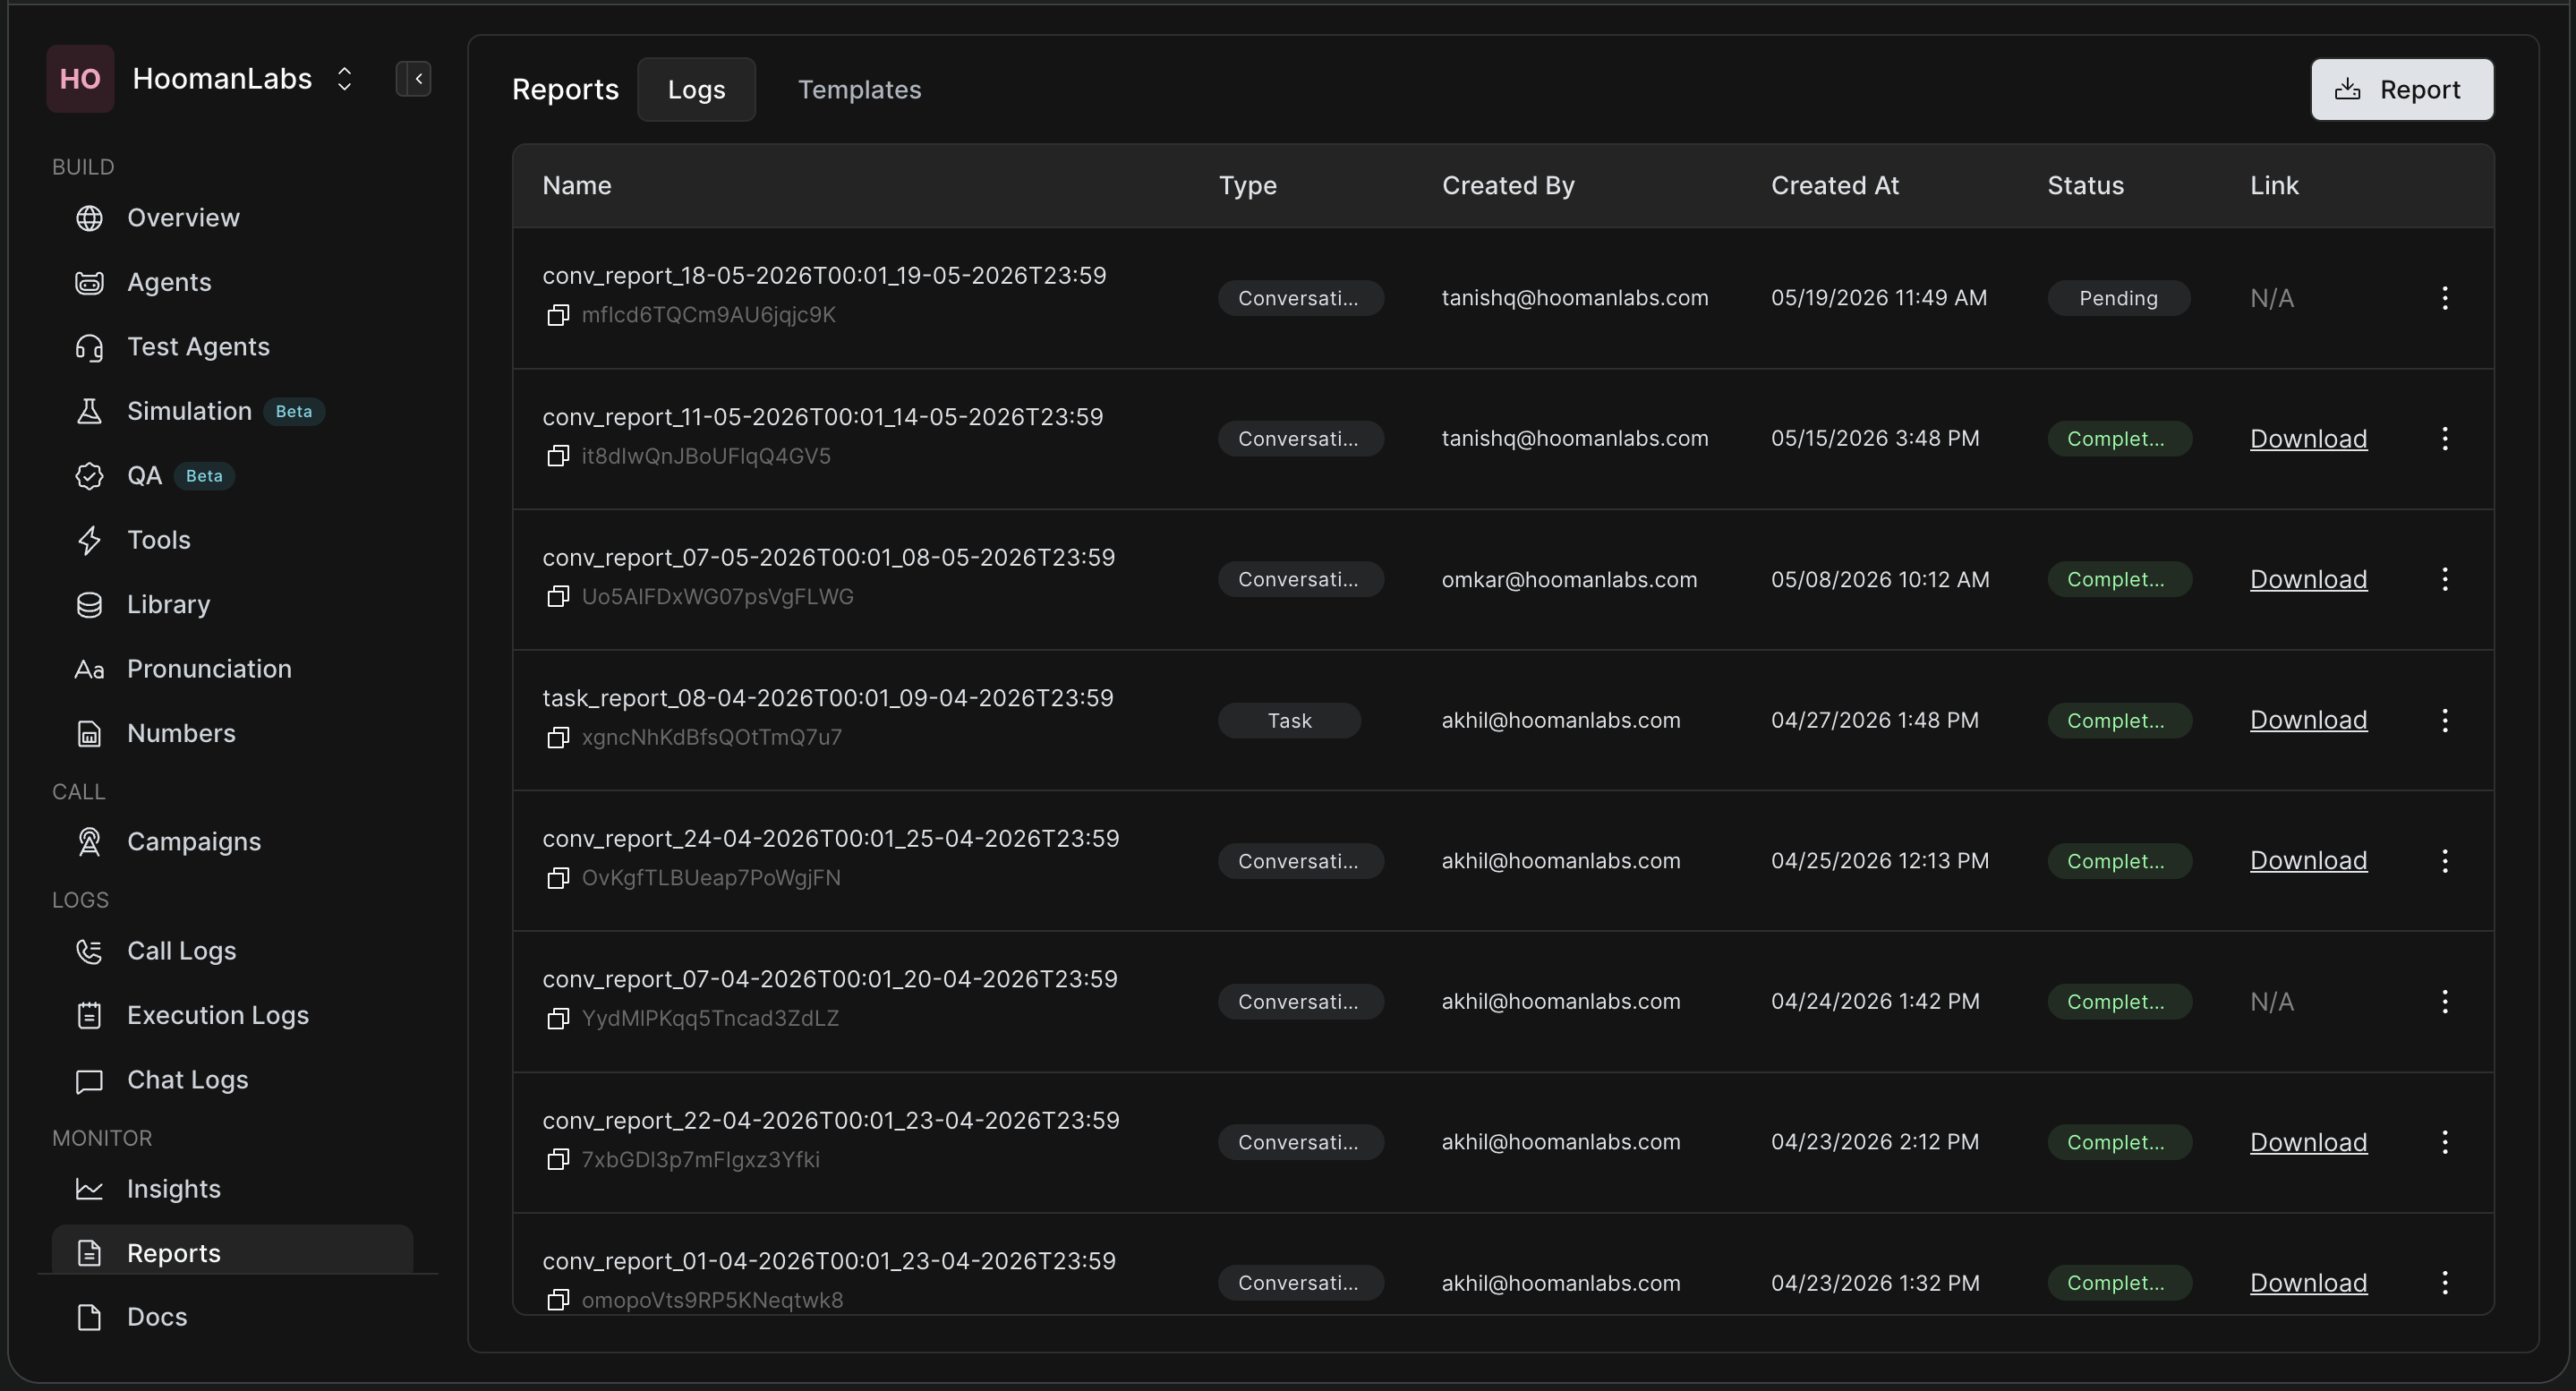
3. Download & Manage Reports
Once you hit Download, your report is added to the queue and will be sent to your email. You will also be instantly redirected to the Reports page under the Monitor section.
From the Reports page, you can:
-
Check the real-time Status of your reports (Pending vs. Completed).
-
Use the Download link to retrieve your generated CSVs.
-
Click the three dots next to any older report to duplicate it. This is a great way to use a past format while simply updating the date range.