Tata Telephony
How to Connect a Tata Telephony Account
Phase 1: Initial Setup in the Application
-
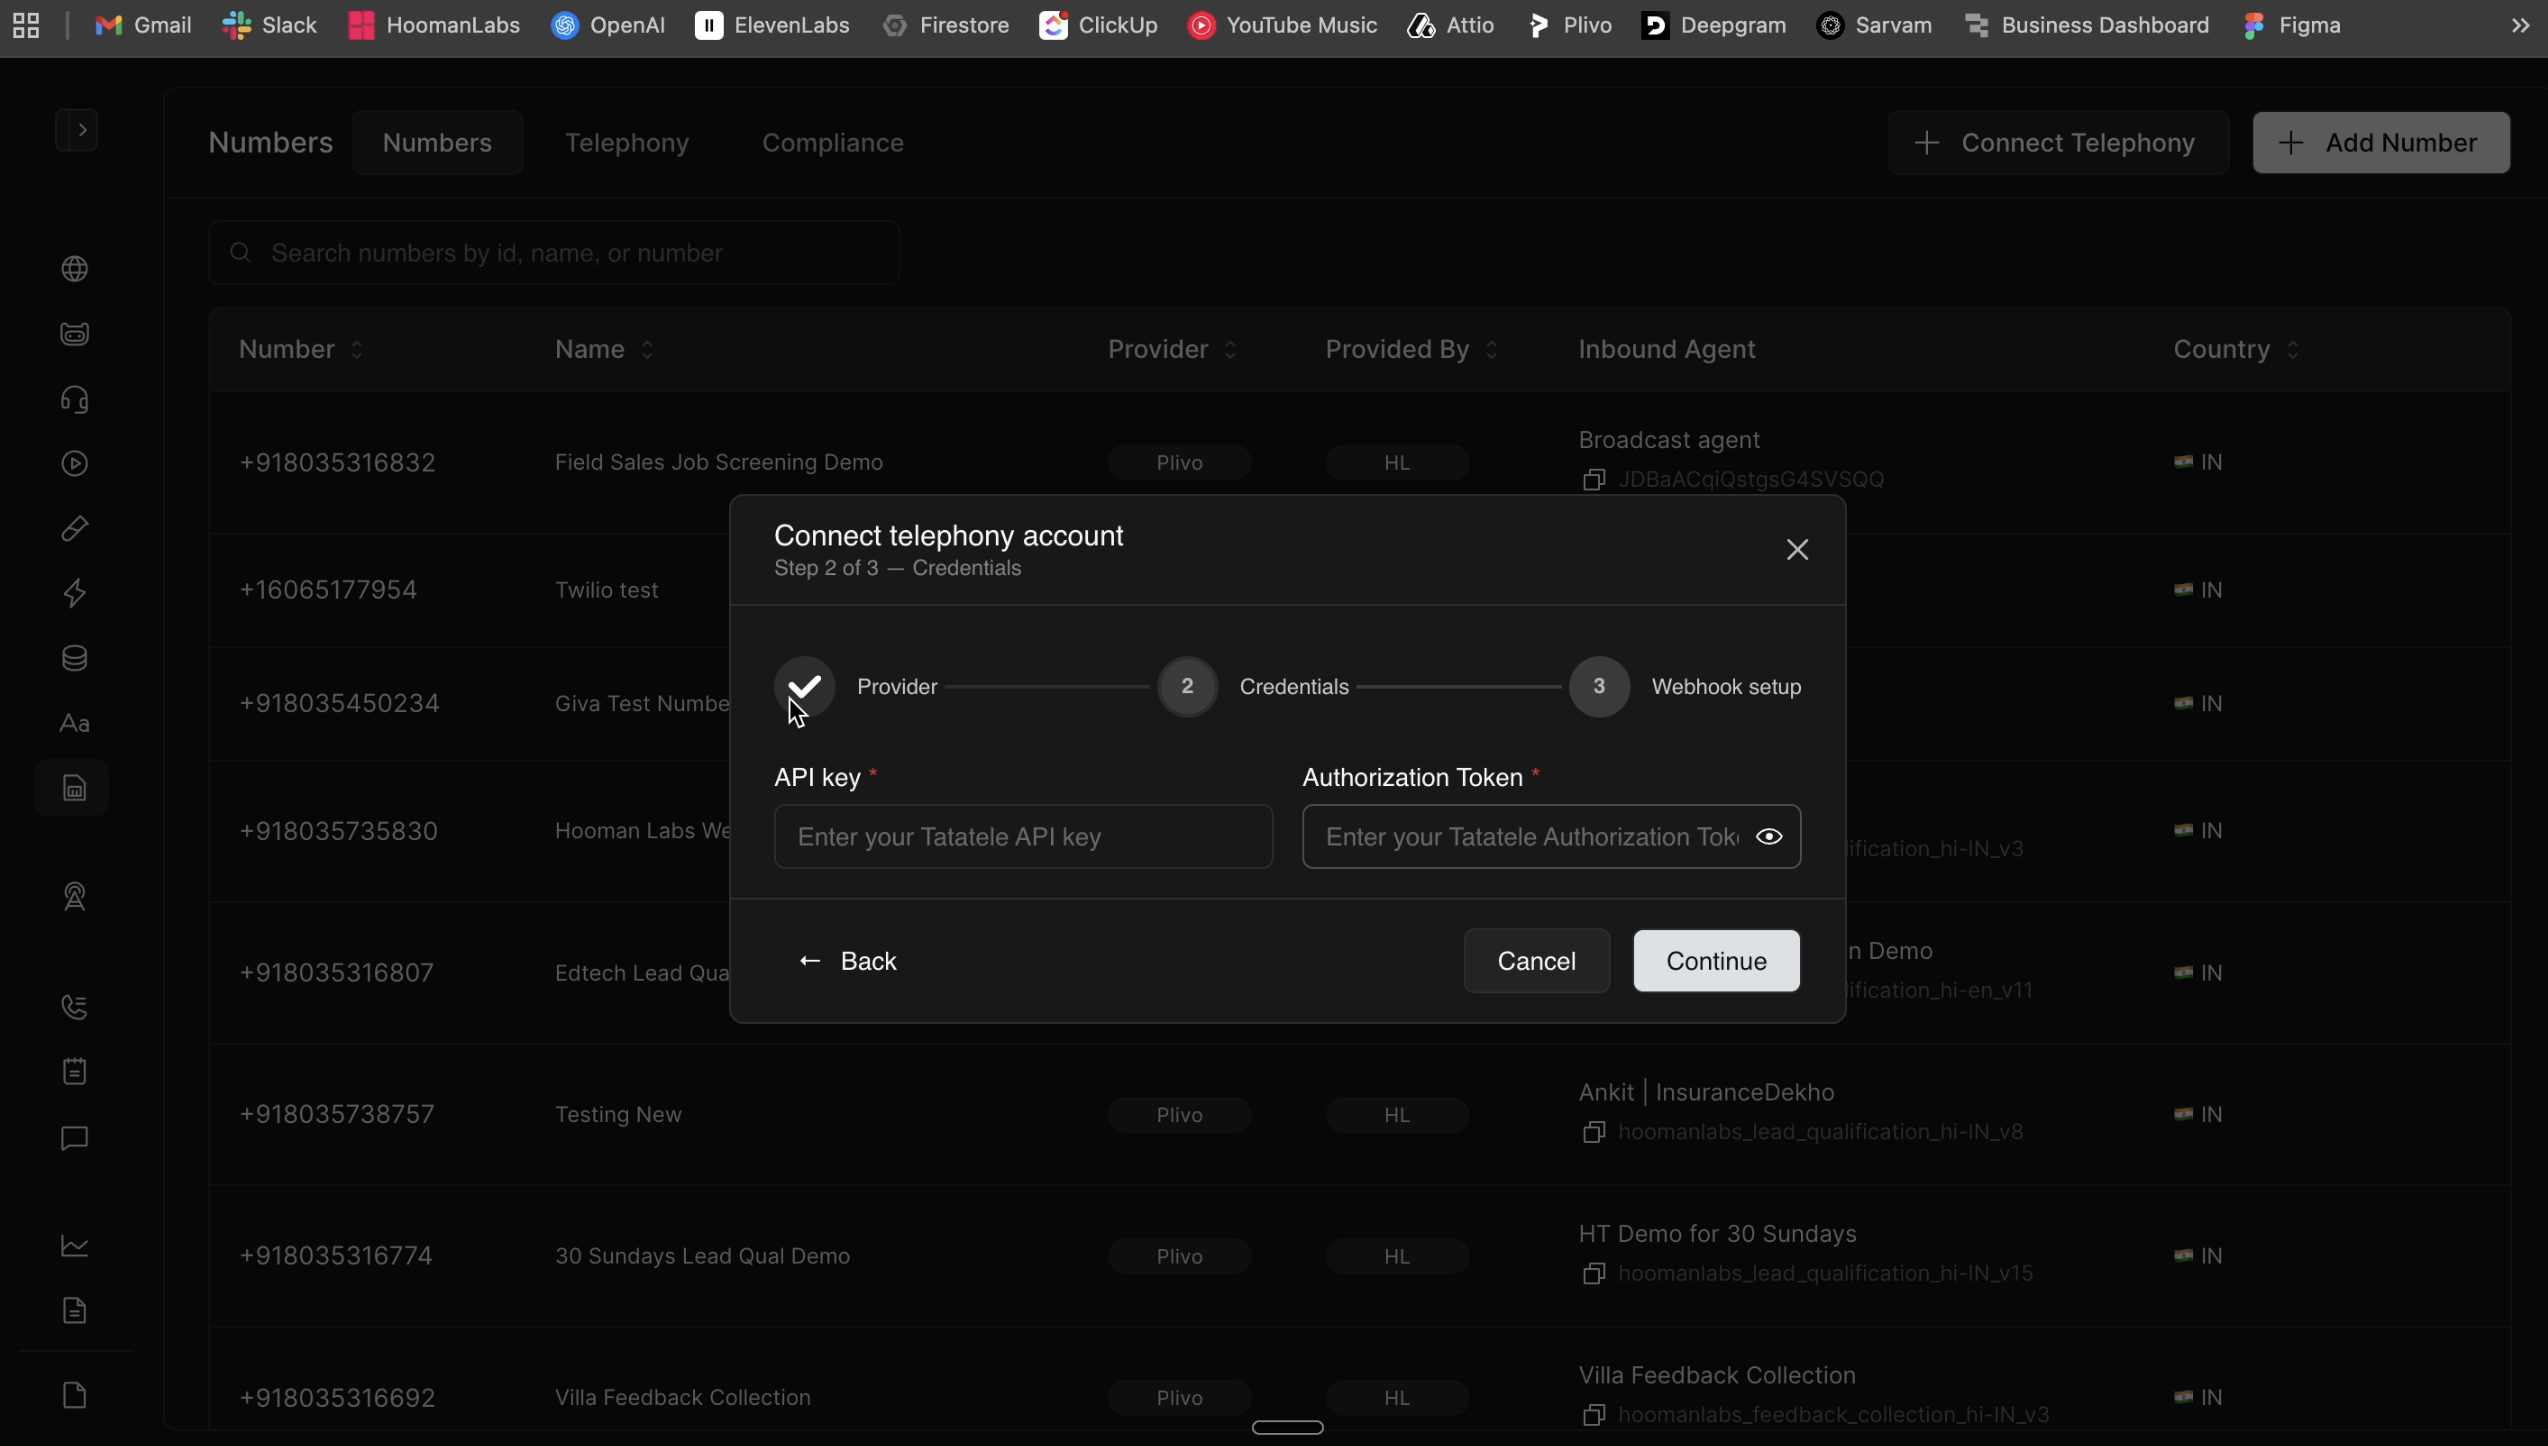
Open the Connect telephony account modal in your workspace.
-
Select Tatatale from the Provider dropdown.
-
Enter an Account name (e.g., "Test TT") and click Continue.
-
Keep this window open; you will need to paste the API Key and Authorization Token here shortly.
Phase 2: Generate the Authorization Token
-
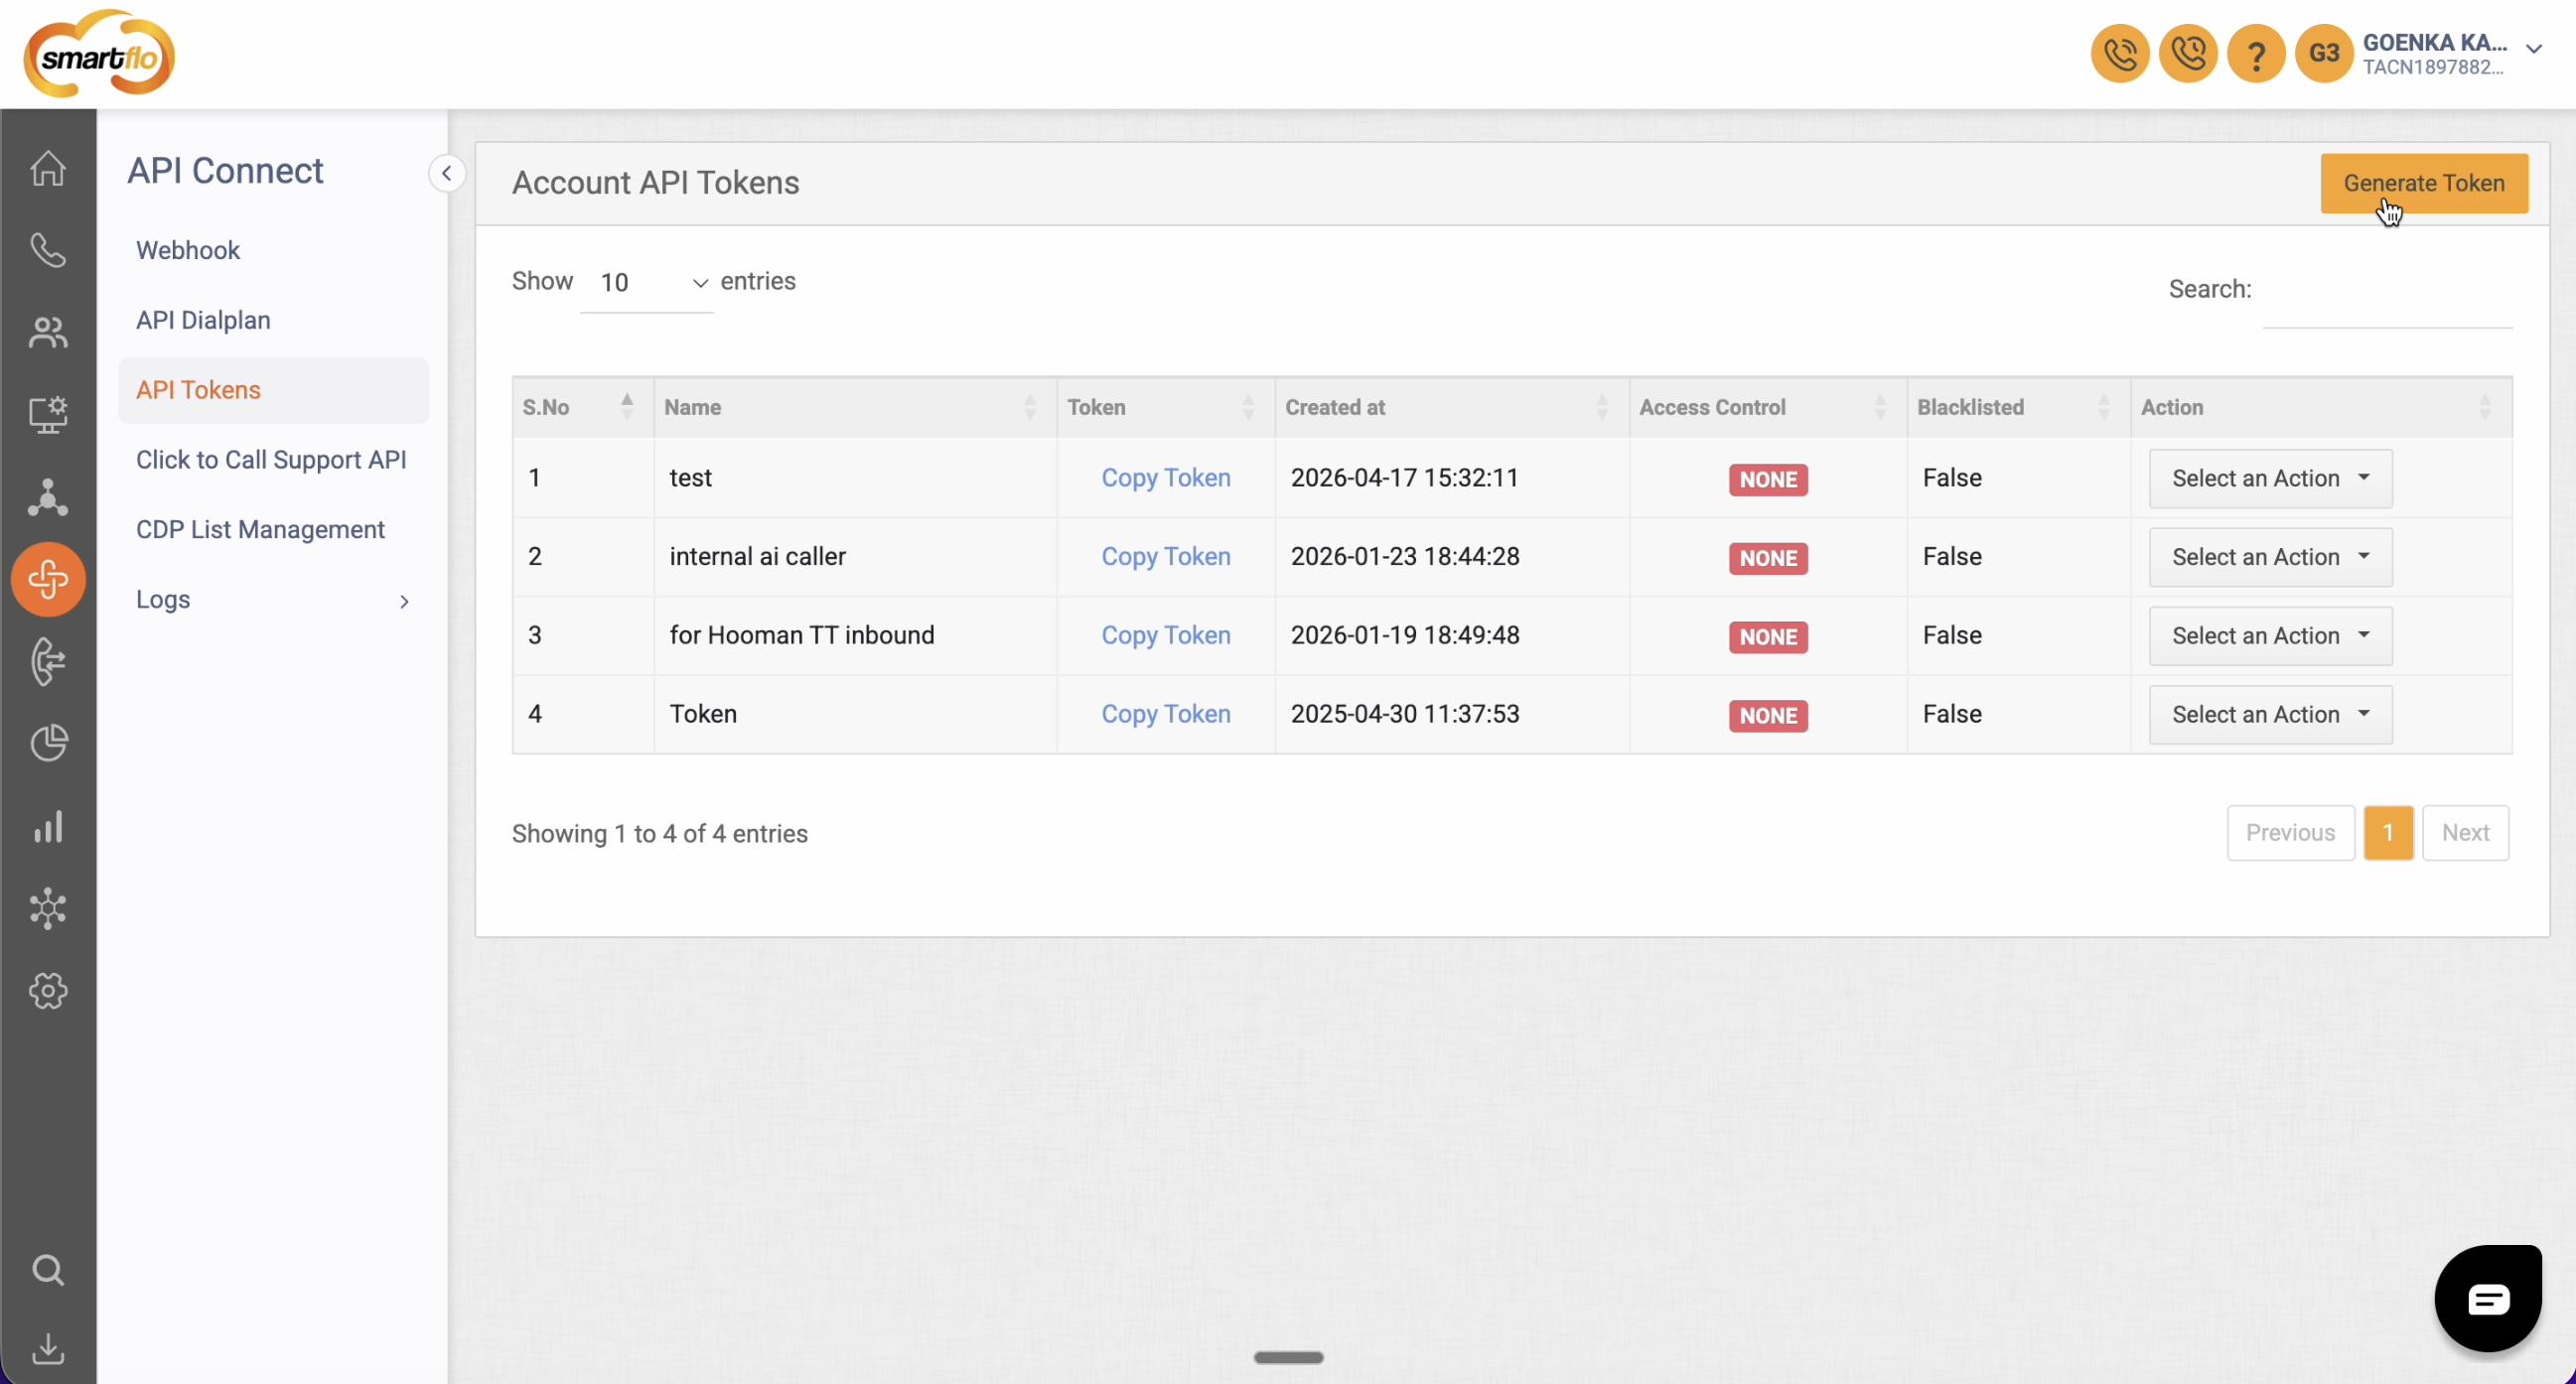
Log in to the Tata Tele Business Services (Smartflo) portal.
-
Navigate to Settings > API Connect > API Tokens.
-
Click the Generate Token button in the top right.
-
Copy the newly generated token. This will serve as your Authorization Token in the application.
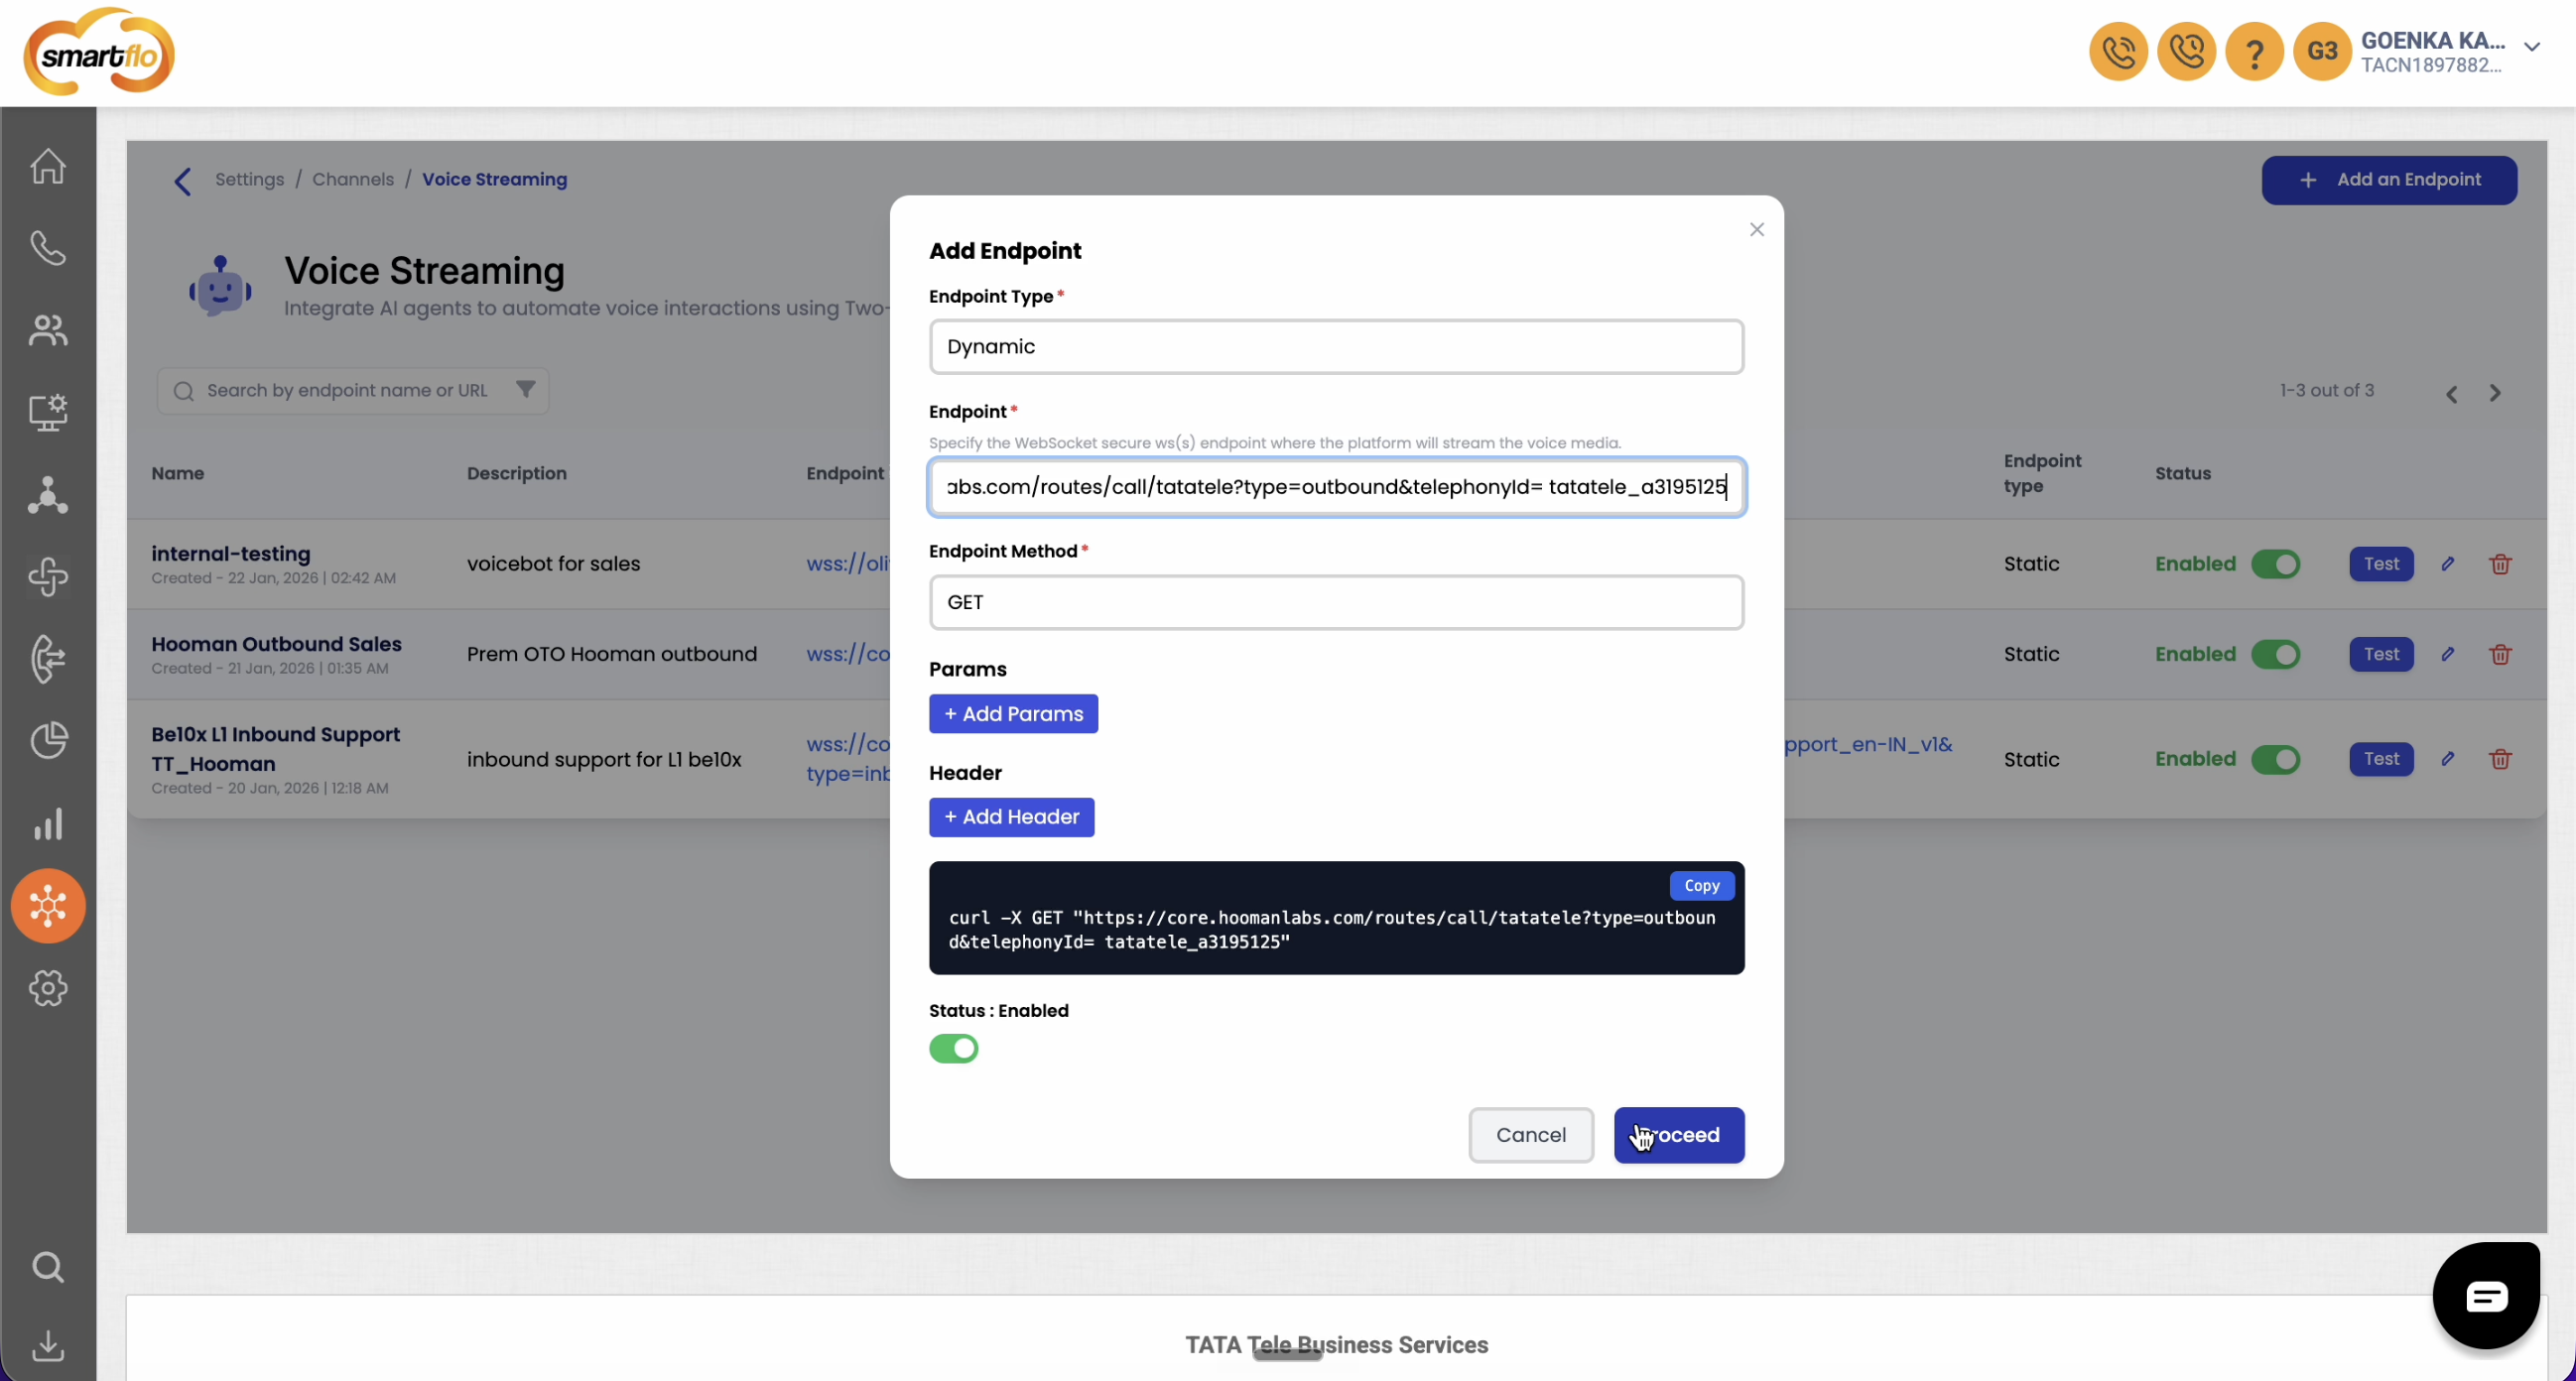
Phase 3: Create a Voice Streaming Endpoint Before generating your API Key, you must establish where the calls will route.
-
In the Tata portal, navigate to Settings > Channels > Voice Streaming > Voice Bot.
-
Click Add an Endpoint.
-
Enter an Endpoint name and Description.
-
Set the Endpoint Type to Dynamic and the Endpoint Method to GET.
-
Switch back to your application's setup window and copy the Outbound Voice URL.
-
Paste this URL into the Tata portal's endpoint URL field. Important: Be sure to replace the telephony ID placeholder in the URL with your actual Telephony ID from your numbers list.
-
Click Proceed to save.
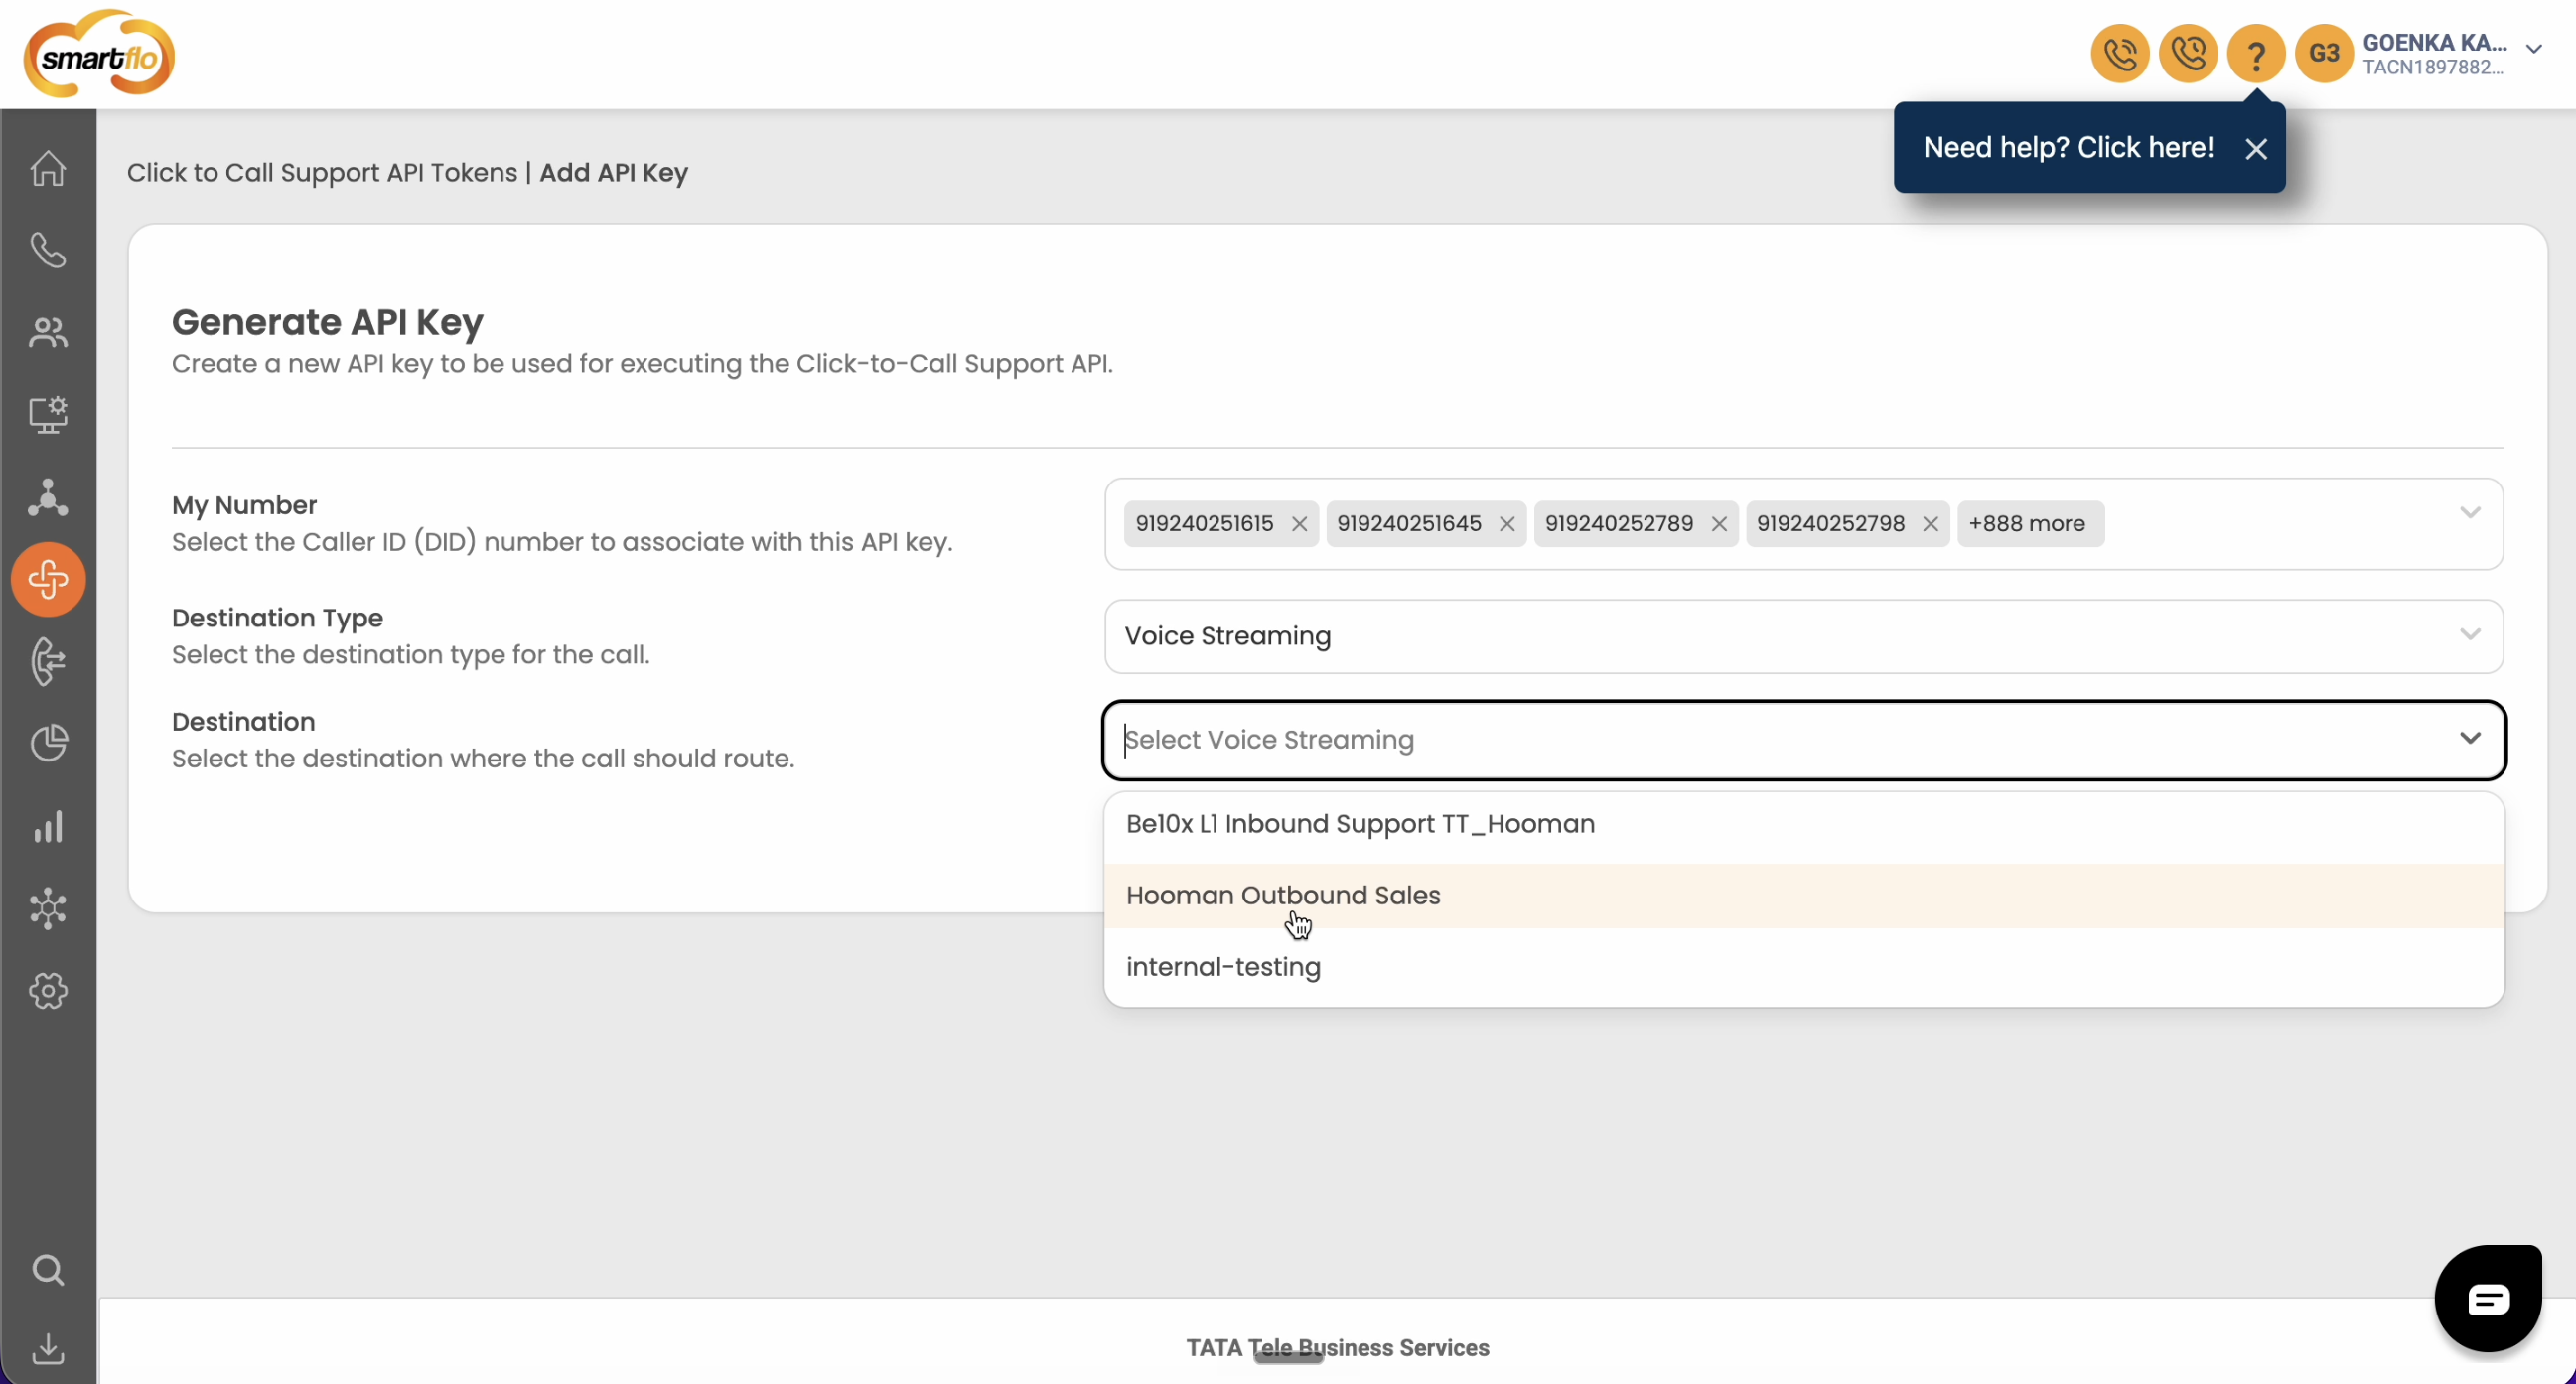
Phase 4: Generate the API Key
-
In the Tata portal, navigate to Settings > API Connect > Click to Call Support API.
-
Click Generate API Key.
-
Select the specific phone numbers you want to associate with this API key for outbound calling.
-
Set the Destination Type to Voice Streaming.
-
Set the Destination to the endpoint you created in Phase 3.
-
Click Submit. Copy this generated key—this is your API Key.
If you add new number in the future, you must return to this page, edit the API key
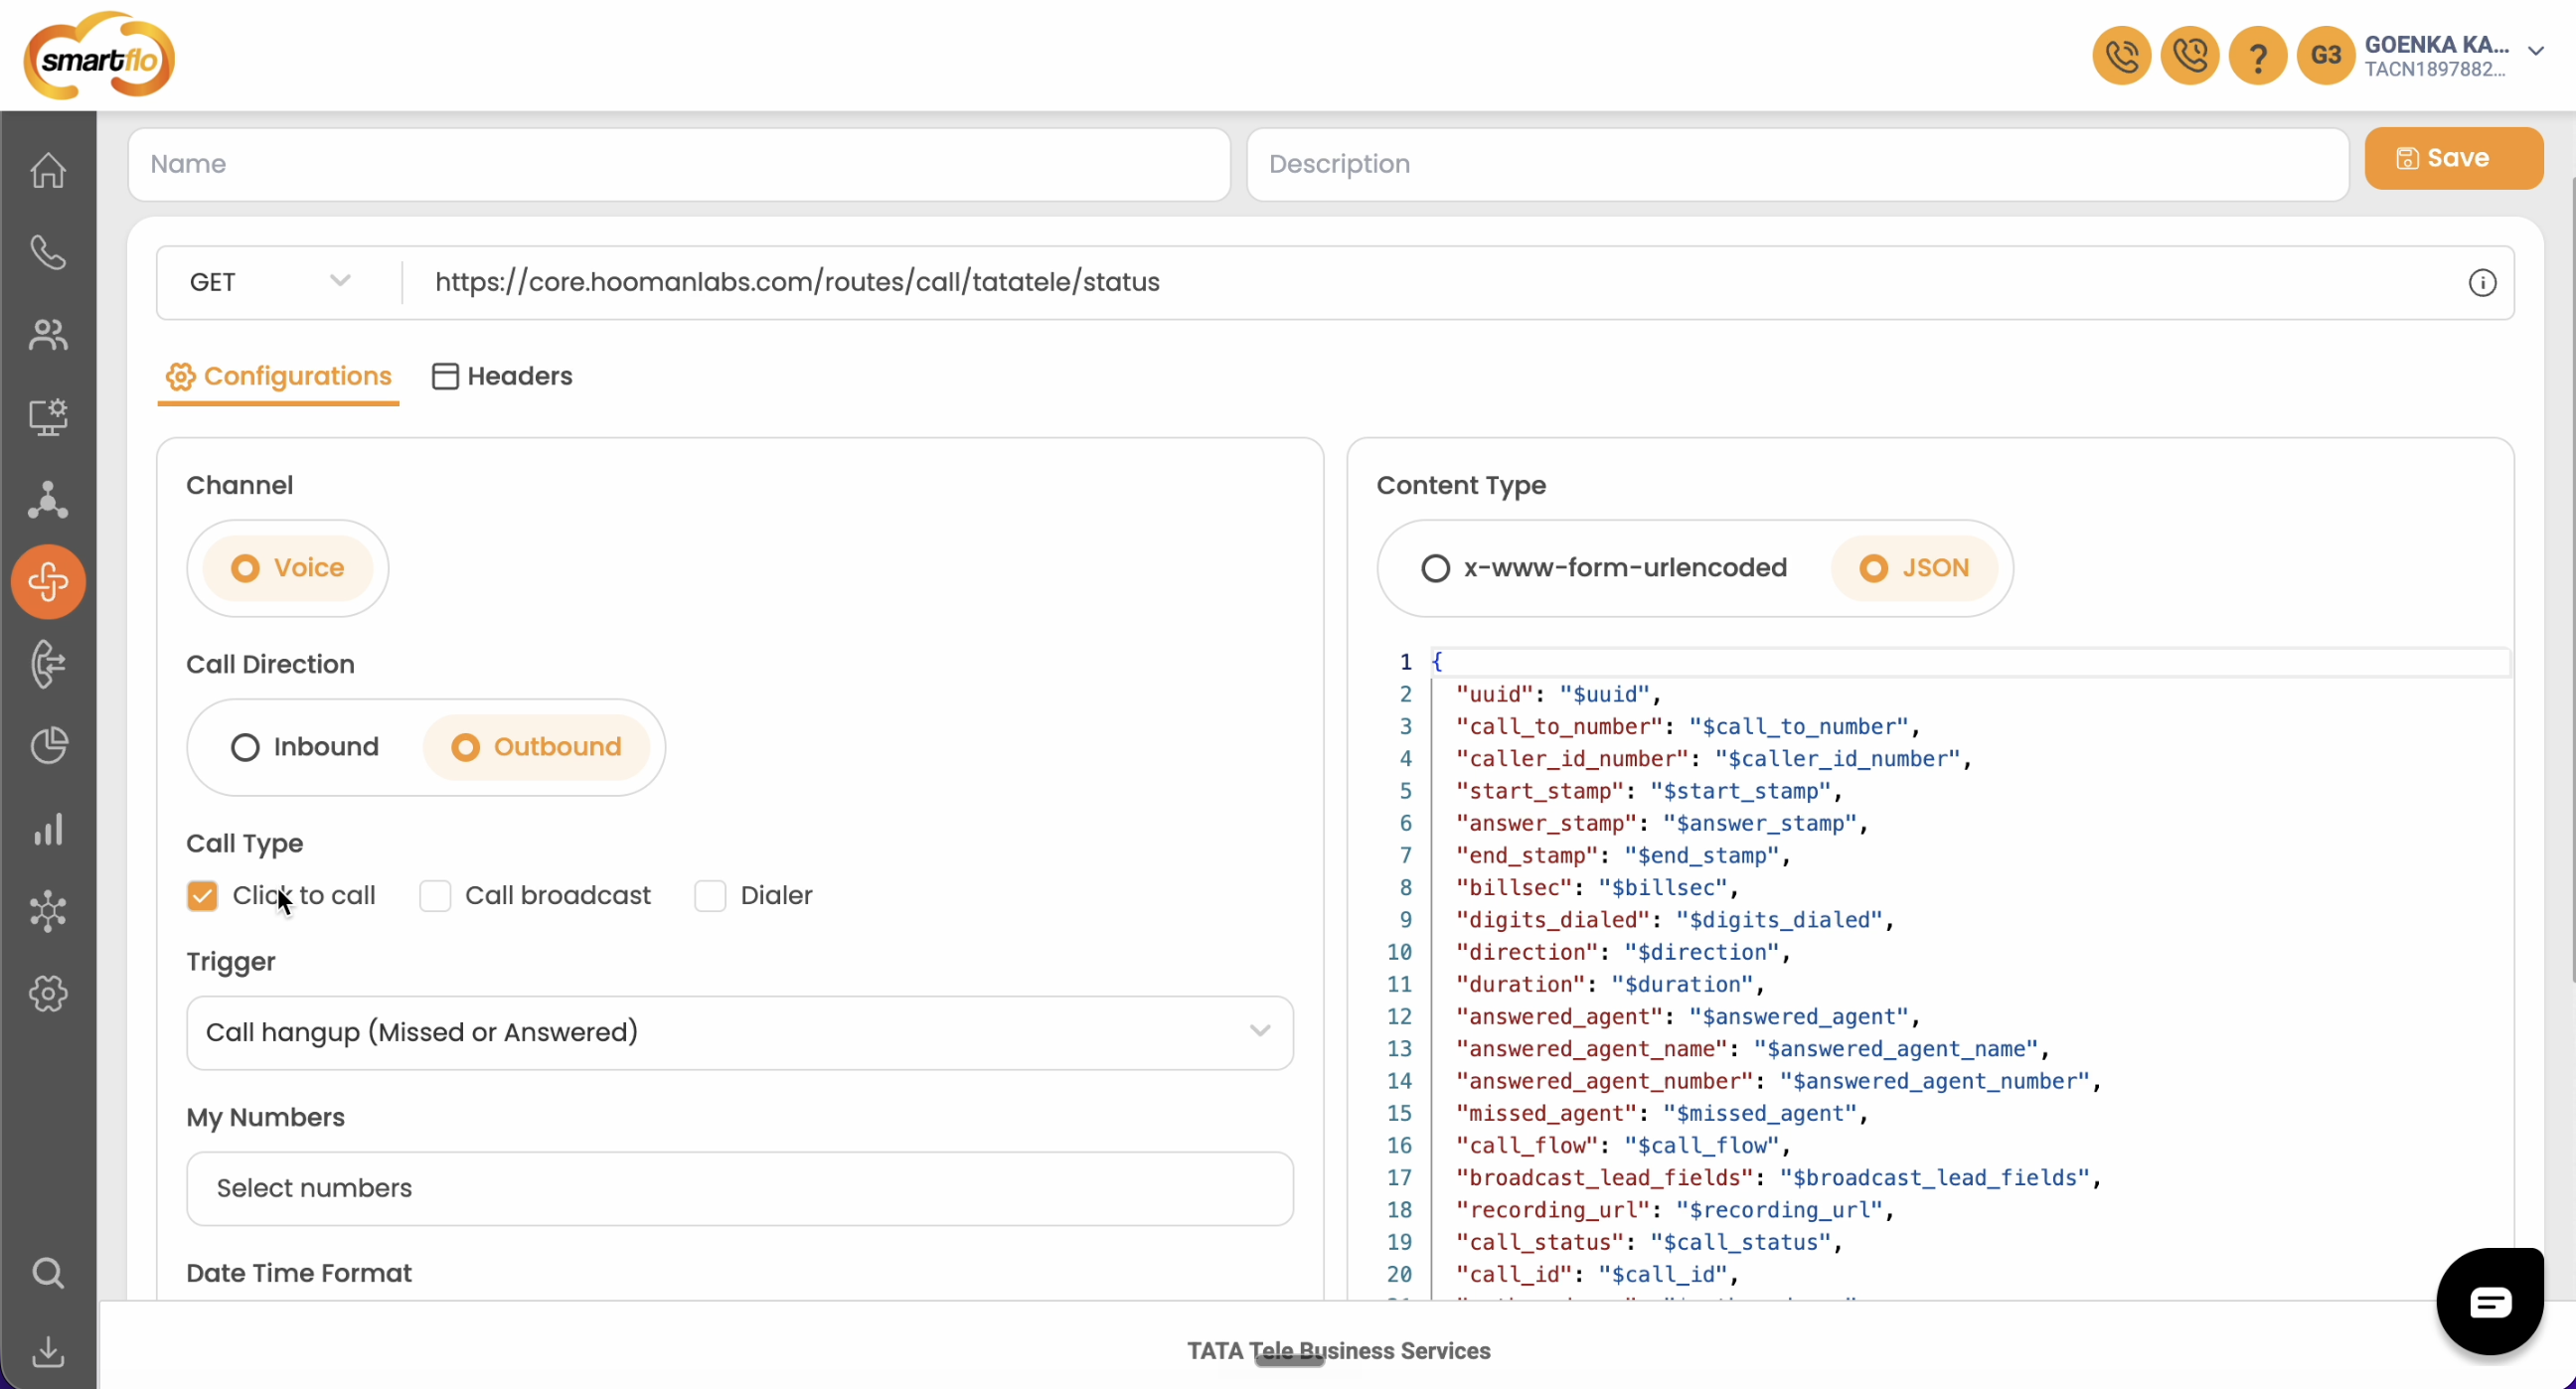
Phase 5: Configure Webhooks for Status Routing Finally, you need to set up webhooks so the system knows the status of calls (e.g., answered, missed).
-
In the application setup window, copy the Status URL.
-
In the Tata portal, navigate to Settings > API Connect > Webhook and click Add Webhook.
-
Paste the Status URL, ensure the method is GET, and name the webhook.
-
Create the Inbound Webhook: Under Call Direction, select Inbound. Set the Trigger to Call hangup (Missed or Answered). Select the relevant numbers and click Save.
-
Create the Outbound Webhook: Click Add Webhook again. Under Call Direction, select Outbound. Set Call Type to Click to call. Set the Trigger to Call hangup (Missed or Answered). Select the relevant numbers and click Save.