Call Transfer
Set up seamless call transfer capabilities to route callers to human agents when AI assistance isn't sufficient. This section explains how to configure live call handoffs so your voice agent can transfer the conversation smoothly based on intent, user requests, or business logic.
1. Enabling Call Transfer
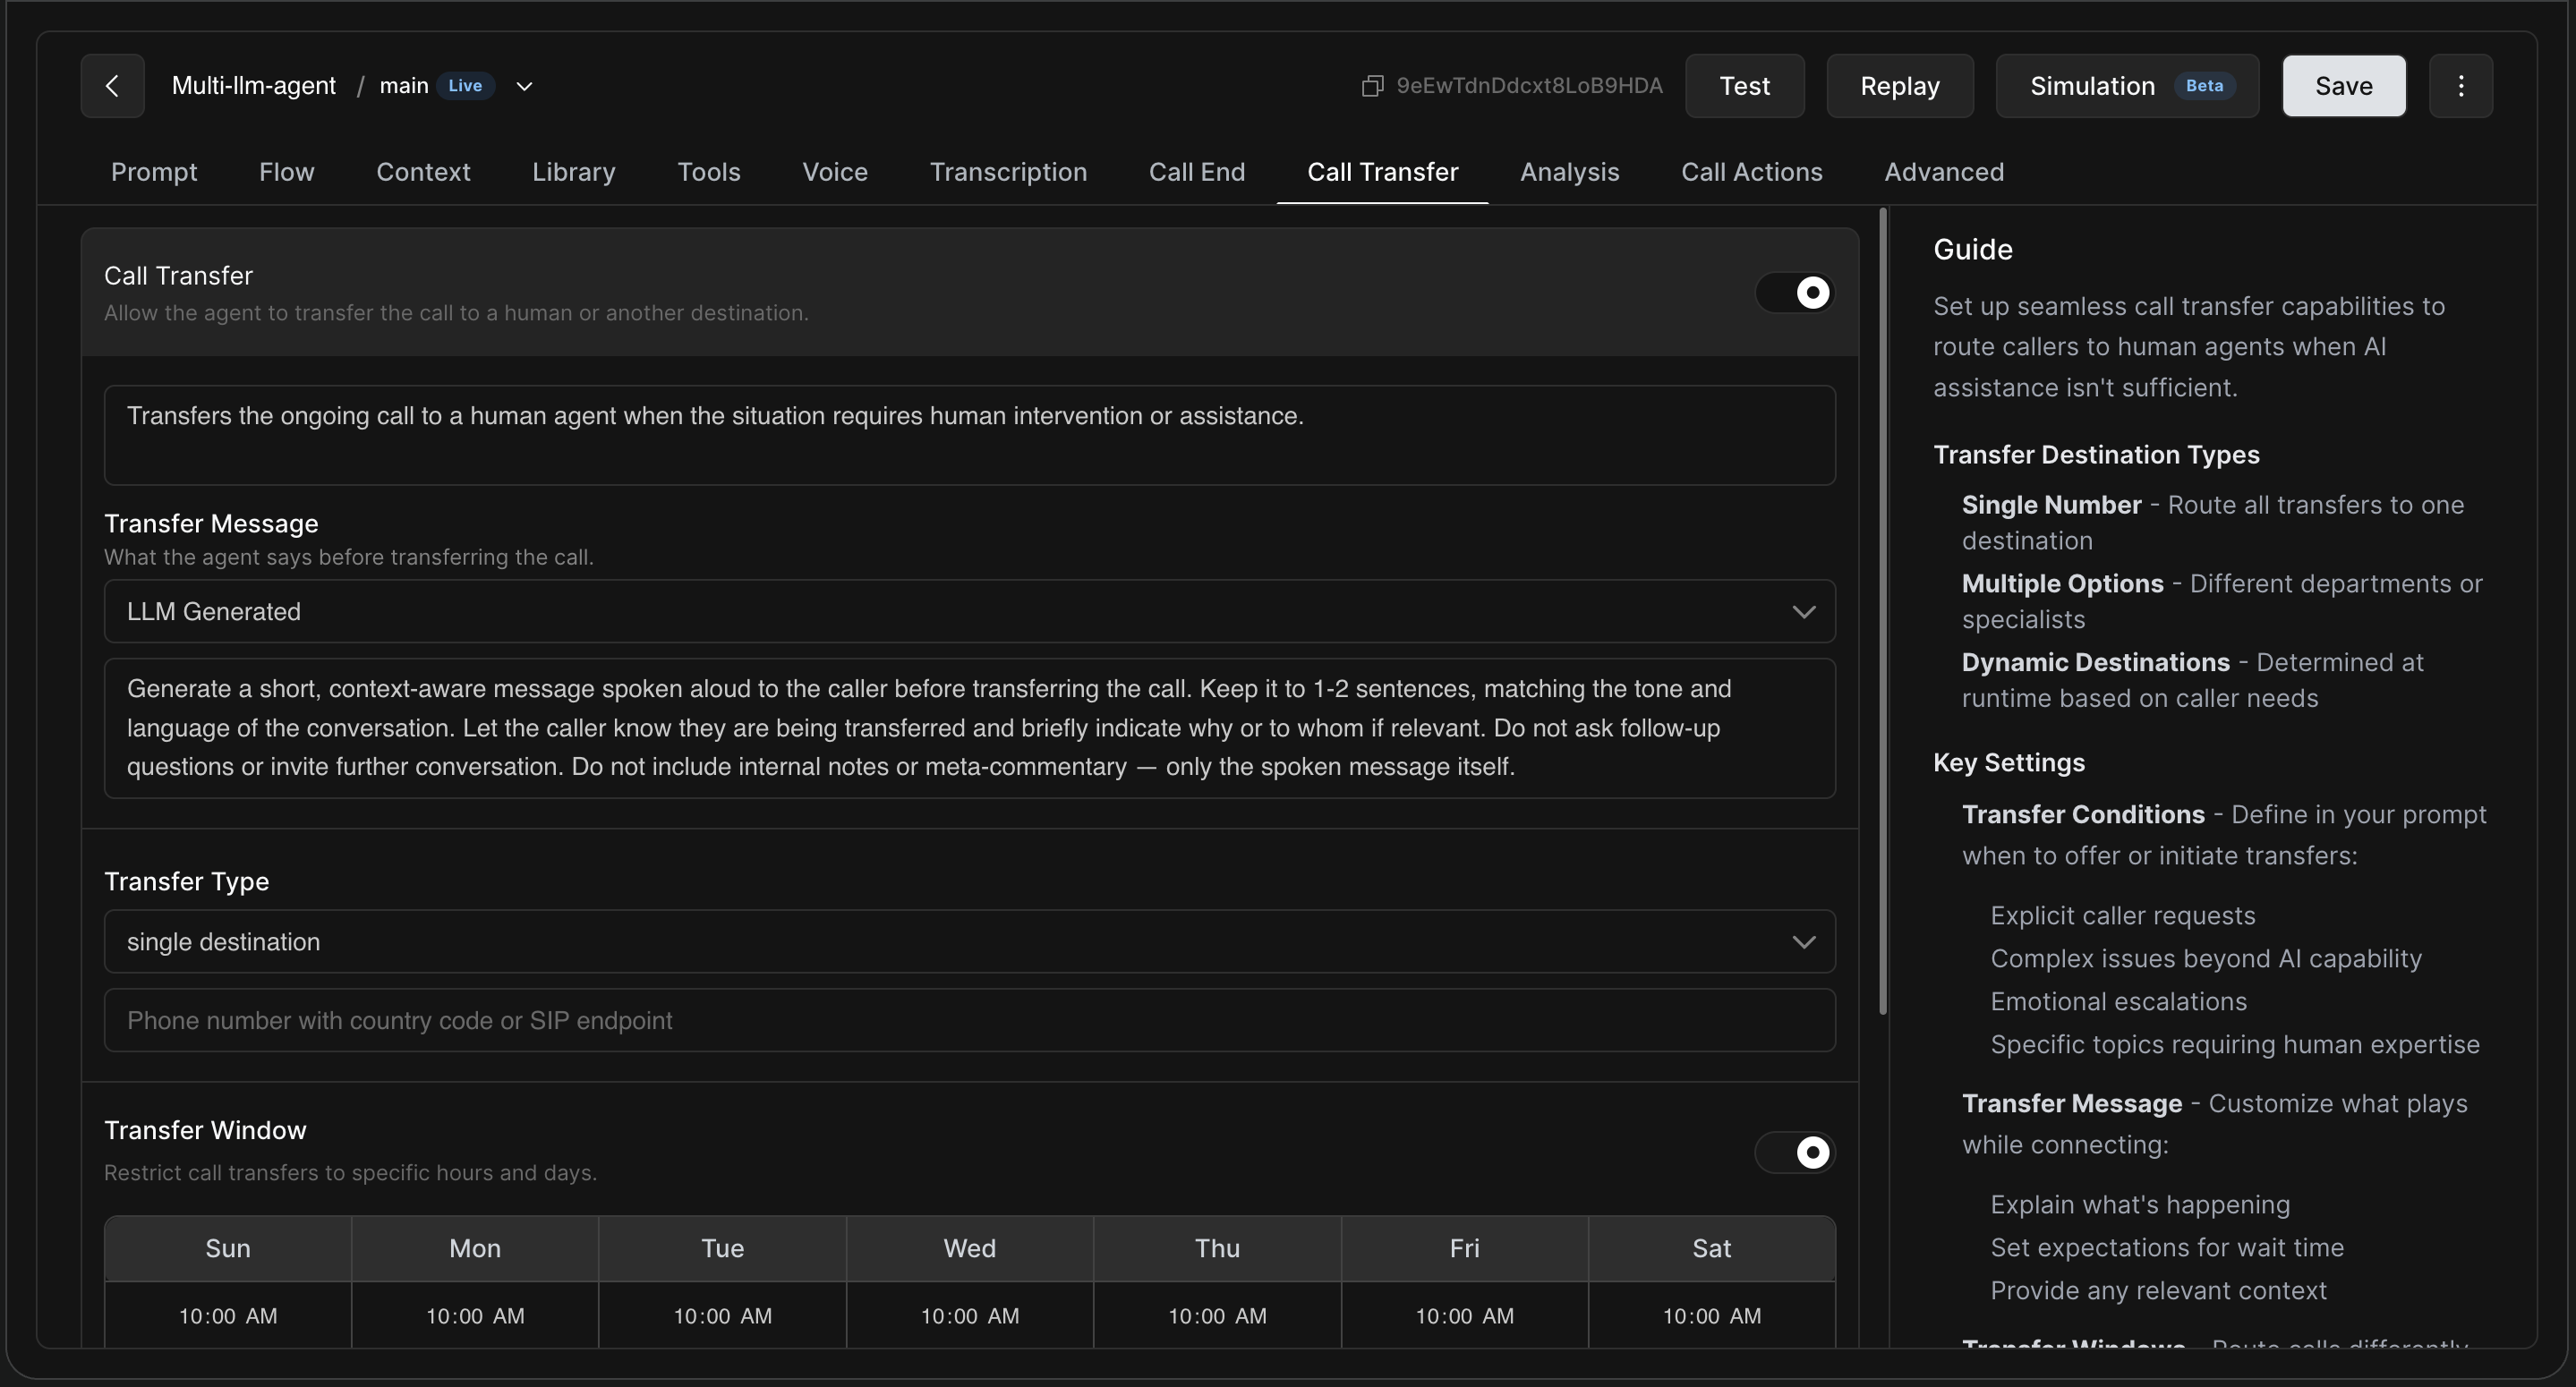
To get started, navigate to the Call Transfer tab in your agent editor.
-
Toggle the main switch in the top right to enabled to allow the agent to transfer calls.
2. Configuring the Transfer Message
Before initiating the handoff, your agent will notify the caller. You can customize what plays while the system connects the call.
-
Fixed Message: A pre-written, standard message that is read exactly as typed (e.g., "Please hold a minute while we transfer your call.")
-
LLM Generated: The AI dynamically generates a short, context-aware message on the fly. Ensure you instruct the agent to keep it brief (1-2 sentences), matching the tone of the current conversation, without asking follow-up questions.
3. Transfer Types and Destinations
Decide how and where the agent should route the caller. Choose one of the following Transfer Types:
-
Single Destination: Route all transfers to one predefined destination.
-
Multiple Options (Multi-Destination): Set up different departments or specialists (e.g., routing to sales vs. support based on the caller's specific query).
-
Dynamic Destinations: The exact transfer number or endpoint is determined at runtime based on caller needs or the result of an API call.
Supported Destination Formats:
-
Phone Number: A valid standard phone number with the country code (e.g.,
+1234567890). -
Phone Number with IVR: If transferring to an automated menu, use the
dtmf:prefix followed by the number, a colon, and the sequence. For example,dtmf:+1234567890:1w2dials the number, presses 1, waits half a second (w), and then presses 2. -
SIP Endpoint: Format your registered endpoint as
sip:username@host.
4. Setting Up Transfer Windows
The Transfer Window feature allows you to restrict call transfers to specific hours and days.
-
Toggle the Transfer Window setting to enable it.
-
Schedule Grid: Define the allowed time windows per day (e.g., 10:00 AM – 6:00 PM, Monday through Friday).
-
This ensures transfers only occur during your business hours or when human staff are actively available.
If callers interact with the agent outside of these set windows, you can configure your agent's core prompt to automatically take a message or offer a callback instead of attempting a transfer).