Agent Configuration
This section provides a high-level overview of how to create and configure a voice agent on Hooman Labs to handle phone calls. Agents can be set up to follow a simple conversational prompt or a more advanced flow with multiple logic-based steps.
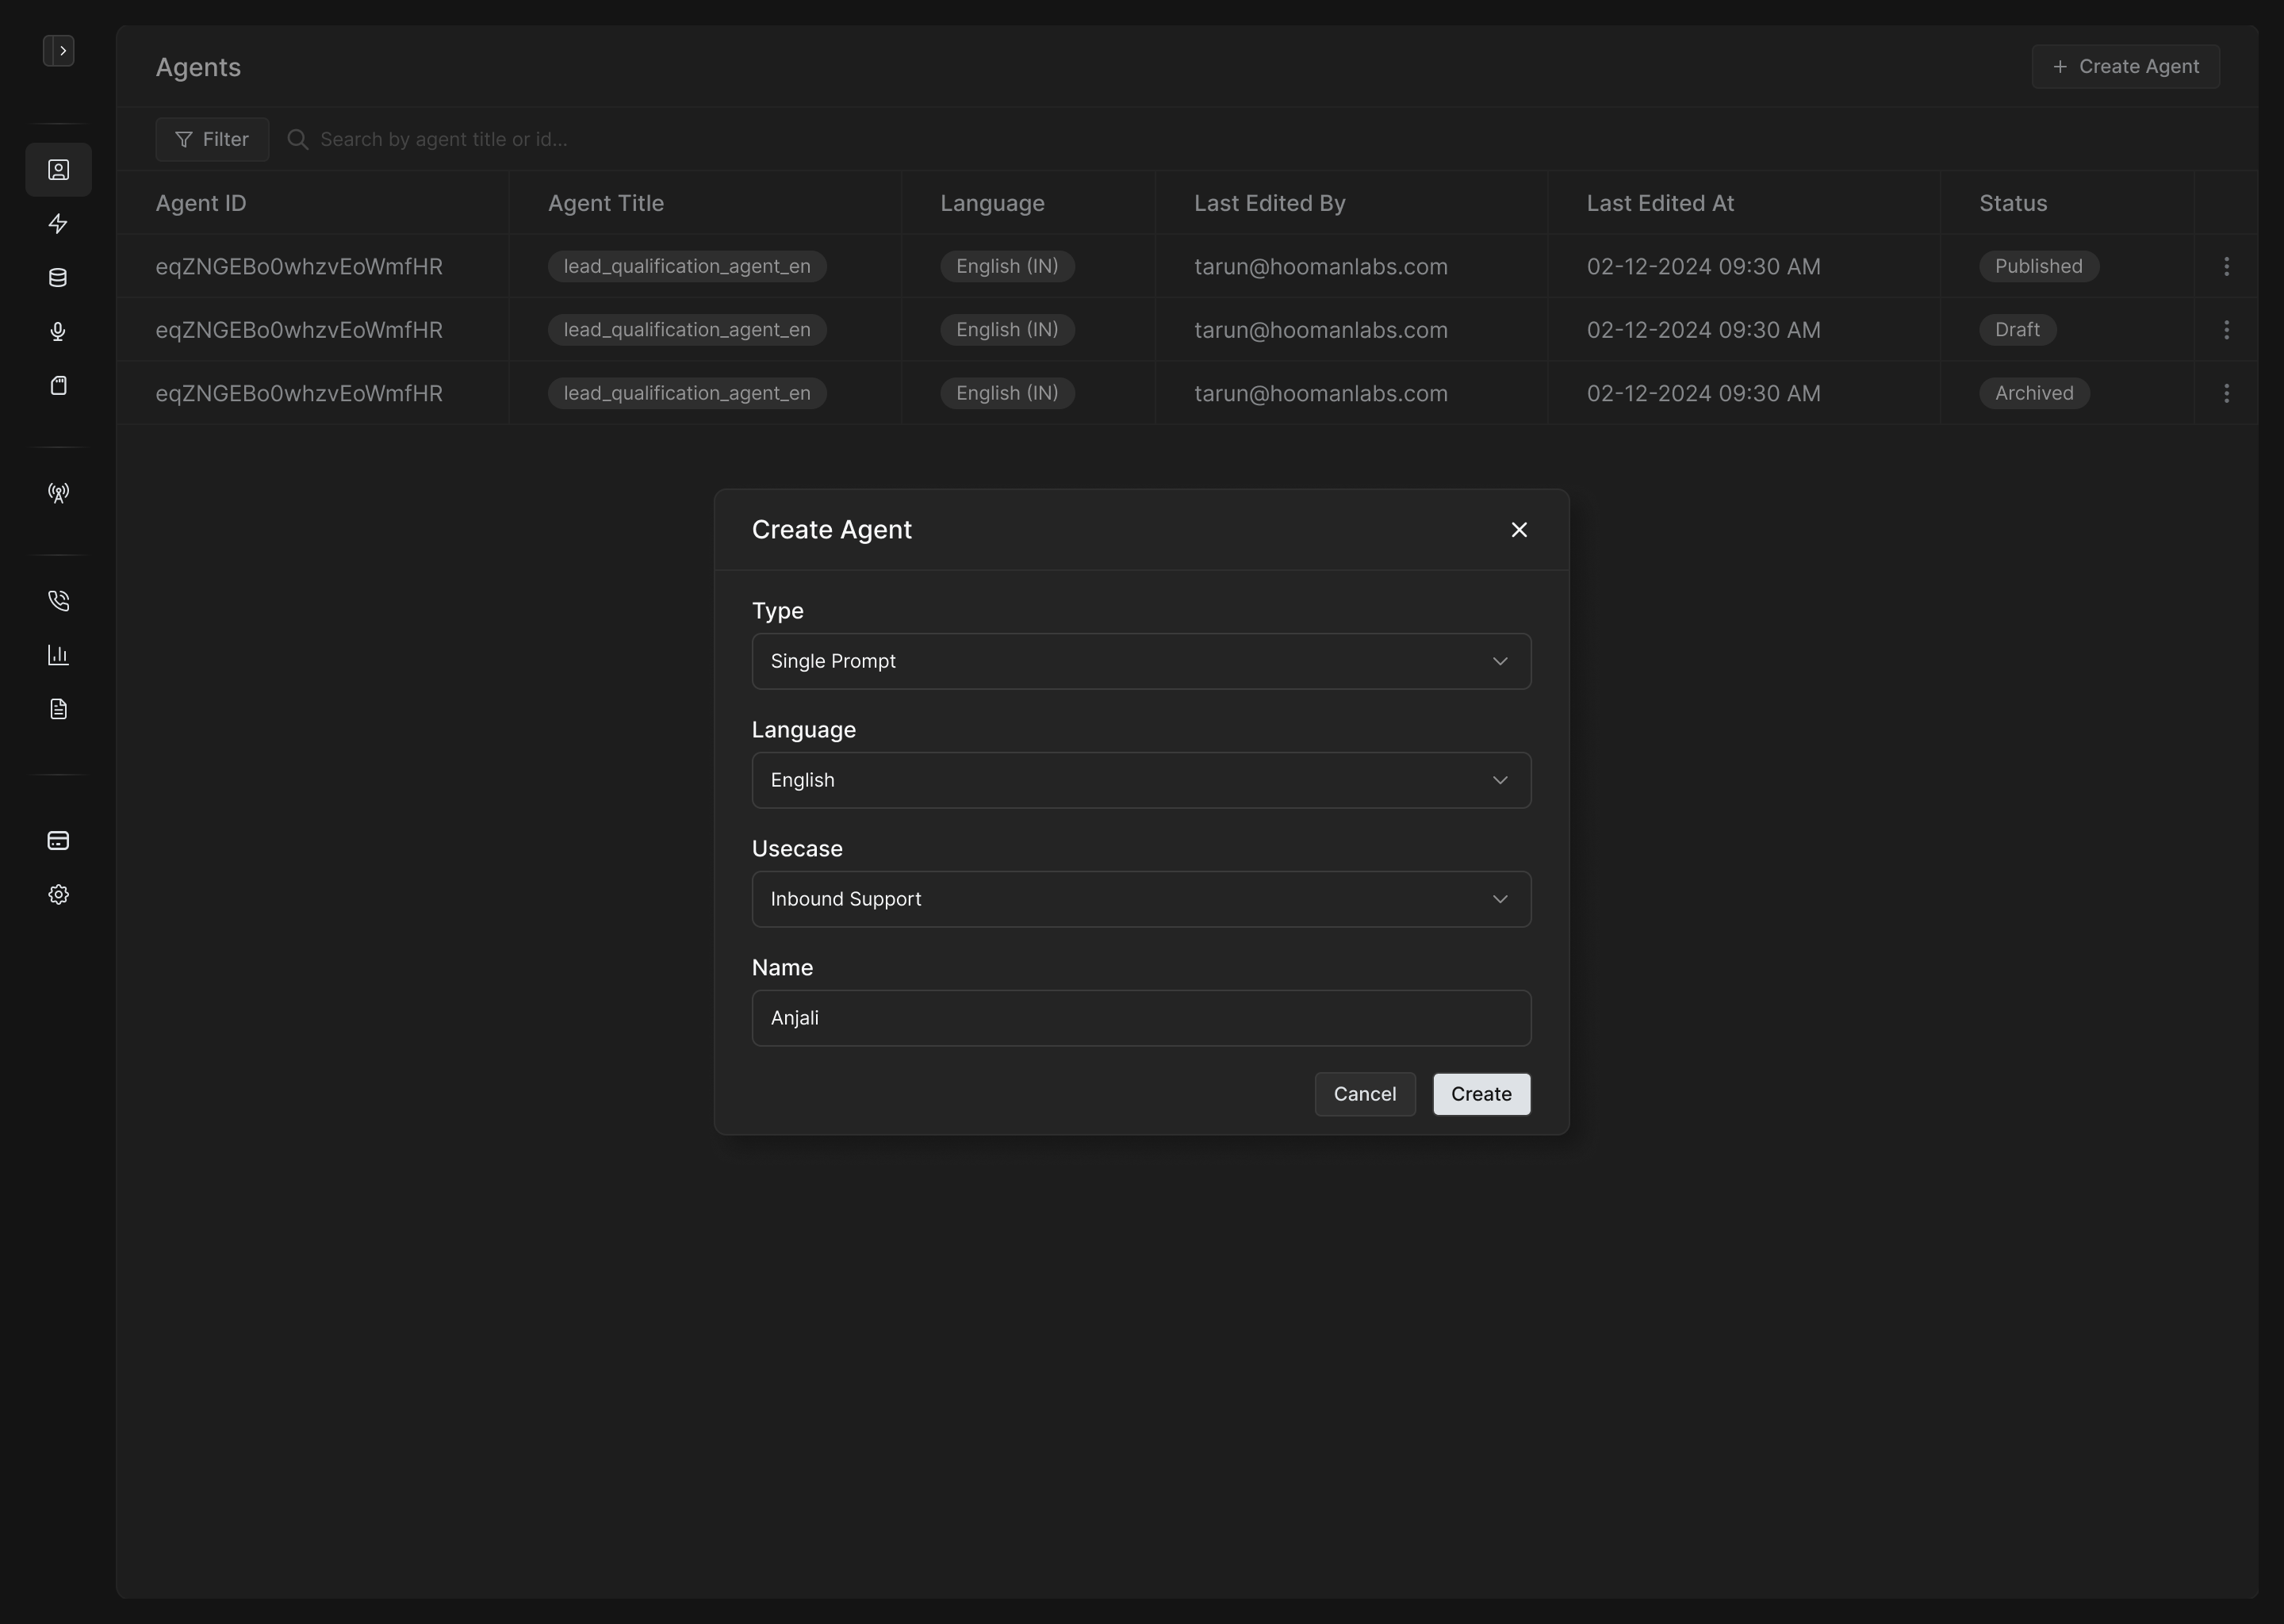
Creating a new agent
To get started:
-
Navigate to
Agents → Create Agent. -
Enter the Agent Name.
-
Select the Language for interaction.
-
Choose a Use Case that the agent will handle (e.g., appointment booking, lead qualification, collections).
-
Select the Prompt Type — either Single Prompt or Flow. Note: This choice is fixed and cannot be changed later.
-
Click Create to begin configuring the agent.
You can also set the agent's timezone by going to Agent → Edit → Metadata.
Prompt type
a. Single Prompt (Simple)
A minimal setup where the agent uses one core instruction or prompt to handle the entire conversation. Ideal for linear conversations.
b. Multi-Prompt (Flow Type)
A flexible flow system where each step (node) can have its own prompt, tool, or transition logic. Ideal for branching conversations with multiple stages.
Flow-based agents support multiple node types:
-
Prompt Node: Standard language model instruction.
-
Fixed Node: Sends fixed messages to the user.
-
Condition Node: Enables branching based on previous values or inputs.
-
API Node: Makes an external API call.
-
Reasoning Node: Executes reasoning steps without directly speaking to the user.
Configuration
Once an agent is created, configure it via the following sections:
3.1 Think Settings
Define how your agent thinks and responds:
-
LLM model selection
-
Prompt or Flow: Configure based on selected mode.
-
Tools: Enable tools like Calculator, Memory, API connectors.
-
Library: Attach reference documents the agent can use (for RAG).
3.2 Transcription Settings
Control how speech is converted to text:
-
STT model selection
-
Interruption and endpoint logic
3.3 Speech Settings
Manage how the agent speaks:
-
TTS model and voice selection (male/female, accent)
-
Speed and pitch tuning
3.4 Call End
Configure how and when a call should end:
-
Define end prompt and message
3.5 Call Transfer
If human intervention is needed:
-
Set rules for when and how to transfer to a human agent
3.6 Analysis
Enable post-call analytics:
-
Summary
-
Outcome
-
Information extraction
3.7 Pre-Call API
Fetch customer-specific context before a call begins:
-
Pull from CRM or internal system
-
Populate variables for use in agent prompts, APIs, or logging
3.8 Post-Call API
Send call summary, outcomes, recordings, or structured data to your backend:
-
Push to CRM, trigger workflows
-
Fully customizable payload with
${variable}syntax
3.9 Advanced Settings
Control operational behaviors:
-
Idle Settings: Define inactivity timeout behavior
-
Voicemail Detection: Enable/disable auto voicemail tagging
-
Max Call Duration: Set cap on total call length
Publish
Once all configurations are set, you have two save options:
-
Save as Draft: Recommended for testing and iteration
-
Publish: Applies live changes to the agent
Best Practice: Always save as draft first and perform test calls. Avoid publishing directly as it may affect production performance.